
Planning a tillage system within the crop rotation of an agricultural enterprise
14 min read
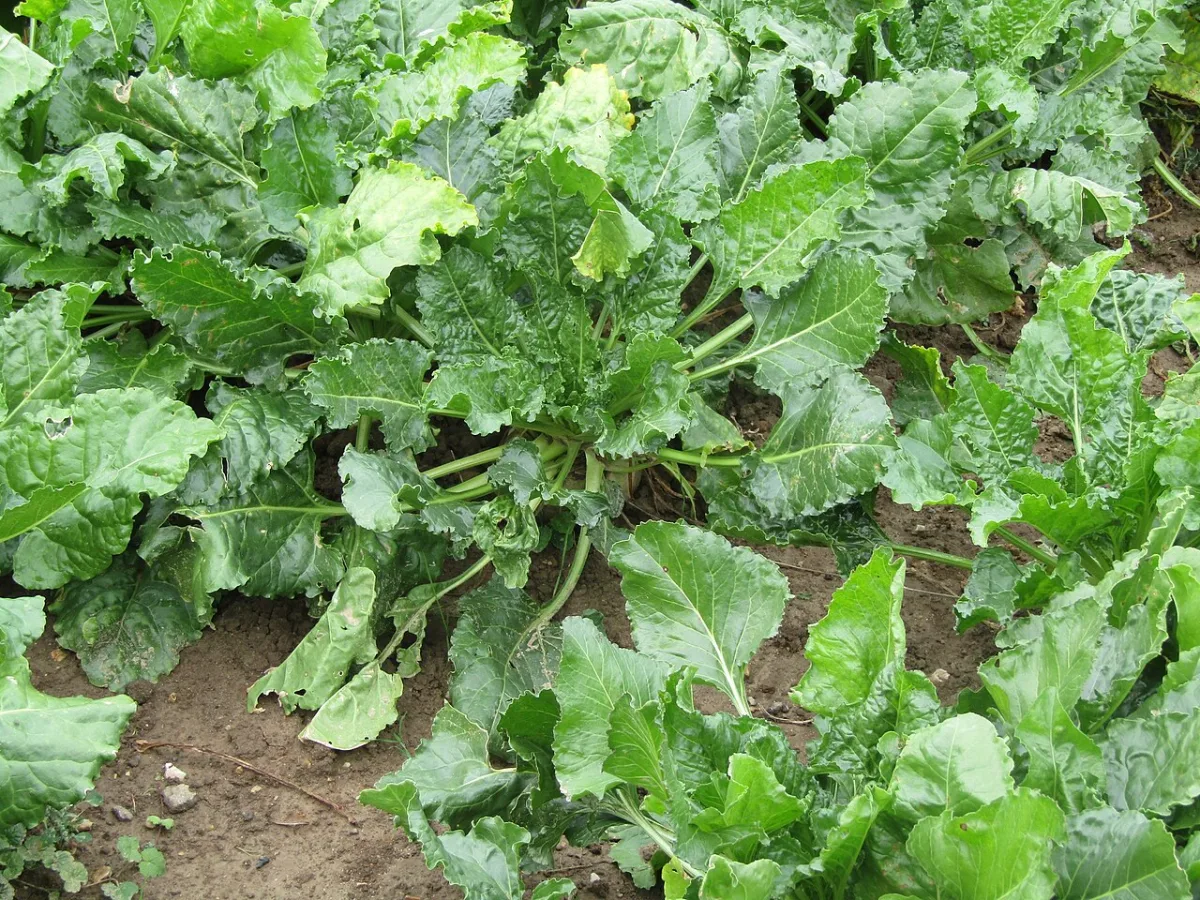
How to plan a soil tillage system in crop rotation
An effective Tillage system soil" system of soil tillage cannot be built without a rational crop rotation established on the farm. All technological operations in a specific field must be coordinated with the agricultural practices of preceding crops and alternated annually. The main guide for an agronomist should be the recommendations of local scientific institutions, cultivar testing stations, and the results of their own field trials.
Be sure to keep a field history record for all crop rotations on the farm. Annually record tillage patterns, their qualitative characteristics, and their effect on yield in order to plan future operations more accurately.
Example of a soil tillage system in crop rotation
Below is a scheme of soil tillage for field crop rotation in the northern zone. The rotation includes the following crops:
- Corn for silage
- Corn for grain
- Stubble disking — from 6–8 cm
- Ploughing for sugar beet — 30–32 cm
- Pre-sowing cultivation — no deeper than seed placement
Field 1. Spring peas after winter wheat
After harvesting the predecessor, perform disking to a depth of 8–10 cm to undercut, shred, and better incorporate stubble during ploughing. Perform primary tillage with a plough with a jointer at 20–22 cm or with a stubble plough (sweep plough) to the same depth. Include a heavy drag, disk battery, or roller in the ploughing unit — this will improve the crumbling of dry and cloddy soil. If soil moisture is optimal and the soil crumbles well, harrowing may be sufficient.
Field 2. Winter wheat after spring peas
Use soil-protecting mulch tillage. Start by shredding crop residues with disk implements in several passes. As weeds emerge, treat the field with a sweep cultivator to the depth of best crumbling or perform surface disking in several passes. Before sowing, treat the soil with disk implements and cultivators.
Field 3. Sugar beet after winter wheat
Immediately after harvesting the predecessor, start the technological cycle of soil preparation:
- Perform disk stubble tillage to a depth of at least 6–8 cm. In case of mass weed emergence, perform a second stubble tillage. If the field is infested with perennial species, work with a stubble plough or sweep plough at 12–14 cm, or perform shallow ploughing at 16–20 cm with harrows or rollers.
- Perform autumn ploughing with ploughs with jointers to a depth of 30–32 cm after weed regrowth following the second stubble tillage (no later than the end of September – October). If the field is free of perennials, deep autumn ploughing can be done earlier — in August or early September after the first stubble tillage.
- Treat early autumn-ploughed soil with cultivators as weeds emerge. In case of heavy infestation or compaction, reploughing to 12–16 cm is allowed, but preference should be given to regular cultivation.
Field 4. Spring cereals after sugar beet
After completing the beet harvest, perform autumn ploughing to a depth of 20–22 cm. Surface tillage of the soil with sweep or disk implements is also possible.
Field 5. Winter wheat after cereal crops
Immediately after harvesting the predecessor, plough the field with a combined unit consisting of a plough, disk battery (or needle disks), roller, and drag to the depth of best crumbling. If it is impossible to plough the field immediately or the soil forms large clods, perform stubble tillage to 6–8 cm first. Maintain the field-in-fallow using harrow-cultivators or sweep cultivators as weeds and volunteer crops emerge. The depth of pre-sowing tillage should not exceed the Seeding depth seeds">seeding depth.
If soil moisture drops below the moisture of capillary connection rupture, be sure to use rollers as part of the ploughing unit. Thoroughly break down the tilled layer during the very first tillage.
Field 6. Corn for silage after winter wheat
Soil-protecting tillage is required for this field:
Soil-protecting mulch tillage in crop rotation
To protect the soil from erosion and preserve productive moisture after cereal predecessors, a system of non-inversion loosening is applied. It allows for creating a dense mulch layer of plant residues on the field surface. When preparing soil for winter and row crops in this system, a strict sequence of operations is observed.
- Immediately after cereal harvest — treatment with a needle harrow to provoke weed emergence and break the crust.
- As weeds grow — cultivation with a sweep plough to a depth of 8–12 cm.
- During mass appearance of root-sucker weed rosettes — chemical weeding with herbicides.
- At the end of autumn — deep non-inversion loosening to 27 cm with a deep-ripping sweep plough.
For the remaining fields of the crop rotation, technological solutions depend on the biological characteristics of the crops and the preceding crops:
| Field and crop | Preceding crop | Tillage technology |
|---|---|---|
| Field 7. Winter wheat | Silage maize | Shredding crop residues with disk implements in several passes. As weeds emerge, perform cultivation with a sweep cultivator to the depth of optimal soil crumbling (shallow disk tillage in several passes is acceptable). Before sowing, perform tillage with disk implements and cultivators. |
| Field 8. Sunflower | Winter wheat | Following harvest, use a needle harrow. On actively growing weeds, use sweep cultivators. In October, perform deep loosening with heavy-duty subsoilers to a depth of 22–25 cm. |
| Field 9. Winter wheat | Sunflower | Disk shredding of crop residues, sweep cultivation, followed by shallow tillage with disk implements in two or three passes, and a final pass with field cultivators. |
| Field 10. Grain maize | Winter wheat | Soil-protecting sweep tillage according to the scheme for Field 8 (needle harrow, sweep cultivators for weeds, subsoiler for deep loosening to 22–25 cm in October). |
| Field 11. Winter wheat | Grain maize | Disk shredding of residues, tillage with sweep cultivators. It is permissible to replace this with shallow disk tillage in two or three passes followed by seedbed preparation with field cultivators. |
- Depth of autumn non-moldboard loosening — 27 cm
- Depth of sweep tillage for sunflower — 22–25 cm
- Depth of the first sweep cultivation — 8–12 cm
Primary tillage in the central zone
In the central zone of the region, a combined system is used for crop rotations involving grain and silage maize, sugar beet, and a specialized field for perennial grasses. It combines moldboard ploughing using a plough with a jointer and shallow disk tillage. The scheme takes into account the degree of weed infestation and the specific relief features of the terrain.
| Field and crop | Preceding crop | Primary tillage scheme |
|---|---|---|
| Field 1. Silage maize | Winter wheat | Immediately after the combine, perform stubble peeling with disks or a needle harrow to a depth of 6–8 cm. Perform secondary peeling upon the emergence of weed seedlings. In the presence of deep-rooted perennial weeds, perform peeling with a moldboard implement or a sweep cultivator to a depth of 12–16 cm with compaction (or shallow ploughing). Autumn ploughing or deep sweep loosening to a depth of 22–25 cm. |
| Field 2. Winter wheat | Silage maize | Post-harvest disking with heavy-duty implements to a depth of 8–10 cm. Ploughing with a combined tillage unit (plough with jointer + disks or needle rollers/harrow) to a depth of 18–22 cm. If necessary, break down the furrow slice. Replacing ploughing with shallow disk and sweep tillage is possible. Before sowing, the field is prepared using a bare fallow technique. |
| Field 3. Sugar beet | Winter wheat | Disk peeling of stubble to a depth of 6–8 cm; perform the second peeling after mass emergence of weed seedlings. In the presence of deep-rooted perennials, perform peeling with a moldboard implement or a sweep cultivator to a depth of 12–16 cm (or shallow ploughing with harrowing and compaction). Autumn ploughing with a jointer to a depth of 30–32 cm no later than the end of October. |
| Field 4. Winter wheat | Sugar beet | Shallow tillage with a heavy disk implement. Ploughing to the depth of optimal crumbling with thorough breakdown of the furrow slice is justified only in areas with an abundance of perennial weeds and on fields with pronounced depressions and basins. |
| Field 5. Soybean | Winter wheat | Similar to the technology used in Field 3 (for sugar beet). |
| Field 6. Winter barley | Grain maize | Peeling with a disk harrow to a depth of 8–10 cm, followed by disking and harrowing. On plots infested with perennials and fields with depressions, use ploughing with a combined tillage unit to the depth of optimal crumbling, followed by soil preparation. |
| Field 7. Sugar beet | Winter barley | Similar to the technology used in Field 3. |
| Field 8. Grain maize | Sugar beet | Ploughing with a plough and jointer to a depth of 20–22 cm. |
| Field 9. Winter wheat | Grain maize | Similar to the technology used in Field 4. |
| Field 10. Sunflower | Winter wheat | Similar to the technology used in Field 3. |
| Field 11. Winter wheat | Sunflower | Similar to the technology used in Field 4. |
| Field 12. Winter wheat | Perennial grasses (specialized field) | Immediately after the second cut of the grass mixture, perform peeling to a depth of 6–8 cm and ploughing to 22–25 cm using a combined tillage unit. If necessary, immediate breakdown of the furrow slice is required. Before sowing, the field is treated as a bare fallow. |
When switching to shallow disk tillage for winter cereals, ensure you monitor the field relief. In areas with pronounced basins, depressions, and heavy infestation by perennial weeds, disking is ineffective; in such cases, deep ploughing with a combined unit is required.
For the specialized perennial grass field and subsequent crops in the rotation, the following rotation scheme has been adopted:
- Field 1. First-year alfalfa
- Field 2. Second-year alfalfa
- Field 3. Winter wheat after perennial grasses
- Grain maize
Tillage schemes by crop rotation fields
Each field in the crop rotation requires an individual approach to tillage. The depth of ploughing and the choice of implements depend on the preceding crop, soil type, and the level of weed infestation in a specific area. Proper selection of equipment helps to conserve soil moisture and effectively break down the furrow slice.
If regrowth of alfalfa is observed after the second or third cut, be sure to carry out pre-ploughing stubble cultivation. This operation will cut and dry out the root collars of the plants. Ploughing with a jointer should be carried out to a depth of 22–25 cm, and after ploughing, the field should be managed using a green fallow system.
- Ploughing after alfalfa cut — 22–25 cm
- Ploughing for wheat after wheat — 20–25 cm
- Autumn ploughing for soybean — 25–27 cm
- Pre-ploughing stubble cultivation for wheat — 8–10 cm
- Number of weed count quadrats — more than 20 units
Field 4. Winter wheat after winter wheat. Immediately after harvesting the preceding crop, the stubble is ploughed to 20–25 cm with a combined ploughing unit. Depending on the quality of soil crumbling, the plough is equipped with disks, rotary harrows, or tines. Until autumn sowing, the ploughed field is managed using a green fallow system.
Fields 5 and 8. Soybean after winter wheat. Soil preparation for soybean includes a multi-stage system of stubble cultivation and deep autumn ploughing. On grey forest and other soils with a thin humus layer, the tillage depth is adjusted according to the depth of the arable horizon. If the subsoil is highly compacted (as in self-mulching chernozems), subsoilers must be used.
- Stubble cultivation with a disk implement to a depth of 6–8 cm immediately after wheat harvesting.
- Second disk cultivation after mass emergence of weeds.
- Full-body cultivation to a depth of 12–16 cm or shallow ploughing with harrowing and packing (if root-sprouting weeds predominate in the field).
- Primary autumn ploughing in October to a depth of 25–27 cm.
Field 6. Corn after soybean. After soybean harvest, the field is treated with a disk cultivator to incorporate crop residues. This is followed by autumn ploughing with a plough equipped with a jointer to a depth of 22–25 cm. On soils with an over-compacted subsoil (self-mulching chernozems, grey forest soils), ploughing is combined with the use of subsoilers.
Fields 7 and 9. Winter wheat after corn and soybean. Immediately after harvesting the preceding crop, pre-ploughing disk cultivation is carried out to a depth of 8–10 cm. Ploughing is performed to the depth that ensures the best soil crumbling (20–25 cm) using a unit equipped with disks, a roller, or a tine harrow. If necessary, additional field cultivation is performed.
Weed control and field mapping
A pre-developed soil tillage plan should not be applied blindly. Weed infestation on each field changes dynamically, so it is important for an agronomist to adjust the technology in a timely manner according to the species composition of weeds. A timely reaction to the appearance of weeds helps save the herbicide budget and prevent harvest losses.
A field weed map must be drawn up and updated annually. Conduct weed counts at times when the maximum number of species growing on a particular crop are present in the field.
| Crop | Survey timing |
|---|---|
| Cereal crops | From stem elongation to heading |
| Row crops | Before the first inter-row cultivation and before harvesting |
| Perennial and annual grasses | Before the first cut |
Weed infestation in crops can be assessed using two methods: visual and quantitative. The visual assessment uses a point scale that divides weed infestation into four degrees:
- 1 point — weeds are found sporadically (light infestation);
- 2 points — weeds account for no more than a quarter of the total plant stand (moderate infestation);
- 3 points — the number of weeds is close to the density of the crop plants (heavy infestation);
- 4 points — weeds predominate in the crop (very heavy infestation).
For precise planning, a quantitative method is used on one-square-meter sampling quadrats. The number of such quadrats depends on the field size and visual infestation. In case of heavy or very heavy infestation, more than 20 frames are placed in the field. Data for each square meter is recorded in a logbook separately by species, and weed clusters are marked on a draft map.
At the end of the survey, the average indicator for each species is calculated, and the type of field infestation is determined. The type of infestation refers to a specific combination of weeds that requires a unified set of measures for control. The following types of infestation are distinguished:
- root-sprouting;
- rhizomatous;
- annual/biennial;
- mixed (root-sprouting-rhizomatous, root-sprouting-annual, root-sprouting-rhizomatous-annual).
Based on the obtained data, a final weed map of the crop rotation fields is compiled. Types of weed associations are indicated on it by color or hatching, and the degree of infestation of each field is shown using pie charts with sectors proportional to the quantity of weeds of a specific species. This allows for targeted selection of tillage methods according to the problem in each specific area.
Before choosing a tillage method, conduct a reconnaissance survey of the field. A weed map provides a general picture, but in practice, it is important to assess the real situation at the current moment. Walk through the plot, determine the species composition of the weeds, their quantity, and their growth stage. Pay special attention to clusters of weed spread in order to differentiate protection measures.
- Perform a visual inspection of the field to assess the weed species composition and growth stage.
- Map weed infestation hotspots for differentiated tillage.
- Determine potential soil weediness by washing soil samples for the presence of weed seed.
- Lower limit of chernozem ripeness — 21–22% humidity
- Upper limit of chernozem ripeness — 24–27% humidity
- Start of soil adhesion to metal — 28–29% humidity
- Critical soil bulk density — 1.3–1.35 g/cm³
Assessment of soil moisture and bulk density in the field
Qualitative indicators of the tilled layer directly determine the choice of implements, tillage depth, composition of machinery units, and equipment speed. In field conditions, chernozem humidity can be quickly determined by the organoleptic method. To do this, dig a pit to the depth of the intended tillage. Take soil samples from different layers and evaluate their physical state.
| Weight moisture, % | Color of chernozem | Signs and behavior of the soil when compressed |
|---|---|---|
| 15–17 | Grey | Clods feel hard to the touch; the soil produces dust when rubbed. |
| 18–19 | Transitional from grey to dark grey | The sample weakly retains its shape when squeezed with fingers and disintegrates upon light shaking. |
| 21–22 | Dark | When squeezed firmly in the palm, a faint fingerprint is visible. The soil crumbles well if the bulk density is low (lower limit of ripeness). |
| 24–27 | Dark | The soil is plastic and starts to form a coil when rolled. It retains its shape well when squeezed, and a clear fingerprint pattern is visible (upper limit of ripeness). |
| 28–29 | Almost dark | On close inspection, faint glimmers of water are visible. The soil begins to adhere to metal. |
The bulk density of the tilled layer is determined on the vertical wall of the test pit. If the density exceeds optimal values at low humidity, a smooth, shiny surface forms on the cut. Operating under such conditions will inevitably lead to negative consequences for the field structure.
An increase in soil bulk density above 1.3–1.35 g/cm³ at low humidity leads to high cloddiness during tillage. This will require additional expenses for leveling the plowed land.
There can be no templates in planning and executing tillage systems. Any pre-developed plan is merely a preliminary guideline. An agronomist must have excellent knowledge of local conditions and the ability to flexibly apply them in practice.
Read next
Soil and tillage For agronomists
Post-harvest tillage technologies for spring crops
Soil and tillage For agronomists
Specifics of soil preparation after row crops for spring crops
Soil and tillage For agronomists