
Establishment of mother plantations and methods of certification for own-rooted grapevines
17 min read
High-quality own-rooted nursery plant material is established only from true-to-type and healthy mother plantations. To exclude varietal mixtures, chronic viral diseases, and crown gall, initial vineyards undergo mandatory inspection and phytosanitary selection. This allows for the collection of cuttings with high varietal purity and productivity.
Vineyard Inspection and Classification
Inspection is carried out in the year the grapes enter the fruiting stage. The cultivar is identified with the highest accuracy during the berry ripening period. The assessment is performed by specialists well-versed in the ampelographic features of the cultivars.
The inspection of plantings is conducted in a strict sequence:
- First, early-ripening cultivars are inspected;
- Then, the focus shifts to mid-ripening cultivars;
- Finally, late-ripening cultivars are evaluated.
Based on the inspection results, an official record is drawn up, documenting the plot area, the number of vines of each cultivar, their growth vigor, yield, disease incidence, and the number of gaps. Based on this data, all vineyards are divided into three categories.
| Category | Planting Requirements |
|---|---|
| First | Varietal purity of at least 95%, good vine development, high yield, absence of diseases and damage, gaps no more than 5%. |
| Second | Varietal purity of at least 90%, vigorous, high-yielding, without pests and diseases, gaps no more than 10%. |
| Third | Admixtures of other cultivars more than 10–15%, satisfactory condition. |
Cuttings for propagation may be harvested only from vineyards of the first and second categories. Harvesting cuttings from plots of the third category is not permitted.
Particular attention is paid to plots with cultivars having a functionally female flower type. If they are correctly alternated in rows with pollinator cultivars, and they grow and fruit well, such arrays are considered homogeneous and are classified into the first or second category. If pollinators are placed in rows haphazardly, the plot is assigned the third category, and cuttings are not harvested from it.
Mass Selection and Types of Mother Plantations
In vineyards of the first and second categories, inspection is combined with mass selection. Depending on the varietal purity of the plot, selection is conducted based on negative or positive traits. Each vine is inspected individually and marked with oil paint or a label.
Depending on the chosen selection method, two approaches are distinguished:
- During selection based on negative traits, admixture vines, as well as diseased, weakened, and low-yielding vines of the main cultivar, are marked for removal.
- During selection based on positive traits, the strongest and most productive vines of the main cultivar are marked, from which cuttings will be harvested first.
The work is performed by a two-person team. The first person assesses the state of the plants, while the second marks them and maintains a mass selection log, recording the cultivar, area, and the number of identified vines with positive and negative traits.
Mass selection in the same plots is conducted for two consecutive years. In the first year, diseased, weak, and barren vines are culled, and in the second year, low-productivity plants are finally removed and replaced with healthy nursery plants of the main cultivar.
The selected plots are upgraded to the status of mother plantations of regionalized cultivars, which are divided into four types:
- Primary selection mother plantations — the best commercial plantings of the first category, where admixtures and weak vines have been removed, and healthy plants of the main cultivar have been planted in their place.
- Selection mother plantations — plots established with true-to-type material grown from cuttings taken from positively selected vines of primary selection mother plantations.
- Clonal mother plantations — vineyards created from cuttings taken from clone vines identified through individual selection in selection mother plantations.
- Elite mother plantations — the most valuable intensive-type plantings with high agricultural standards, established with material from the best vines of clonal mother plantations. They guarantee one hundred percent varietal purity.
From elite mother plantations, the maximum yield of nursery plant material is obtained annually.
- Eight-node (half-meter) cuttings per 1 ha — 100–120 thousand units and more
- Single-node cuttings per 1 ha — 450–500 thousand units
Elite nursery plants are priced 50% higher than those grown from cuttings harvested from ordinary fruiting vineyards. Vineyards established with elite nursery plant material enter the fruiting stage faster and are characterized by the highest yields.
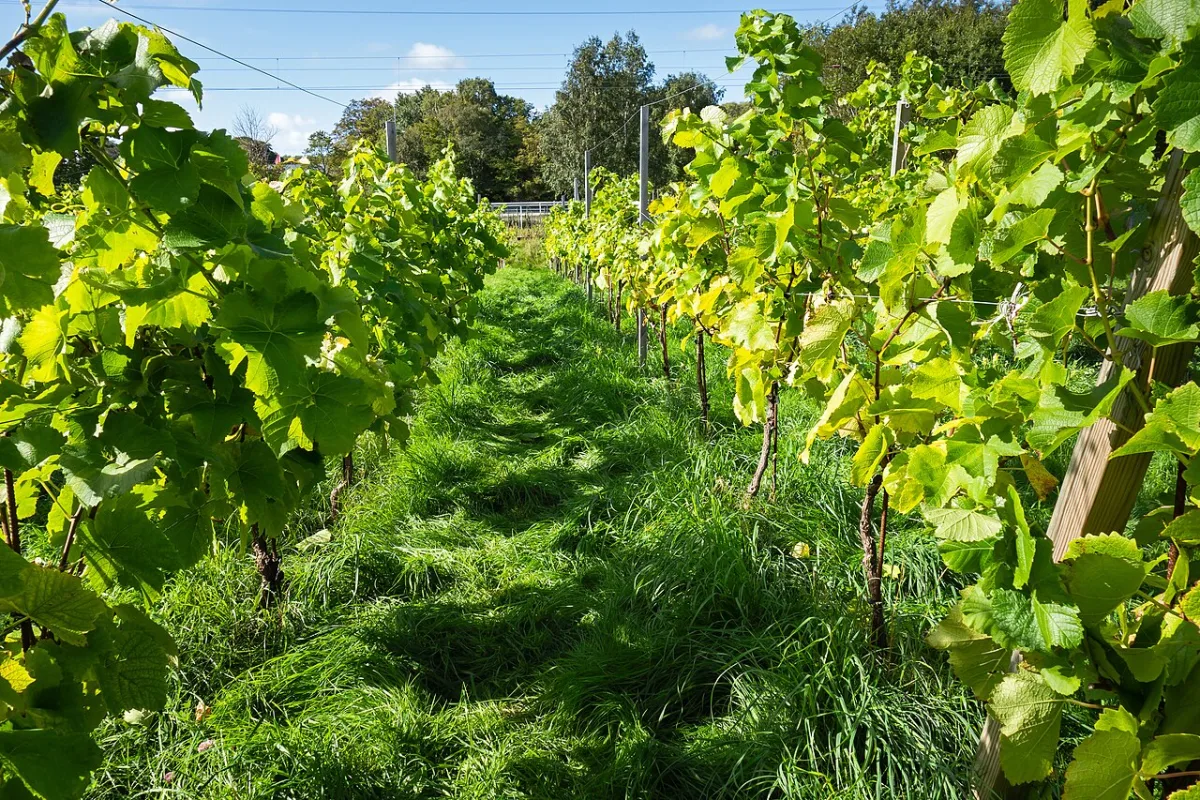
Intensive-type mother plantations are created in nursery enterprises. For the establishment of mother vineyards, slopes up to 8° that are protected from winds and well-lit are chosen, preferably with southern and southwestern exposure, or low plateaus, as they have more heat and less risk of vine damage by early autumn or late spring frosts. The soil should be light or medium in mechanical composition.
Six to seven months before planting, the plot undergoes deep ploughing to a depth of 60–70 cm, during which 40–60 t/ha of organic fertilizer and 150–200 kg/ha of the active ingredient of phosphorus and potash fertilizers are applied. The varietal composition of mother plantings must correspond to the specialization of the farm or the service zone of the nursery.
Intensive-type nursery plantations are established using own-rooted or grafted 1-year-old elite or clonal nursery plants. They are planted at the depth adopted for a specific zone.
Row spacing is 2.5–3 m, and the distance between plants in a row is 1.5–1.75 m, or up to 2 m for vigorous cultivars. In the first years, all agrotechnical practices are aimed at the best plant development, eliminating gaps, and installing trellises.
Bushes in intensive-type nurseries in cover-culture zones are formed without a trunk, following a multi-arm fan shape, only with shortened pruning (to 3–5 buds) of fruit shoots, or following a 1- or 2-sided squat cordon type with spurs arranged on the arms every 12–15 cm. In non-cover zones, these shapes are created with a trunk. In such nurseries, the bush load for low-vigour cultivars is 25–50% lower, and for medium- and high-vigour cultivars 12–25% lower than optimal. In intensive-type nurseries, it is important to timely perform the removal of excess shoots, tying, pinching, topping, and systematic control of plant diseases and pests. Every 3 years, 40 t/ha of manure is applied here, along with 45 to 180 kg/ha of nitrogen, 90 kg/ha of phosphorus, and 30 kg/ha of potassium, depending on the soil type and soil fertility. 10–15 days before flowering, the first top dressing is applied at a rate of: 60 kg/ha of nitrogen, 45 kg/ha of phosphorus, and 15 kg/ha of potassium. 15–20 days after flowering, the second top dressing is carried out, applying 45 kg/ha of phosphorus and 15 kg/ha of potassium. Good results are obtained by top dressing nurseries with macro- and micro-fertilizers containing boron, zinc, manganese, iron, etc. Winter irrigation is mandatory. Such care for intensive-type nurseries allows, as early as the 3rd year, to harvest 100–120 thousand eight-bud cuttings in the conditions of Ukraine and Moldova, and 150 thousand in the conditions of Uzbekistan, while simultaneously obtaining 8–10 t/ha of grapes.
Efficiency of grape nursery plantations at the R. R. Shreder Scientific Production Association for Horticulture, Viticulture and Winemaking
V i n e y a r d P r o d u c t i o n Yield of 8-bud cuttings per ha, thous. units yield, t/ha value of cuttings obtained per ha, rub. value of grapes per ha, rub. total value of grapes and cuttings obtained from 1 ha, rub. Additional costs for pinching, tying, cutting harvesting, etc., rub. Income per ha minus expenses for additional costs, rub. Excess income from nursery vineyard, rub.
The profit from the sale of cuttings alone at the R. R. Shreder Scientific Production Association for Horticulture, Viticulture and Winemaking is about 700 rubles, and from cuttings and berry harvest — 2650 rubles per 1 ha.
Harvesting and storage of cuttings.
The quality of planting material largely depends on the timing of cutting harvesting and the conditions of their winter storage. In cover-culture viticulture zones, cuttings are harvested in autumn during the preliminary pruning of bushes before the onset of frosts, which can damage the buds, and in spring after uncovering the bushes and their final pruning. In non-cover viticulture regions with a mild, warm climate, where there is no danger of bud damage by frost, cuttings are harvested in autumn after leaf fall and continued in winter when labor is partially available, as well as in spring before the onset of sap flow. When harvesting cuttings in autumn, special attention is paid to their quality and timely removal of leaves, through which moisture evaporates actively, leading to dehydration and a decrease in cutting quality. To avoid this and facilitate cutting harvesting, defoliation is carried out in the vineyard 2 weeks before pruning — spraying with a solution of 60% magnesium chlorate powder at an application rate of 7 kg/ha, which accelerates leaf fall.
When preparing cuttings, the shoots (vine) are freed from wire or other supports, cleaned of tendrils, poorly developed lateral shoots, remaining fallen leaves, and thin unripened tips are removed. Then, the shoots are cut into cuttings at the internode. The length of the prepared cuttings should exceed the depth of the grape planting by 10–15 cm, taking into account the refreshing of the cuts before planting.
Preparation and sorting of cuttings
The preparation of grape cuttings requires strict adherence to the sequence of operations; otherwise, there is a high risk of mixing up cultivars or overdrying the vine. Start pruning by removing all off-type, diseased, and barren bushes that were culled during the inspection and mass selection. Only then proceed to prepare planting material from high-quality, healthy bushes of the main cultivar.
Do not allow any delay between the pruning of the shoots and the cutting of the material. In the wind, the cut vine quickly loses moisture, which sharply reduces the survival rate.
Each cutting must meet standard requirements. Culls include curved, flattened, or twisted shoots, as well as vines with mechanical damage or traces of hail. Pay special attention to signs of disease: brown spots indicate infection with downy mildew (mildew) or powdery mildew (oidium), black marks remain from hail, and deformations can be a sign of viral fanleaf degeneration.
| Cutting parameter | Standard requirements (OST) |
|---|---|
| Length for trunk cultivation | 1.5–1.8 m (depending on the height of the trunk) |
| Cutting diameter | 7–10 mm |
| Minimum wood diameter | At least 2/3 of the total shoot diameter |
| Permissible format for accelerated propagation | Shortened, one- and two-bud cuttings |
Well-ripened vine is determined visually by the characteristic cultivar color of the bark, a dense diaphragm at the node cut (it should match the color of the wood), and a light crackling sound when bent. For an express check of the ripening degree, a simple iodine test is used, although the exact carbohydrate content is determined only by chemical analysis.
- Make a fresh cut of the cutting at the internode.
- Immerse the cut for 1 minute in a 1–2% alcohol solution of iodine.
- Assess the coloration: dark purple wood confirms good ripening and starch accumulation.
Sorted cuttings are laid with their upper ends in one direction and tied into bundles. Long cuttings are tied in bundles of 100, and short ones in bundles of 200. The lower ends are leveled, tied tightly in two places with soft stainless wire, and provided with a label indicating the cultivar and date of preparation. The tied material is sent to the storage location on the same day to prevent drying out.
Storage conditions and spring inspection
During the winter period, the grapevine must be protected from freezing, drying out, and the premature consumption of nutrients through respiration. To achieve this, a strict temperature and humidity regime is maintained in the storage facility. Deviations from the norm are dangerous: at elevated temperatures, the buds consume carbohydrates, and at sub-zero temperatures, they get damaged.
- Storage temperature — from 0 to 4 °C
- Relative humidity — 80–85 %
- Concentration of Chinosol solution — 0.5 %
- Vine soaking time — 5 hours
- Height of the cutting stack — 1.5–2 m
Before placing into storage, the cuttings must be treated with a fungicide to protect them from mold, necrosis, and black spot. For this, bundles are immersed for 5 hours in metal containers with a volume of 1 m³, painted on the inside with oil paint and filled with a 0.5% Chinosol solution (the application rate is based on a 98% technical grade preparation). Such a container can hold about 5 thousand eight-bud cuttings.
The same working solution of Chinosol is permitted to be used no more than 3 times. After treatment, allow the solution to drain from the cuttings before placing them in the storage facility.
It is optimal to store the vine in specialized chambers with regulated conditions. In their absence, basements, fruit storage facilities, or covered trenches can be used, provided they are pre-disinfected, whitewashed with lime, and have their concrete floors cleaned. The bundles are laid horizontally in stacks on a 4 cm layer of moist sand, and the stack is tightly covered from the top and sides with plastic film, with its edges held down by weights.
If the cuttings are stored in an improvised room, increase the thickness of the sand cushion on the floor to 10–12 cm. Before covering the stack with film, additionally cover it with mats.
During the winter, the film must be removed 2–3 times for 1–2 days for ventilation and to remove accumulated moisture. At the same time, the condition of the vine is monitored: a random sample of 25–30 cuttings is taken from different parts of the stack. The sample is checked for moisture, necrosis infection, gray mold, and other diseases, taking measures if they are detected.
25–30 days before planting in the nursery, a final assessment of the material's suitability is conducted after winter storage. To do this, a representative sample of 40–50 cuttings is selected, and the integrity of the buds is checked using longitudinal and transverse cross-sections made with a razor blade. In viable buds, the central and 1–2 replacement zones on the cross-section should be bright green. If the buds have turned brown, black, or break off easily when pressed with a finger, they are dead.
If only the central bud of the cutting is damaged, but the replacement buds are healthy, the material can be used. A batch is considered suitable for planting if the proportion of damaged buds in the sample does not exceed 15%.
Preparation of cuttings and assessment of their suitability
Before planting, it is necessary to assess the quality of the harvested material. The freshness of a cutting is determined by a freshly cut transverse cross-section: in healthy shoots, the wood is bright green, and moisture appears when lightly pressed with a knife. If the cross-section has a whitish-green color, the cuttings have dried out — they will need to be soaked in water for 2–3 days before planting. The presence of dark spots or black streaks under the bark indicates that the tissues have frozen.
- Humidity (by fresh mass) — 48–50%
- Carbohydrates (sugars and starch by dry mass) — no less than 12%
- Water temperature for soaking — 15–16 °C
- Soaking time — 1–2 days
Well-ripened cuttings are firm to the touch, retain the brown bark color characteristic of the cultivar (brighter at the nodes), and do not break when bent. To restore moisture after winter storage and activate the cambium, bundles of cuttings are submerged with their lower ends one-third of the way into containers with clean rainwater or pond water. After the procedure, a control cross-section is mandatory at the upper end of the cutting: it must be bright green and moist when pressed.
Do not exceed the recommended soaking times. Excessive time in water leads to the leaching of nutrients, which sharply reduces the quality of the planting material.
After soaking, proceed to cutting the stems and refreshing the cuts. This procedure triggers an influx of wound hormones to the tissues, stimulating root formation and bud development. When pruning, strictly follow the rules for the direction and positioning of the cuts:
- the bottom cut is made straight, directly below the node;
- the top cut is made 3–4 cm above the node at an angle, slanting away from the bud.
For small-scale production of nursery plants, grooving is additionally applied. Shallow longitudinal scratches are made on the lower ends of the cuttings using the teeth of a pruning saw or a special metal comb. Damage to the bark activates the release of hormones and accelerates the formation of the root system.
Callusing technology
Callusing is a mandatory technique in commercial viticulture, allowing for the synchronization of nursery plant development. Under natural conditions, buds break dormancy earlier than roots develop, which leads to shoot death from a lack of nutrients. To delay shoot growth and accelerate root formation, a temperature contrast is artificially created for the different ends of the cutting.
| Cutting zone | Temperature range, °C |
|---|---|
| Lower end (root formation zone) | 22–24 |
| Upper end (shoot growth zone) | 18–20 |
In large nursery farms, callusing is carried out using electric heating in ESU–2M or UES–6 systems. For medium and small-scale production, excellent results are achieved by callusing in trenches or hotbeds with top biological heating. The dimensions of such structures are standard.
| Trench (hotbed) parameter | Dimension, m |
|---|---|
| Depth | 1.4–1.8 |
| Width | 1.5 |
The preparation of the trench and the placement of the material are performed in the following sequence:
- In early spring, fill the trench with snow or ice to half its depth or slightly higher.
- At a distance of 78–80 cm from the soil surface, install a removable slatted bottom made of slats or perforated boards on beams.
- 20–25 days before planting, place the soaked and trimmed bundles of cuttings tightly onto the grate with their lower ends facing up.
- Cover the cuttings with a 4–5 cm layer of damp sawdust or moss, place a 10–15 cm layer of humus or manure on top, and cover tightly with frames or polyethylene film.
Up to 4,000 cuttings fit under one hotbed frame. For correct thermal regulation, be sure to leave an air gap between the cover and the soil, and constantly monitor the substrate to ensure it remains moist.
Depending on weather conditions, callusing lasts from two to three weeks and is considered complete if the majority of the cuttings (over 80%) have formed a circular yellow-white callus protrusion at the basal ends, root primordia have appeared, and the bud of the uppermost eye of the cutting has just begun to grow.
To enhance root formation and callus development at the base of the cutting heel, they are treated with growth regulators (see p. 247).
Read next
Viticulture For agronomists
Technologies for growing grape nursery plants with a ready-made high trunk
Viticulture For agronomists
Preparation and storage of grapevine cuttings for grafting.
Viticulture For agronomists