
Technology of growing early white cabbage transplants in protected soil
18 min read
To obtain high-quality transplants of early white cabbage by the time of planting, it is necessary to grow healthy 60–65-day-old plants. Sowing dates are calculated based on this period. The main task of an agronomist is to create optimal temperature and nutrient regimes at all stages of growth.
- Transplant age at planting — 60–65 days
- Seed sowing depth — 0.5–1 cm
- Application rate per 1 m² of greenhouse — 10–14 g
- Soil temperature for emergence — 18–20 °C
- Air humidity during ventilation — 60–70%
Cabbage sowing for transplants and temperature regime
Sowing begins with the preparation of a nutrient soil. To do this, mix two parts of humus, one part of soil, and one part of sand. To prevent the transplants from being affected by damping-off, 130–150 g of ash or 200–250 g of lime are added per 1 m² of the mixture. To optimize mineral nutrition, 15 g of ammonium nitrate, 45 g of superphosphate, and 20 g of potassium sulfate per 1 m² are applied to the substrate, spreading the finished mixture in a layer 3–5 cm thick.
For one sowing tray measuring 50x35 cm, 3 g of seed are used, and when sowing in a greenhouse bed — from 10 to 14 g per 1 m². Seeds are sown at a depth of 0.5–1 cm with a spacing of 2 cm between rows. To obtain uniform emergence, the soil must be mulched with a film. At an optimal temperature of 18–20 °C, the first seedlings appear as early as the 3rd–4th day.
After emergence, the seedlings are hardened for 4–7 days by lowering the air temperature. Lower temperatures during this period contribute to the development of a strong root system, as its temperature optimum is lower than that of the above-ground part of the plants. This allows for obtaining stocky transplants and avoiding etiolation.
| Growing period | Recommended air temperature, °C |
|---|---|
| Clear (sunny) day | 15–17 |
| Cloudy day | 13–15 |
| Night time | 7–9 |
When managing the microclimate, it is important to consider illumination: on a cloudy day, when photosynthesis is weaker, the temperature is maintained 2–4 °C lower than on a sunny day. The night temperature is always kept significantly lower than the day temperature.
Monitor the night air temperature. Excessive heat during the dark hours leads to the stretching and weakening of plants due to increased consumption of nutrients for respiration.
Pricking out, top dressing, and greenhouse soil preparation
Upon the appearance of the first true leaf, the plants are pricked out into pots measuring 6x6 or 8x8 cm. The mixture for the pots is prepared from three parts of peat and one part of humus, or by mixing 3 to 8 parts of humus with one part of soil. For every bucket of prepared soil, 20 g of ammonium nitrate, 70 g of superphosphate, and 20 g of potassium sulfate are added. To ensure the fertilizer is distributed evenly, it is mixed into the soil gradually.
Before lifting, the seedlings are watered abundantly. When planting, they are buried in the holes to a depth of 2–3 cm, gently firming the soil around the roots and the hypocotyl. The taproot of the seedling must be pinched to stimulate lateral branching.
Immediately after pricking out, the transplants are watered with warm water and shaded for 2–3 days. During this time, the soil and air temperature are kept 2–3 °C higher than usual to accelerate establishment. Subsequently, irrigation is carried out moderately — once every 7–10 days at a rate of 10 l of water per 1 m².
It is better to water the transplants in the morning followed by ventilation of the greenhouse. This helps to reduce the relative humidity of the air to 60–70%, which significantly reduces the risk of fungal disease development.
During the growing process, the transplants are fed three times, strictly observing the dosage and sequence of fertilizer application:
- First top dressing is carried out at the 2–3 true leaf phase. A solution of 20 g of ammonium nitrate, 40 g of superphosphate, and 10 g of potassium sulfate per 10 l of water is used (application rate — 10 l per 1 m²).
- Second top dressing is performed 10–15 days after the first one. The dosage of nitrogen, phosphorus, and potassium is increased: 30 g of ammonium nitrate, 60 g of superphosphate, and 20 g of potassium sulfate are taken per 10 l of water.
- Third top dressing is carried out 24 hours before transplanting. To increase the stress resistance of the plants, the potassium dose is increased: 20 g of ammonium nitrate, 40 g of superphosphate, and 60 g of potassium sulfate are added per 10 l of water (per 1 m²). After top dressing, the soil moisture is brought to 100% of field capacity.
Hardening begins 10–15 days before planting the plants in their permanent location. For the first 3–5 days, ventilation of the greenhouses is simply increased, lowering the overall temperature. 10 days before planting, the greenhouse roof or hotbed frames are opened completely or by 30% from the sides. The transplants are watered only upon noticeable wilting of the leaves, protecting them from natural precipitation.
In parallel, the soil is prepared directly in the greenhouse. Its surface is carefully leveled to prevent the accumulation of irrigation water and uneven soil maturation. To improve soil structure and warming, up to 50% of organic matter by volume is incorporated into the top 10 cm layer. Additionally, per 1 m², 15–20 g of ammonium nitrate, 80–100 g of superphosphate, and 30–35 g of potassium sulfate are added. The soil is loosened several times when it reaches a state of physical maturity.
Sowing in the greenhouse soil begins in early April, when the soil temperature at a depth of 10–15 cm reaches 12 °C in the morning. Beds 1.6–1.8 m wide are formed across the greenhouse, leaving a central path. Furrows 6–10 cm deep are cut every 24 cm with a slope for water drainage, followed by fluid sowing with sprouted seed and water.
Caring for cabbage transplants after emergence
After emergence, the agronomist's main task becomes the development of a powerful root system and preventing stem elongation. Once the cabbage seedlings have developed 3–4 true leaves, perform hilling. The soil that was removed when cutting the furrows is pushed back toward the plant stems using a standard hoe during loosening. Additional mounding stimulates the formation of adventitious roots and increases the overall stability of the transplants.
It is necessary to loosen the soil in the greenhouse regularly. This technological operation destroys weeds, improves air access to the roots, and prunes their lateral branches, which stimulates the branching of the root system. Wide row spacing significantly facilitates crop care, and for manual tillage, it is most convenient to use hand cultivators.
- Row spacing — 24 cm
- Hilling stage — 3–4 leaves
- Traditional feeding pattern — 6x6 or 7x7 cm
Switching to wide-row sowing with 24 cm spacing gives cabbage an advantage in terms of lighting. With a classic square planting scheme, plants are well-lit only at the beginning. Before transplanting, when the leaves close up, wide-row crops continue to receive a sufficient amount of light, whereas with the square scheme, seedlings begin to shade each other and stretch.
Water the transplants sparingly and only at the base, avoiding water on the leaves. Excessive air and soil humidity, especially in cold weather, provokes the development of dangerous fungal diseases.
To protect fragile plants from spring frosts in the greenhouse, a set of protective measures is applied. During cold periods, the beds are covered with a second layer of film. Soil irrigation along furrows between rows and external sprinkling of the greenhouse dome are also effective — for this, nozzles are set to spray water over the surface of the outer film.
Choosing tomato cultivars and hybrids for greenhouses
In modern greenhouse vegetable production, classic cultivars are giving way to heterotic first-generation (F1) hybrids. Tomato fruits are highly valued for their content of sugars, carotene, vitamins C, B, PP, as well as malic and citric acids. First-generation hybrids are characterized by high plasticity, provide a stable harvest in extreme growing conditions, and are genetically resistant to the main pests and diseases of protected ground.
F1 hybrids are obtained by crossing specially selected parental lines with strong genetic properties. Unlike cultivars, they surpass the parental forms in vitality and yield.
All cultivated tomato cultivars and hybrids are divided into groups depending on the growth habit of the shoots. Indeterminate plants have unlimited growth, whereas determinate, semi-determinate, and super-determinate forms terminate growth independently after the formation of a certain number of inflorescences. The choice of a specific type determines the planting density and the plant training scheme.
| Tomato growth type | Number of inflorescences on the main stem | Position of the first inflorescence | Interval between subsequent inflorescences | Planting density, plants/m² | Development and application features |
|---|---|---|---|---|---|
| Super-determinate | 2–3 | Above the 5th–7th leaf | Every 1, rarely 2 leaves | 8–10 | Plant height 50–100 cm. They make poor use of greenhouse volume and are better suited for open ground and tunnels. They mature quickly, escaping late blight and frosts. |
| Determinate | 4–6 | Above the 8th–9th leaf | Every 1–2 leaves | 5–6 | Rationally use the greenhouse volume. Plants are taller and easier to train compared to super-determinate ones. |
| Semi-determinate | 7–8 | Above the 9th–11th leaf | Every 2–3 leaves | — | Grown primarily in protected ground. Growth of the bush may stop after the formation of terminal clusters. |
| Indeterminate | Unlimited | Above the 9th–11th leaf | Every 3 leaves | — | Possess continuous growth. Easily trained to a single stem, providing a uniform and long-term yield of high quality. |
The tomato is a light-loving plant. Raising transplants of tomatoes under insufficient sunlight leads to plant elongation and flower drop. The plant is demanding of heat; the optimal temperature for its growth and development is 18—28 °C.
| Temperature regime | Consequences for the plant |
| Below 15 °С | Plants do not flower, pollen does not germinate |
| Above 35 °С | Pollen is sterile, flowers drop off |
| Night temperatures below 12 °С | Delayed fruiting, abundance of side shoots |
Cold resistance of tomatoes increases if germinating seeds and seedlings have undergone hardening and were grown with abundant phosphorus-potassium nutrition.
Tomatoes are demanding of soil fertility and its moisture level. Consequences of disrupting the moisture regime:
- Lack of moisture: flower drop, formation of small fruits with high sugar content, yield reduction.
- Excess moisture: plant disease with late blight and fruit rot.
- Sudden fluctuations in humidity and temperature: fruit cracking and the appearance of blossom-end rot.
Before sowing, seeds are separated by density using a 3-5% solution of table salt or potassium nitrate (30-50 g per 1 l of water), by immersing the seeds and stirring thoroughly. After 5—7 minutes, dense, heavier seeds settle to the bottom. They are removed, rinsed thoroughly, dried, and used for sowing.
Seeds are considered good if their germination rate is at least 85%.
Soaking in solutions of physiologically active substances significantly accelerates seed germination. The most common is the following: boric acid — 0.02%, manganese sulfate manganese and zinc sulfate — 0.05%, ammonium molybdate ammonium — 0.01%, copper sulfate — 0.05%, and potassium iodide — 0.025%. Seeds in a tight bag made of several layers of gauze are placed in a vessel so that the water or solution just covers them, and kept in the solution for 12-18 hours at a temperature of 20-25 °С. If soaking is carried out in water, it must be changed every 3—4 hours, and seeds should be soaked for 24—48 hours.
To increase germination, seeds are placed in a vessel with water, and air is pumped through for 15—20 hours or oxygen for 12-18 hours. For this purpose, it is convenient to use an aquarium compressor or a cylinder with oxygen or compressed air equipped with a reducer. Bubbling (hydro-aeration) is especially effective for seeds with low germination.
In the non-chernozem zone, "hardening" of seeds yields good results, especially if conditions for growing seedlings are unfavorable. To do this, swollen tomato seeds are wrapped in gauze and plastic film and left in the refrigerator for 10-12 hours at a temperature of 0-1 °С, and moved to a living room (15—20 °С) during the day. This is done until some of the seeds begin to sprout (usually after 10—15 days), then they are sown. Seeds that have undergone hardening with variable temperatures begin to germinate at 14—16 °С and develop well at 16—20 °С.
To destroy viral diseases hidden inside the seeds, it is recommended to heat them in an oven or drying cabinet for 4—5 hours at a temperature of 40-60 °С. The temperature is raised gradually.
An effective method for controlling various seed diseases is treating them with high and ultra-high frequency currents. It can also be performed in a household microwave oven. Seeds slightly moistened with water are kept for 10-15 minutes and then placed in the oven for 20-40 seconds. The final temperature of the seeds should not be higher than 48-50 °С.
- Tomatoes are a crop with a long growing season. It takes 100—120 days from emergence to fruiting. Therefore, in the central region, in order to plant seedlings in mid-May, seeds should be sown no later than March 20.
Seedlings are usually grown in small boxes. Sowing is carried out in late March — early April. Soil for this is prepared in the autumn (humus or sod soil). It is frozen over the winter, and after thawing, it is poured into boxes in advance, slightly compacted, and furrows 2 cm deep are made at 4 cm intervals. Granulated superphosphate is evenly spread along the bottom of the furrows (1 pinch per 1 m of furrow), covered with the soil mixture, and seeds are sown, placing them at a distance of 1 cm from each other.
2-3 g of seeds are sown in a seedling box measuring 35x50 cm. Water with warm melted snow water or well-settled tap water.
In early May, seedlings are transplanted (pricked out) into milk cartons with drainage holes made in the bottom, or into boxes. Pricking out is carried out in the two-true-leaf stage. Soil is poured into the carton, 3—4 g of superphosphate and potassium are added, mixed, the seedling is lowered in, and covered with soil. To avoid damaging the plant, it is better not to press the soil down, but to water it well with warm water with the addition of a complete complex fertilizer (1 tablespoon per 10 l of water). Plants are left in a warm room for 1-2 days, and then hardening begins by placing them outside on warm days (on the south side), while shading them with paper so that the plants do not get burned.
Nutrient mixtures for making pots for transplants can be prepared from 3–4 parts of peat, 1 part of sod soil, and 7-10% manure or 3 parts of peat, 1 part of sawdust, and 0.5 parts of manure. To 100 kg of the mixture, add 30 kg of river sand, 0.1 kg of ammonium nitrate, 0.2–0.3 kg of superphosphate, and 0.1–0.15 kg of potassium chloride.
Technology for growing tomato transplants in a greenhouse
High-quality soil substrate ensures uniform emergence and vigor of young plants. For sowing tomatoes, a soil mixture can be prepared from equal parts of sod sandy loam and raw manure. For every kilogram of this mixture, add 1 tablespoon of wood ash and 30 g of superphosphate. The substrate is prepared five days before seed sowing and poured into boxes in a layer 15–20 cm high. Before sowing, the soil must be saturated with a weak solution of potassium permanganate at a rate of 1 g per 10 L of water.
- Sowing depth — 0.5–1 cm
- Soil temperature before emergence — 24 °С
- Pricking out scheme for seedlings — 5x5 cm
- Depth of autumn ploughing — 22–25 cm
Seeds are placed at intervals of 1.5–2 cm in a row, maintaining row spacing of 4–5 cm, with the first row at least 2 cm from the edge of the box. If the mixture is used for forming pots, 10 kg of prepared soil yields 20–25 pieces. During the growing period, transplants are top-dressed up to five times with a working solution: 3–5 g of ammonium nitrate, 2–3 g of potassium salt, and 6–8 g of superphosphate per 10 L of water. The application rate of the prepared solution is one bucket per 1–1.5 m² of the useful area of the greenhouse.
- Cover the boxes or pots with film or glass immediately after sowing.
- Maintain the soil temperature at 24 °С until emergence.
- Remove the cover upon the appearance of individual seedlings.
- Switch on continuous lighting for two to three days, lowering the temperature to 20 °С during the day and 15 °С at night.
In the first days, seedlings are irrigated moderately, completely excluding top dressing. Peat blocks are also excellent as a substrate for growing tomato transplants. Before sowing the seeds, they are moistened until moisture appears when the surface is pressed lightly. Mineral fertilizers supplied with the peat blocks are divided into two equal parts. Dissolve the first half in 1 L of warm water at 40–50 °С and water the peat block evenly. Tomato seeds are placed into the cells and covered with sand or peat crumbs. This supply of nutrients lasts for 25–30 days of development, after which a second top dressing is performed with the remaining portion of fertilizers dissolved in 2 L of water. Transplants are planted in their permanent location directly in the peat blocks.
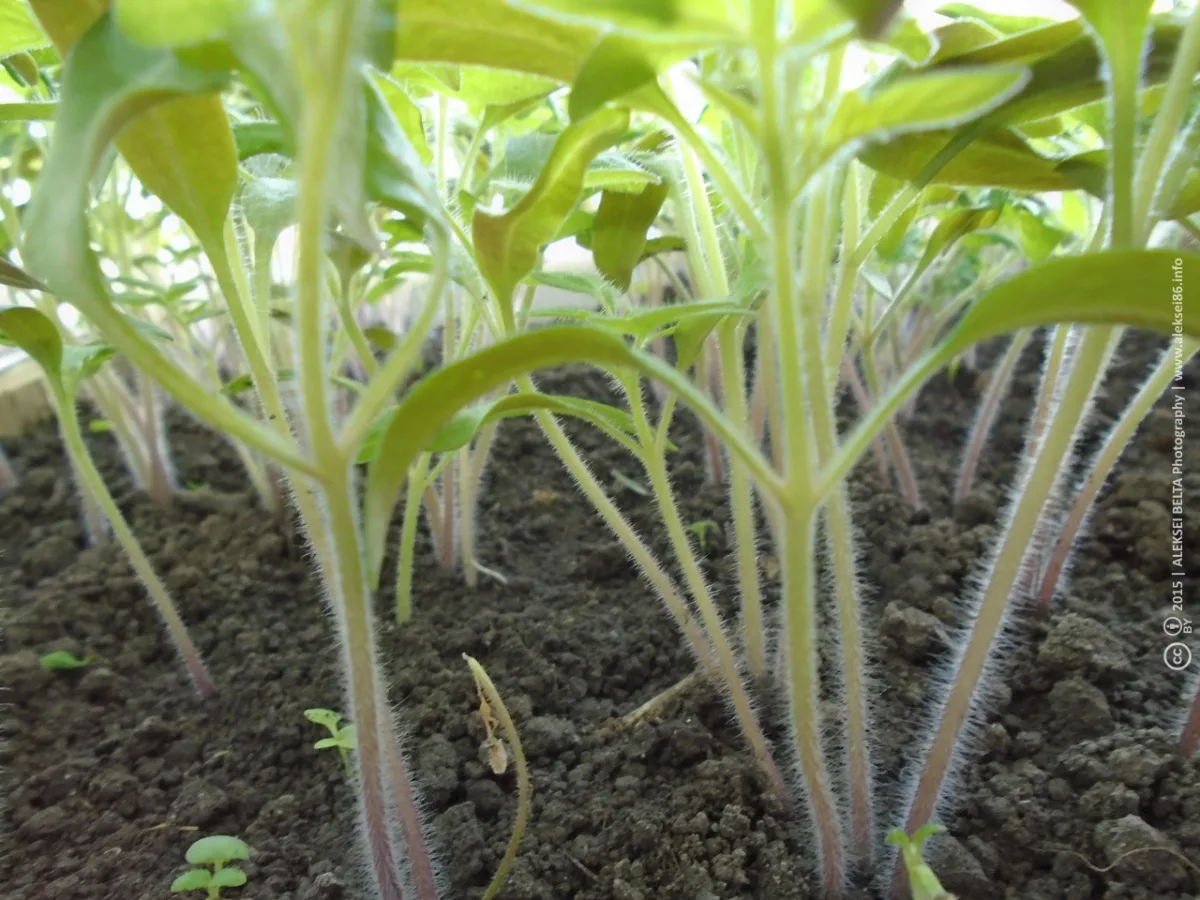
Upon the appearance of the first loops and seedlings, the boxes are immediately exposed to maximum light. After the cotyledons unfold, the air temperature is lowered to 11–16 °С, which prevents the stems from stretching. After a week, when plant tissues strengthen, the daytime temperature is increased to 17–18 °С. Once every 7–10 days, starting from the first true leaf phase, seedlings are watered with a weak solution of potassium permanganate. Once a day, the containers are turned to face the sun from a different side so that the seedlings develop evenly and do not bend.
Often, tough seed coats get stuck on the tips of cotyledons, inhibiting growth. In this case, spray the tips with warm water using a sprayer and carefully remove the shell by hand. Avoid over-moistening the soil during this procedure, otherwise, the plants may suffer from mass outbreaks of blackleg disease.
15 days after emergence, the first root top dressing is performed by dissolving 1/2 teaspoon of nitrophoska in 1 L of water. Pricking out is performed on the 15th–20th day after emergence. During this process, the taproot is carefully trimmed under the fibrous part, and the plant is buried up to the cotyledons. Transplanting using a 5x5 cm scheme stimulates the development of robust lateral roots. This technique is critical when growing tall tomato cultivars, as well as when transferring transplants to light sandy soils or areas with high groundwater levels.
If transplant growth has slowed down and plants are becoming excessively thin and pale, lower the greenhouse air temperature to 10–12 °С to strengthen the stems.
10–12 days after pricking out, the plants are top-dressed again. To do this, thoroughly dissolve 1 tablespoon each of double superphosphate and potassium nitrate in 10 L of water. To increase the yield of tomatoes (especially low-growing cultivars) by 30–50%, the "Tur" preparation is used. Transplants are sprayed twice with an interval of 7–8 days. The application should only begin strictly after pricking out, once the plants have formed at least four leaves.
When growing tomatoes in heated greenhouses with artificial supplemental lighting, an extra-early harvest can be obtained. In this case, sowing is carried out immediately after the area is cleared of the predecessor, which is most often cucumber. The soil is prepared thoroughly, following a strict sequence of technological operations.
- Completely collect and remove all plant residues from the greenhouse: leaves, stems, and damaged fruits.
- Remove the top 2–3 cm layer of soil and send it to the compost to prevent the accumulation of infections.
- Evenly apply 4–5 kg of well-decomposed compost or humus, 40–50 g of superphosphate, and 15–20 g of potassium salt per square meter of the area.
- Dig the greenhouse soil to a depth of 22–25 cm to incorporate the fertilizer.
Read next
Greenhouses and covers For gardeners
Technologies for growing vegetable transplants in protected soil
Greenhouses and covers For agronomists
Technology for growing and preparing tomato transplants for planting in a greenhouse
Greenhouses and covers For gardeners