
Sowing and growing technology of tomato transplants for greenhouses
17 min read
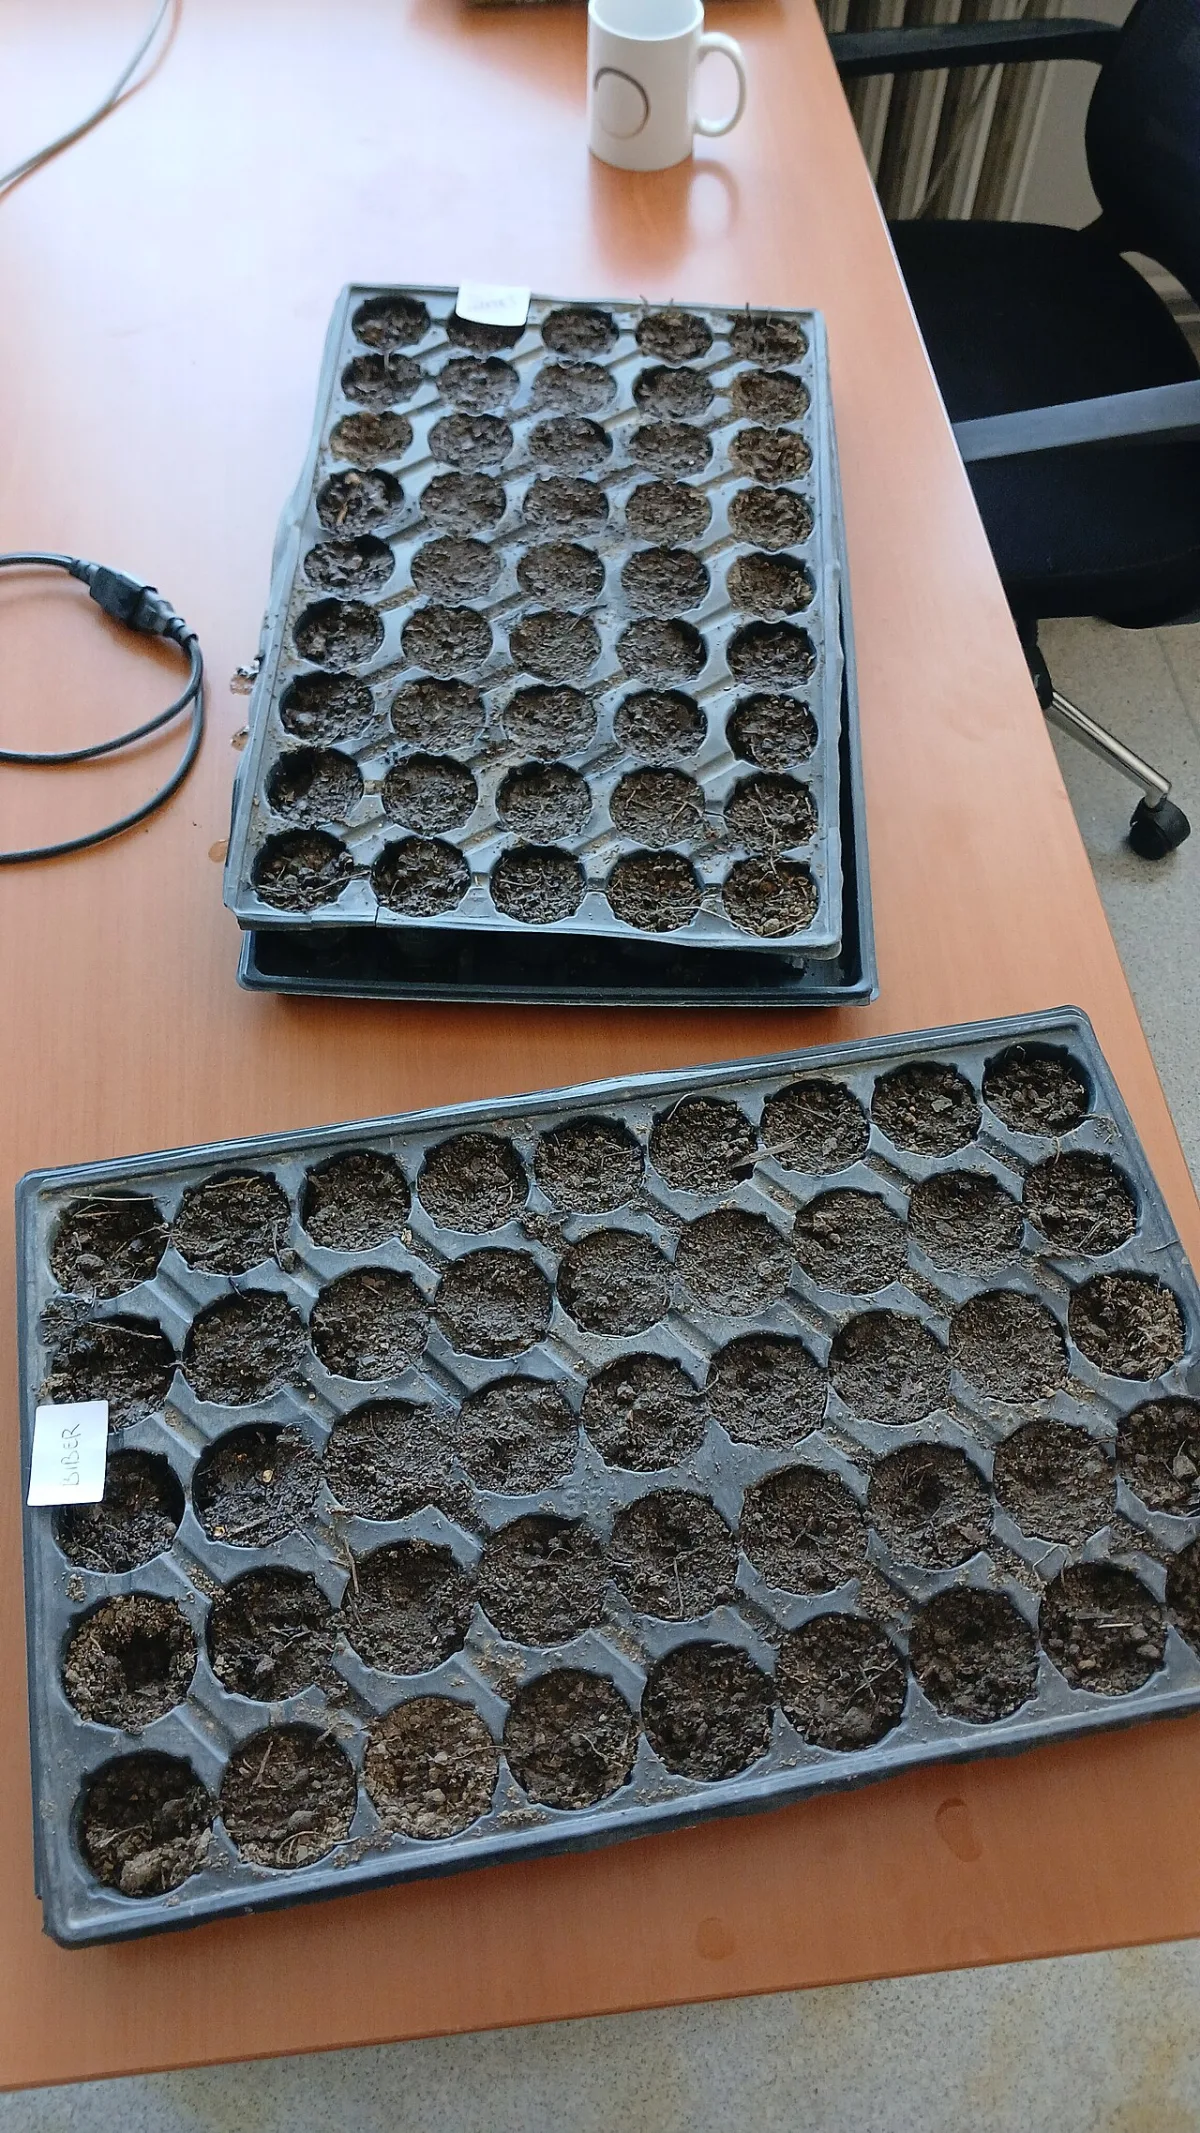
Growing high-quality transplants of tomatoes for greenhouses requires strict control of humidity, temperature, and proper development of the root system. Two-stage transplanting and a gradual increase in pot size suppress undesirable stem elongation and stimulate the development of robust roots. This is the key to a high harvest and plant resistance to diseases.
- Sowing dates — from February 5 to 25
- Seed sowing depth — 1 cm
- Irrigation water temperature — no less than 20 °C
- First top dressing timing — 18 days after pricking out
- Top dressing application rate — 1 glass per 2 pots
Sowing tomatoes and soil preparation
For planting in greenhouses, seeds of hybrid and tall tomato cultivars are sown in nurseries (densely) in boxes. Subsequently, seedlings must be pricked out into nutrient-rich pots. This technique inhibits excessive growth of the aerial part and prevents plants from stretching.
The soil mixture for sowing is prepared according to one of the following recipes. Each component must be of high quality and clean. Choose one of the five substrate options:
- 1 part each of peat, manure humus, and sod soil (add 1 tablespoon of wood ash and 1 teaspoon of superphosphate per bucket of mixture);
- 1 part each of peat and humus (add 1 tablespoon of wood ash and 1 tablespoon of superphosphate per bucket of mixture);
- 1 part of "Fialka" peat briquette and 1 part of sod loamy soil (add 1 tablespoon of superphosphate and 1 tablespoon of wood ash per bucket of mixture);
- 1 part of "Mikroparnik" mixture briquette and 1 part of sod soil (add 1 tablespoon of superphosphate per bucket of mixture);
- "Zhivaya Zemlya" ready-made soil in pure form is the best option, which does not require the addition of fertilizers.
The selected substrate should be thoroughly mixed before use. When sowing, strictly follow the sequence of soil preparation and seed sowing. This will help avoid mold and ensure uniform emergence.
- Moisten the prepared soil mixture.
- Fill the container with a 5–7 cm layer of soil, level it, and lightly pack it.
- Water the soil with a hot (80–90 °C) solution of copper sulfate at a rate of 1 teaspoon per 10 liters of water.
- Make planting furrows 1 cm deep at a distance of 5–7 cm from each other.
- Sow the seeds in the furrows at 1.5–2 cm intervals (no denser) and cover them with the same soil mixture.
Containers with seeds are placed in a warm and bright place at a temperature of no less than 22 °C. Emergence usually occurs in 6–7 days. To speed up the process, the sowings can be covered with a film in the form of a dome.
Growing seedlings and pricking out rules
Maintaining the temperature regime in the first weeks of seedling life prevents them from stretching. The air temperature is regulated depending on the development phase of the plants. The temperature schedule is presented below.
| Growing period | Day temperature, °С | Night temperature, °С |
|---|---|---|
| First 7 days after emergence | 16–18 | 14–15 |
| Until the appearance of 2–3 true leaves (30–40 days) | 18–20 | 15–16 |
| First 3–4 days after pricking out into pots | 16–18 | 14–15 |
While in the box, seedlings are watered only 2–3 times at the root with settled water at a temperature of no less than 20 °C. The first time is upon full emergence, the second — 10–12 days later, and the last — 3 hours before pricking out. From the moment the first true leaf appears, the plants are sprayed every 7 days in the morning with a solution of skimmed milk (half a glass of skimmed milk per 1 liter of water). This is a reliable prevention of dangerous viral diseases that cause leaf curling.
Do not place the seedling box directly on the windowsill — use a stand for air circulation at the roots. Rotate the container daily to face the glass from the other side so that the transplants do not bend towards the light. Seedlings are grown in the box without top dressing.
In the 2–3 true leaves phase, seedlings are pricked out into 6x8 or 8x8 cm pots, having previously watered the soil with hot water. During the work, discard weak and diseased plants. If the seedlings have stretched, the stem can be buried to half its height during planting, but not up to the cotyledonary leaves. After pricking out, the transplants are watered once a week until the root ball is completely soaked, allowing the soil to dry out slightly between waterings.
18 days after pricking out, apply top dressing with a solution of nitrophoska or nitroammophoska (1 tablespoon per 10 liters of water) at a rate of 1 glass per 2 pots. After another 22–25 days, the transplants are repotted into larger pots of 12x12 or 15x15 cm. Plants are watered with warm (22 °C) water at 1 glass per pot and then left without watering for 10–12 days. Subsequently, water moderately and individually as the soil dries, to hold back the growth of the aerial part.
When growing more than 50 transplants, do not prick out seedlings directly into large containers. In an excessive volume of soil, water stagnates, the roots suffocate, and the transplants become leggy. A double transplanting is necessary to restrain stem growth and ensure proper root ball formation. Planting directly into 10x10 cm pots is permissible only when growing a small number of transplants — up to 20–30 units.
After transplanting into larger pots, the transplants should be watered and given top dressing only after 10—12 days: add 1 tablespoon each of superphosphate and nitrophoska to 10 l of water. A top dressing with the "Signor Pomidor" fertilizer is effective: dissolve 1 tablespoon in 10 l of water, applying 1 cup of solution per pot.
The next top dressing is carried out if the transplants are growing slowly and have a pale green color: add 1 tablespoon of urea, "Krystallin", or ammonium nitrate to 10 l of water, applying 1 cup to each pot. After the top dressing, the thermal regime must be improved: keep the temperature at 18—20 °С during the day and 16—17 °С at night.
If the transplants are developing too rapidly, stop watering until the soil dries out. Then, provide a root top dressing with a strong superphosphate solution: use 3 tablespoons per 10 l of water, applying 1 cup of this solution to each pot. In sunny weather, maintain a temperature of 22—23 °С during the day and 16—17 °С at night, and in cloudy weather, reduce it to 17—18 °С during the day and 15—16 °С at night.
In April, the transplants are hardened by opening the window vent both day and night. On warm days (12 °С and above), take the transplants out to the balcony for 2-3 hours for 2-3 days, leaving them uncovered, and then take them out for the whole day; you can even leave them overnight, but be sure to cover them with film. In case of a temperature drop (below 8 °С), it is better to move the transplants indoors. Well-hardened transplants have dark green leaves with a bluish-purple tint.
To preserve flower buds on the first inflorescence, it is necessary to spray the transplants with a boric acid solution (1 teaspoon per 1 l of water) 4—5 days before planting in a garden bed or greenhouse, doing so in the morning during cloudy weather. This should not be done in sunny weather, otherwise burns will appear on the leaves. The transplants should be 25—35 cm high with 8—11 well-developed leaves and have formed inflorescences (one or two).
Gardeners often buy transplants at the market. Their main disadvantage, as a rule, is that the seed is sown too late. This can be determined by the appearance of the plants: they are pale green, with large internodes, thin, leggy, and have no signs of flower buds. Such transplants always produce a late and meager harvest and are susceptible to fungal diseases, especially late blight, which is why we advise growing transplants yourself.
2-3 days before planting transplants into their permanent location, it is recommended to prune 2-3 lower true leaves. This operation is done for better ventilation and light penetration, which will promote good development of the first inflorescence. Prune them so that 1.5—2 cm long stubs remain, which will dry out and fall off on their own without damaging the main stem.
The grown transplants are planted into the greenhouse from May 1-20. It is still cool at this time, especially at night, so it is recommended to cover the greenhouse with two layers of film with a 2-3 cm gap between them; such a cover not only improves the thermal regime but also extends the service life of the bottom layer of film until late autumn. The top layer of film is removed on June 10.
The greenhouse intended for tomatoes should have window vents not only on both sides but also at the top (one or two), since tomatoes, especially during flowering and fruiting, require good ventilation.
To avoid diseases, it is not recommended to plant tomatoes in the same greenhouse for several years in a row. Usually, they are rotated with cucumbers, i.e., one season — cucumbers, the second — tomatoes. However, recently cucumbers and tomatoes have started suffering from the same fungal disease — anthracnose (root rots). Therefore, if tomatoes are planted after cucumbers, all soil must be removed from the greenhouse or at least its top 10-12 cm layer, where all the infection resides. After that, the soil must be sprayed with a hot (100 °С) solution of copper sulfate (1 tablespoon per 10 l of water) or an "Oxyhom" solution (1 tablet per 5 l of water).
If there is only one greenhouse, it is partitioned in the middle with a film, growing cucumbers on one side and tomatoes on the other. Tomatoes and cucumbers are not grown together in the same greenhouse, as tomatoes require more ventilation, lower humidity, and lower air temperature compared to cucumbers. A greenhouse must be illuminated by sunlight from morning until evening; even slight shading by trees or shrubs leads to a decrease in yield.
Beds are made along the greenhouse; their number depends on its width. The beds are prepared 5–10 days before planting transplants. Their height is 35–40 cm, width depends on the size of the greenhouse, usually 60–80 cm, and an aisle of at least 60–70 cm is left between the beds.
For a bed of loamy or clayey soil, add 1 bucket of peat, sawdust, and humus per 1 m²; if the beds are made of peat, add 1 bucket of humus, sod soil, sawdust or fine wood shavings, and half a bucket of coarse sand. In addition, add 3 tablespoons of superphosphate, 1 tablespoon each of potassium sulfate and potassium-magnesia, and 1 teaspoon of urea or sodium nitrate. To reduce soil acidity, add 1 glass of wood ash or 1 glass of dolomite flour. All components
Fig. 40. Planting tomato transplants. E an
_ch__ o 69: \30 2>0040<2
The prepared beds are watered with a hot (80-90 °C) manure solution (a one-liter jar of concentrated (thick) manure per 10 l of water) at a rate of 3–4 l of solution per 1 m2.
The transplants are watered and removed from their cups. Before planting, the bed is watered with a potassium permanganate solution (1 g per 10 l of water) at a rate of 1 l per planting hole. The transplants (25-35 cm) are planted vertically, covering only the root ball with the root system with the soil mixture. If the transplants have overgrown, it is a mistake to try to bury the entire stem in the soil during planting. A buried stem will immediately produce additional roots. This suspends the plant's growth and contributes to flower drop from the first cluster. Therefore, if the transplants have overgrown, plant them as follows: make a hole 12 cm deep, and inside it a second, deeper hole, to the height of the pot. Water with warm water. Place the soil pot with the transplant into the second hole and cover with soil. Leave the first hole open for now. After 12–15 days, as soon as the transplant is well established, fill the first hole with the soil mixture as well. Such planting brings the first flower cluster closer to the surface of the bed, and in the future, the number of flowers and fruits on it will increase.
Hybrids and cultivars of tall plants are planted in the middle of the bed in a single row or in a staggered pattern 60 cm apart from each other. After planting, the plants are not watered for 12–15 days; this prevents them from stretching and allows their root system to develop well.
10-12 days after planting the plants, the tomatoes are tied to a wire stretched over the bed at a height of 1.8–2 m. It is better to tie them with polyethylene twine, as stems rot from damp felt twine. Then the plant is wrapped around the twine.
Tomatoes are trained to a single stem, leaving 7–8 flower clusters. You can leave only one lower sucker with one flower cluster, and remove all other suckers from the leaf axils and roots when they reach a length of 8 cm. It is best to do this in the morning when the suckers break off easily. To avoid infection with viral diseases, do not cut the suckers, but break them off sideways so that the plant sap does not get on your fingers, because one can transfer infection from a diseased plant to a healthy one by hand. Leave the stubs of the suckers 2–3 cm high.
Pollinate the flowers during the day in warm, sunny weather by the method of lightly shaking the flower clusters. For the pollen to germinate on the stigma of the pistil, it is necessary to water the soil or spray the flowers with a fine mist of water immediately after shaking.
Two hours after watering, lower the air humidity by opening the vent and door in the greenhouse. Ventilation is mandatory, especially during the plant flowering phase. In addition to the side vents, the top vents must also be open so that there is no condensate (water droplets) on the film. Excessive soil moisture reduces the content of dry matter and sugar in tomato fruits, making them sour and watery, and also reduces their fleshiness. Therefore, it is necessary to ensure such irrigation that allows for a high yield without reducing the quality of the fruits.
Tomatoes do not tolerate prolonged cooling and excessive air humidity, as this causes flower and fruit set drop. Before flowering, plants are irrigated every 5—6 days at a rate of 4—5 l per 1 m?, and during flowering and fruiting — 10—15 l per 1 m?. The water temperature should be 22—25 °C.
During the growing season, it is necessary to perform three to four root top dressing applications.
First root top dressing (20 days after planting transplants): 1 tablespoon of nitrophoska and 1 tablespoon of "Ideal" fertilizer per 10 l of water. At a rate of 1 l per plant.
Second root top dressing (10 days after the first): 1 tablespoon of superphosphate, 1 teaspoon of potassium nitrate or potassium sulfate per 10 l of water. At a rate of 5 l per 1 m?.
Third root top dressing (12 days after the second): 1 l of slurry-like mullein or chicken manure or 1 tablespoon of sodium humate per 10 l of water. At a rate of 6-8 l per 1 m?.
The third and fourth top dressings are performed at intervals of 8—10 days using a solution of "Signor Pomidor" fertilizer (1 tablespoon per 10 l of water) or by adding 1 full teaspoon of dry "Kormilets" fertilizer around the plant before irrigation.
During the flowering of the second and third inflorescences, plants are sprayed with a boric acid solution (1 teaspoon per 10 l of water).
In well-developed plants, the top leaves curl slightly during the day and straighten out at night; flowers do not drop, they are bright yellow, large, and numerous in the inflorescence. These signs indicate that the plant has everything it needs: light, nutrients, etc. Such plants also provide a high yield.
Gardeners have many questions regarding tomato care: flowers drop, leaves curl, yield decreases, etc. For example, a fairly common situation: the top leaves of the tomato are constantly curled, there is rapid growth, the plant itself is vigorous, the stems are thick, and the leaves are dark green, large, and succulent, i.e., as the gardeners themselves say, the plants are "fattening." This happens from abundant irrigation and the application of high doses of nitrogen and organic fertilizers. Such a plant will not produce a good yield, as all the nutrients go into the vegetative mass, into the greenery. Such plants, as a rule, form a very weak inflorescence with a small number of flowers.
How to correct such plants? First of all, it is necessary not to irrigate them for 8—10 days. In addition, it is necessary to carry out pollination correctly — in warm, dry weather from 11 to 13 hours, manually shake the inflorescences, and prune excess leaves and suckers. To delay growth, perform a root top dressing with superphosphate (3 tablespoons per 10 l of water) at a rate of 1 l under each plant. And in a short time, the plants recover.
It happens that the leaves of the plants are directed upwards at an acute angle and do not curl either during the day or at night. On such plants, flowers and even small fruits often drop. The reason is dry soil, high temperature in the greenhouse, and poor ventilation. In this case, it is necessary to irrigate the plants and apply top dressing (1 tablespoon of "Ideal" per 10 l of water), lower the temperature in the greenhouse, and ventilate.
It often happens that large fruits fill out on the first cluster, while filling on the second and third clusters is slow. In order to accelerate the fruit filling on the second and third inflorescences and improve the flowering of subsequent ones, it is necessary to harvest the first crop from the first cluster as early as possible, without waiting for the fruits to turn red. The harvested brown fruits will quickly ripen on a sunny windowsill (literally in two days).
Furthermore, immediately after harvesting, you should apply a top dressing with a nitrophoska solution (2 tablespoons per 10 l of water) at a rate of 5—6 l per 1 m?; do not prune suckers and leaves for a week, and lower the temperature in the greenhouse to 16—17 °C (open vents and doors), especially at night. Under these conditions, the yield is quickly formed on subsequent clusters at an earlier date.
Sometimes in a good, new greenhouse, thin plants develop with long internodes, a loose inflorescence, and a small number of fruits. The reason is that fruit trees or berry bushes grow around, and the illumination inside the greenhouse is low. As a result, the yield is 3—4 times lower than in a greenhouse well-lit by the sun. Therefore, one must always remember that tomatoes are the most light-loving crop. In a glass greenhouse, the illumination is better than in a plastic one. But in a glass greenhouse, it is very hot for the plants, especially on a warm sunny day, and the pollen becomes sterile, fruits do not form, so ventilation is necessary.
Obtaining a tomato harvest until the New Year holidays is not a problem in heated greenhouses. The last green fruits will ripen at home in a warm place (15—20 °С), and cherry tomatoes will become even more aromatic.
Of course, only healthy fruits will ripen at home.
ФФ ФлФФАхФААх ХХ ХХХ ХХХ ох
Nowadays, one can only marvel at the variety of tomatoes. There are red, pink, yellow, striped, and even white tomatoes; there are tall or bushy plants, and there are even cultivars for growing in small pots.
Fruit, cherry, or "sherry" tomato bushes produce many fruits, but they are all the size of a sweet cherry. They have almost no scent. Only the last fruits, harvested green in autumn, are very aromatic. Meaty tomatoes, large and usually ribbed, are not particularly suitable for salads. Climbing tomatoes, round and medium-sized, represent the idea of the standard. Currently, cultivars with a slight green "blush" around the stem are very popular, although in commercial vegetable growing such "blushes" are considered an indicator of lower quality, as hard fibers remain in the flesh under the stem; cultivars where these "green blushes" turn red are considered more preferable.
Grape tomatoes, traditional cultivars for Italy, are a new crop in Germany; they are harvested from the bushes as whole "grape" clusters, and all fruits in the cluster must be firm. Of course, they can also be picked gradually as they ripen. These tomatoes have delicious and aromatic flesh.
Yellow round or plum-shaped tomatoes and pear-shaped "perettito" tomatoes of yellow and red colors are striking rarities. They produce just as abundant harvests as tomatoes with red fruits. Their taste is sweeter.
Egg-shaped tomatoes are productive cultivars with firm bottle-shaped or egg-shaped fruits. They are especially good for cooking and for the production of tomato paste.
Let us focus on the most common tomatoes that can be found in the greenhouses of our vegetable growers. Most often, these are representatives of the following groups:
- extra-early cultivars;
- early cultivars;
- mid-season cultivars.
Read next
Greenhouses and covers For gardeners
Growing eggplant transplants in individual containers and a greenhouse
Greenhouses and covers For agronomists
Calculation of transplant requirements for open field and greenhouse cultivation
Greenhouses and covers For agronomists