
Technology of growing high-quality cucumber seedlings at home
10 min read
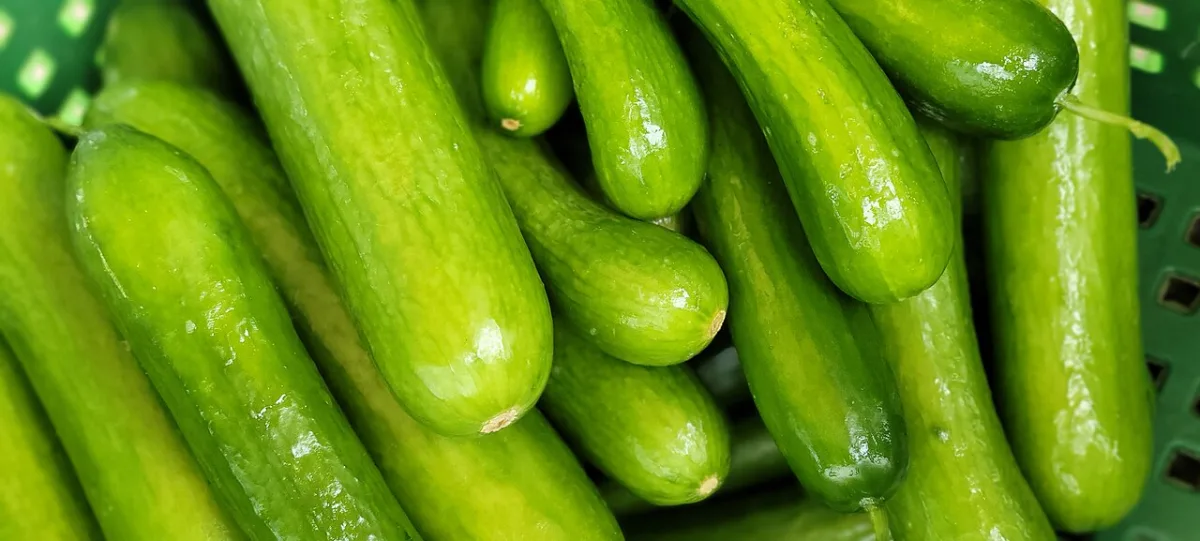
Growing transplants on a windowsill
Growing transplants on a windowsill allows you to obtain an early harvest of cucumbers both for open soil and greenhouses. The method is suitable for working with small batches of plants. The main thing is to properly prepare the seed and strictly adhere to the temperature regime. This will ensure uniform emergence, accelerate fruiting, and prevent an abundance of barren flowers.
Hybrid seed, as well as seed in branded packaging from well-known manufacturers, do not require home preparation. Do not heat or treat them before sowing.
- Heating. Keep large, full-weight seed near heating appliances for a month at a temperature of 25 °C.
- Disinfection. Keep the seed for 15–20 minutes in a solution of potassium permanganate (1 g per 0.5 l of water), then rinse with clean water.
- Soaking. Place the seed in fabric bags and lower them for 12 hours into a nutrient solution (1 teaspoon of nitrophoska or sifted wood ash per 1 l of water). Afterward, rinse with clean water.
- Swelling. Place the seed in a damp cloth for 1–2 days at a temperature of 22–23 °C until swollen. Ensure they only slightly sprout, but do not germinate fully.
- Hardening. Place the sprouted seed on the bottom shelf of a refrigerator (at a temperature of 1–2 °C) for one day.
Seed is sown during April into pots or cups 8–10 cm high. The soil mixture is prepared in advance according to one of the recipes below. You can also use ready-made store-bought soil like "Zhivaya Zemlya" without adding fertilizer.
| Mixture components | Option 1 | Option 2 | Option 3 |
|---|---|---|---|
| Peat | 2 parts | 1 part | 1 part |
| Humus | 2 parts | 1 part | 1 part |
| Sod soil | — | 1 part | — |
| Small old wood sawdust | 1 part | 1 part | — |
| Fertilizer (per bucket of mixture) | 1 tbsp nitrophoska, 3 tbsp wood ash | 1 glass of wood ash | 1 glass of wood ash |
Any prepared mixture is thoroughly mixed and poured into containers to the top. To compact, the soil is watered with a warm (40 °C) nutrient solution. To prepare it, dissolve in 10 l of water 2 tablespoons of slurry-like mullein, 1 tablespoon of urea, and half a teaspoon of copper sulfate.
- Growing period — no more than 25–30 days
- Daytime temperature — 18–20 °C
- Nighttime temperature — no lower than 14–15 °C
- Irrigation water temperature — 25 °C
- Irrigation frequency — 1 time per week
Water the transplants strictly in the morning hours (around 10–11 a.m.), fully soaking the soil clod. If the room temperature rises above 22 °C during the day, open the window for ventilation, but protect the seedlings from direct cold drafts. In the phase of two true leaves, carry out top dressing: dissolve in 3 l of warm (25 °C) water 2 teaspoons of nitrophoska, nitroammophoska, or "Kormilets" fertilizer.
Growing transplants in a plastic greenhouse
If you have a reliable greenhouse with a double-layer plastic cover, there is no need to grow transplants at home. Sowing is carried out directly in the greenhouse room on a small area of the bed. This allows you to obtain hardened plants ready for transplanting to a permanent location as early as mid-May.
- Sowing date — April 20
- Growing period — 22–25 days
- Transplanting to a permanent location — May 10–12
- Daytime temperature — no lower than 15–16 °C
- Nighttime temperature — no lower than 12–14 °C
- Bed preparation. Dig up the soil in the greenhouse, level it, and lightly compact it. Spray the bed from a watering can with a hot (80 °C) solution of copper sulfate (1 tbsp per 10 l of water) at a rate of 2 l per 1 m².
- Container preparation. Fill pots or cups 8x8 or 10x10 cm in size with a nutrient soil mixture. Water with a warm (50 °C) solution of liquid sodium humate (1 tbsp per 10 l of water).
- Sowing. Place the pots on the bed close to each other (bridge method). In the center of each pot, make a hole 2 cm deep, place one seed, cover with the soil mixture, and cover from above with a cover material.
During the growing period, the transplants are watered only 1–2 times with warm (30 °C) water at a rate of 2–3 l per 1 m² of the bed. Watering is carried out in the morning (at 10–11 a.m.) when the air in the greenhouse warms up. At night, the plants are covered more warmly, and during the day, excess insulation is removed. If the temperature rises above 20 °C, open the vent on one side of the greenhouse, and during cold spells, stretch a light thin film inside.
On a warm day, when the seedlings have formed two true leaves, carry out top dressing. To do this, dissolve 1 glass of liquid mullein (or 1 tbsp of "Ideal" liquid fertilizer) and 1 teaspoon of mineral fertilizer in 10 l of warm water. The application rate of the working solution is 2–3 l per 1 m² of the bed.
Disinfect the greenhouse in autumn or early spring. To do this, treat the structure with a solution: 1 tbsp each of karbofos and copper sulfate per 10 L of water. Application rate — 10 L of solution per 15–20 m² of area.
In April, prepare fertile soil for the entire greenhouse area by mixing the components in the necessary proportions. The ingredients of the mixture must be well distributed. Choose one of the four composition variants presented in the table.
| Mixture components | Variant 1 | Variant 2 | Variant 3 | Variant 4 |
|---|---|---|---|---|
| Sod soil | 1 part | — | 2 parts | 1 part |
| Peat | 1 part | 6 parts | 3 parts | 1 part |
| Humus | 1 part | 2 parts | 3 parts | 1 part (or manure humus) |
| Wood sawdust | 1 part | 2 parts | 1 part | — |
Bed preparation and transplanting
Proper preparation of the greenhouse soil and compliance with the planting scheme is the foundation of cucumber health and their protection against root rots. Beds are formed 5–6 days before transplanting the plants to their permanent location. This allows the soil to warm up and the applied fertilizers to partially convert into a form available to the roots.
- Bed width — 80 cm
- Bed height — 35 cm
- Distance between plants — 50–60 cm
- Trellis height — 1.5–2 m
- Solution temperature for planting holes — 50 °C
- Form the beds, leaving walkways 60–70 cm wide between them. Apply 1 tablespoon of potassium sulfate, 1 teaspoon of urea, 2 tablespoons of superphosphate, and 1 cup of wood ash or a deoxidizing agent per each square meter of soil.
- Water the beds with a hot (70–80 °C) nutrient solution: add 0.5 L of liquid manure or poultry manure and 1 teaspoon of copper sulfate to 10 L of water. Be sure to strain the solution and use 5 L per 1 m².
- Immediately after watering, cover the beds with clean plastic film to retain heat and soil moisture. Stretch two parallel wires along the beds at a distance of 20–30 cm from each other for future vine trellising.
- On the day of planting, prepare planting holes to the depth of the size of the transplant pot. Pour 0.5 L of the "Ideal" preparation solution (1 tablespoon per 10 L of warm water at a temperature of 50 °C) into each hole.
- Plant the watered transplants vertically in a staggered pattern.
If the transplants have become leggy, plant them vertically, but be sure to cover the stem up to the cotyledonous leaves with a mixture of peat and sawdust (1:1), pure peat, or sawdust. This will protect the plant from root rots. After planting, spray the bushes with the "Zaslon" preparation.
For film greenhouses, choose hybrids according to your goals. The Saltan, Buyan, Mazay, Fermer, and Lord hybrids provide excellent storability and transportability of fruits. If fresh consumption and pickling qualities are the priority, it is better to use the Mayskiy (salad), Rodnichok, Topolek, Zhuravlenok, and Golubchik hybrids.
Irrigation, top dressing, and canopy formation
The cucumber is extremely sensitive to soil moisture and the concentration of salts in the root zone. Disrupting the irrigation regime leads to fruit set shedding, and errors in vine formation lead to overcrowding and harvest losses. Regularly clear the beds of weeds and monitor the soil aeration.
Water the cucumbers only with warm water at a temperature of 23–25 °C and exclusively at the root. Watering with cold water causes disease and mass death of fruit set. Do not use a strong stream from a hose to avoid washing away the soil and damaging the root system, stems, or leaves.
The irrigation regime is adjusted depending on the growing season phase of the plants. Before flowering begins, cucumbers are watered moderately — every 5–7 days with 3–4 L per 1 m². During the flowering and fruiting period, watering is increased to once every 2–3 days, using from 6 to 12 L per 1 m² depending on the weather (on cloudy days, the rate is reduced).
To preserve the roots in the first 2–3 weeks, perform only light loosening to a depth of 2–3 cm. Subsequently, loosening is carried out depending on soil permeability. If water begins to stagnate during irrigation due to compaction, carefully make punctures with a pitchfork between plant rows to the depth of the tines — 4–5 punctures per 1 m².
During the summer, 4–5 top dressings with mineral and organic fertilizers are carried out in the greenhouse. Rotating nutrients stimulates abundant fruiting. In the absence of natural manure or poultry manure, they can be replaced by humic preparations: sodium humate, or substrates such as "Kormilets", "Ideal", or "Plodorodie".
| Stage and timing of top dressing | Solution composition (per 10 L of water) | Solution application rate |
|---|---|---|
| At the beginning of flowering (1st top dressing) | 1 tsp each of potassium sulfate, urea, and superphosphate + 1 cup of slurry manure (or 1 tbsp of sodium humate) | Root watering until moist |
| At the beginning of fruiting (2nd top dressing) | 1 cup of slurry poultry manure + 1 tbsp of nitrophoska | Root watering until moist |
| 10–12 days after the 2nd (3rd top dressing) | 0.5 L of manure + 1 tsp of potassium sulfate | 5–6 L per 1 m² |
| 12 days after the 3rd (4th top dressing) | 0.5 L of manure or poultry manure + 1 tbsp of nitrophoska or nitroammophoska (or a garden/flower mixture) | 5–10 L per 1 m² |
Bush formation begins 10–15 days after planting the transplants, when the plants are tied with twine to a stretched wire. The crop is strictly trained to a single main stem. This ensures an optimal light regime and simplifies plant care by preventing overcrowding.
- Perform "blind pruning" in the axils of the first 4 true leaves by completely pinching out all emerging flowers and lateral shoots.
- On the next 5–6 nodes, leave lateral shoots up to 20 cm long, then pinch their tips.
- Higher up the stem, leave lateral shoots 30–40 cm long, also pinching their tips.
- Near the trellis wire, increase the length of the remaining lateral shoots to 40–50 cm.
- Drape the main stem over both wires and pinch its tip once it hangs 60 cm down past the wire.
Read next
Vegetable growing For students
Soil preparation and technologies for growing high-quality vegetable transplants
Vegetable growing For gardeners
Agrotechnology for growing early tomatoes in film greenhouses using biofuel
Vegetable growing For gardeners