
Effective technologies for the rapid propagation of rare grape cultivars
12 min read
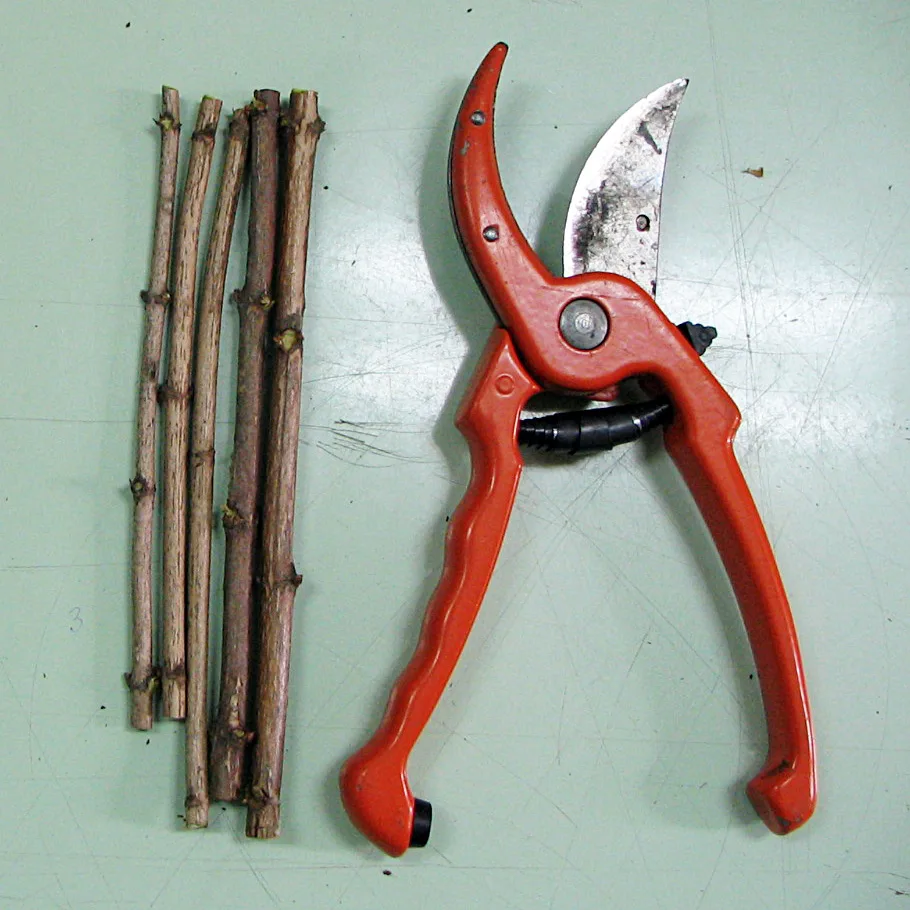
Accelerated propagation methods for grapes allow for the rapid production of high-quality nursery plants of scarce cultivars. If conventional nursery plants are in short supply, nurserymen use green or shortened woody cuttings. These methods require strict control of temperature and humidity but ensure high plant survival rates.
Growing nursery plants from green cuttings
For mass propagation using green cuttings, plastic greenhouses or hotbeds equipped with misting systems are used. The soil within them must be well-drained. A layer of sand is spread over prepared beds 1.2–1.4 m wide, and sprayers for intermittent fine-mist irrigation are installed in the center of the beds.
- Air temperature — 20–30 °C
- Optimal humidity — 65–85% (100% on hot days)
- Sand layer thickness — up to 4 cm
- Growing period — 1–1.5 months
Harvest green cuttings only during the grape flowering stage — at this time, the shoots contain maximum levels of nitrogen, phosphorus, potassium, and carbohydrates. Perform cutting in the morning hours or in overcast weather from healthy, productive vines.
- Place the cut shoots into containers with water, move them to a cool place, and cover to prevent drying.
- Cut the shoots into two-bud cuttings using a sharp knife or razor blade. Make a straight cut directly below the node on the side opposite to the bud.
- Completely remove the lower leaf and trim the upper one by half, then place the bottom ends of the cuttings in water.
- Plant the cuttings using a 10x10 cm spacing at a depth of 2–3 cm. The base of the cutting should be in the moist sand without touching the soil underneath.
During the rooting period, it is important to prevent the soil from drying out. To achieve this, the automatic irrigation system is set to deliver water for 3–5 seconds every minute, reducing the frequency or switching it off completely at night. Maintenance includes regular loosening of the soil, 2–3 applications of mineral top dressing, and plant protection against diseases. As the roots develop, irrigation is reduced, and 5–7 days before transplanting into the nursery row, the plastic film is removed to harden off the plants. By this time, the green shoots reach a length of 20–30 cm.
Propagation using shortened woody cuttings
This method relies on the use of well-matured canes, from which one- or two-bud cuttings are cut in the spring. One-bud cuttings are made 5 cm long with the bud exactly in the middle. For two-bud cuttings, the bottom cut is made at a right angle, and the top cut 1.5–2 cm above the bud on the side opposite to it.
- Soak the cut cuttings in water for 1–2 days and store them in plastic bags.
- Before planting, soak the cuttings again and place them in a greenhouse for stratification at a temperature of 22–23 °C and humidity of 90–95%.
- Insert the cuttings tightly into moist sand and cover them with the same, leaving only the top bud exposed.
- After the formation of callus and root primordia, plant the cuttings into paper cups or peat blocks with a mixture of sod soil, humus (1:1), and 3–5% river sand.
- Transfer the cups in crates to a plastic greenhouse and cover with sand so that the top bud protrudes 2–3 cm above the surface.
With early spring planting, the cuttings can be planted directly into the greenhouse soil without cups. In this case, they are buried up to the top bud either vertically or at a 45° angle. The microclimate parameters and maintenance schemes for this type of cultivation are presented in the table.
| Maintenance parameter | Technical requirements |
|---|---|
| Greenhouse air temperature | 25–26 °C |
| Relative air humidity | 70% |
| Distance between plants for direct planting | 10 cm |
| Row spacing for direct planting | 30 cm |
| Mandatory agricultural practices | Regular irrigation, loosening, organic and mineral top dressing, spraying against diseases |
On the 25th day after planting, the nursery plants begin to be hardened off: the temperature in the greenhouse is gradually lowered and light exposure is increased. Plants are transferred to the nursery row once the threat of spring frosts has passed. For transplanting, it is best to choose overcast days, early morning, or evening.
Plant the nursery plants in furrows at a depth of 20–22 cm. Ensure that the edges of the paper cups or peat blocks are 3 cm below the soil level. After filling the furrows, be sure to irrigate and hill up the plants.
Propagation by layering is used in regions where own-rooted grape culture is practiced to quickly obtain new nursery plants. The method allows for the production of up to 20 developed vines from a single plant in one growing season. Woody shoots are laid down in the autumn after harvesting or early in the spring, while green shoots are laid down during their active growth phase.
To correctly establish the layers, prepare trenches on both sides of the vine. Lay the canes into them, following the recommended technical parameters. This will ensure high bud survival rates.
| Layering parameter | Recommended value |
|---|---|
| Trench width | 40–50 cm |
| Trench depth | 20–25 cm |
| Shoot length | 8–12 buds |
- Select 2–3 of the strongest, longest, and undamaged shoots at the base of the bush.
- Remove all leaves, tendrils, and lateral shoots from them.
- Lay the shoots horizontally in the trenches along the row and secure them with garden pins in 2–3 places.
- Apply well-rotted manure or humus to the bottom of the trenches, cover it with soil mixed with superphosphate and potash salt.
- Cover the laid shoots with a thick layer of loose soil and water abundantly.
Throughout the entire growing season, the layers require regular care. Water and fertilize the plants, loosen the soil, perform shoot thinning, and tie up the developing green shoots. For protection against disease, be sure to carry out preventive spraying against downy mildew. In autumn, after leaf fall is complete, carefully dig up the layers, separate them from the mother bush, and cut them at the internodes into individual nursery plants.
Green grafting: propagation in phylloxera-infested zones
In areas with a high risk of phylloxera infestation, green grafting becomes the primary method for the accelerated propagation of scarce cultivars. Work is carried out directly in the vineyard during the growing season. The main condition for successful union is the active growth of the rootstock, scion, or both components simultaneously.
- Grafting period — from mid-May to mid-June
- Length of rootstock shoots for work — 15–20 cm
- Grafting height for trunk formation — 80–100 cm
- Binding tape width — 1–2 cm
- Time for component union — 15–20 days
- Water temperature for soaking cuttings — 20–25 °C
In simple whip grafting, a single-bud green scion cutting is joined with a slanting cut to a green rootstock shoot. To do this, the mother bushes of phylloxera-resistant cultivars are pruned to the "black head" in spring and slightly hilled. Once the shoots grow out, grafting begins.
- Leave 4–8 of the strongest shoots located at the base on the prepared rootstock bush, and remove the rest.
- On the day of grafting, completely clean the remaining rootstock shoots of leaves, tendrils, and buds.
- Prepare single-bud cuttings from high-yield scion bushes directly on the day of work.
- Join the components with a slanting cut without a tongue at the base of the bush or at the required height for the trunk.
- Wrap the union site tightly with PVC film or a rubber strip, and cover with soft paper on top to protect against dehydration.
After grafting, water and hill the mother bushes abundantly, and throughout the summer, regularly remove all new growth from the head of the bush. Two to three weeks later, remove the binding material. Before leaf fall, cut the matured grafted shoots, sort them, and put them into storage for spring planting.
Green grafting significantly depletes the mother rootstock plants. To maintain the productivity of the mother plantation, perform this procedure on the same bushes no more than once every other year.
For grafting green shoots with lignified cuttings, use scion material harvested in autumn. The operation is carried out during the period of active sap flow, when sap appears on the cut surfaces of the rootstock. Before starting work, cut the vine into single-bud cuttings.
If there is no sap flow on the rootstock bushes during the grafting period, water the vineyard abundantly 2–3 days before the procedure. Before starting work, be sure to soak the cut lignified scion cuttings for 12 hours in warm water.
- Graft success rate — at least 90%
- Budding dates — from late July to early August
- Cleft green grafting dates — from mid-May to late June
- Worker output per season — up to 15,000 grafts
Green grafting is one of the fastest ways to propagate a rare grape cultivar and obtain the first harvest as early as the following year. This method allows for the efficient use of the existing rootstock stock without wasting time on growing new bushes. With proper care, tissue healing occurs quickly, and the vine has time to fully mature before the autumn frosts.
Green grafting by slanting cut and budding
Simple green grafting is performed directly on the rootstock shoots. A slanting cut 2–3 cm long is made at the required height, and a similar cut is made on the single-bud scion cutting just below the bud. Both surfaces must match in length and width for maximum tissue contact. The cuts are joined while moist, pressed tightly together, and bound with film.
Remove the binding film only after the components have fully fused. As the scion shoot grows, be sure to tie it to a support and remove all emerging inflorescences.
To accelerate bush formation, the scion shoot is pinched when it reaches a length of 20–25 cm. This operation stimulates the active growth of lateral shoots, which are necessary for creating the aerial part of the bush. By autumn, high-quality cuttings of the propagated cultivar can already be harvested from these shoots. In the following season, the bushes are finalized and produce their first harvest.
Green shoot grafting using the shield budding method is planned for the period from late July to early August. On the rootstock mother bushes, 4 to 6 strong, well-developed shoots are selected. The grafts themselves are placed in the zone from the 4th to the 15th node from the base of the shoot.
The technique for performing budding consists of the following steps:
- Maintain a distance of at least 40 cm between grafts on a single shoot.
- Make two cuts at a 45° angle on the rootstock node and cut out a shield 2–3 cm long.
- Insert a similarly cut single-bud scion shield into the resulting slot.
- Wrap the joint tightly with thin (40–50 mm) polyvinyl chloride film or a rubber strip, leaving the bud open.
- Remove the binding material 30–40 days after the procedure.
Before the autumn leaf fall, the grafted shoots are carefully cut from the bushes and sorted. Then they are placed into winter storage in a cool place. In the spring, this material is planted in a nursery to grow high-quality nursery plants.
Grape Cleft Grafting Technologies
Green cleft grafting is performed on adult bushes during the phase of intensive sap flow — from mid-May to late June. In spring, only 2–3 of the strongest shoots are left on the rootstocks, and all other overgrowth is removed. As the remaining branches grow, they are lateral-shooted (pinched) and tied vertically to a trellis or stakes. The grafting is performed at a height of 40 to 150 cm from the soil level.
The rootstock shoot is cut at a distance of 5–6 cm from the node at the level of the 4th internode from the top. A longitudinal cleft is made in the center of the cut with a knife strictly up to the node. A single-bud green scion cutting is inserted into it, the lower end of which is cut into a wedge 1 cm long (short) or 2–3 cm long (long). It is important to select scion and rootstock of the same thickness and to hermetically seal the joint with film.
Cleft grafting with lignified cuttings is done on adult bushes in the spring before bud break. The rootstock bushes are pre-excavated to a depth of 20–30 cm until thick roots are revealed. Then the trunk is sawn off 10–15 cm below the soil level with a hacksaw. The cut surface is carefully smoothed with a sharp knife and split in the center with a chisel to a depth of 2.5–3 cm.
With this graft, it is critically important to precisely align the cambial layers of the scion and rootstock. Direct the lower buds of the cuttings outward, and make the upper cut with a bevel on the side opposite to the bud.
Technique for preparing and sealing the underground cleft:
- Soak lignified single- or double-bud cuttings in warm water for 12–18 hours.
- Sharpen the lower end of the cutting into a wedge directly below the lower bud.
- Insert the cuttings into the trunk cleft (one for a half-cleft, two for a full cleft).
- Wrap the connection area with film, cover with paper, and seal the gap between the cuttings with clay or wedge them with a wooden wedge.
- Cover the graft with moist moss, sawdust, or a mound of moist soil, completely covering the cuttings.
| Cleft Type | Number of cuttings, pcs. |
|---|---|
| Half-cleft | 1 |
| Full cleft | 2 |
During the summer, the grafted bushes require careful maintenance. This includes regular unearthing of the mounds, removal of rootstock overgrowth and scion roots. Shoots are also pinched to develop lateral shoots, the growth is tied up, and it is protected from diseases. At the end of summer, the binding material is removed, and in autumn, harvesting of cuttings begins.
According to field trial data, survival rates increase when performing cleft grafting into an aerial trunk at a height of 50–100 cm or more. This method is used on relatively young bushes by cutting off the aerial part at the specified height. A prepared and pre-waxed single-bud lignified cutting is inserted into the end of the trunk. The connection area is tightly wrapped with polyethylene film, and subsequent care is carried out according to the standard scheme.
Read next
Viticulture For agronomists
Technology of soil preparation and planting of nursery plants in a grapevine nursery
Viticulture For agronomists
Preservation technologies and preparation of grafted grape scions for planting
Viticulture For agronomists