
Mushroom cultivation technologies in greenhouses and product storage
18 min read
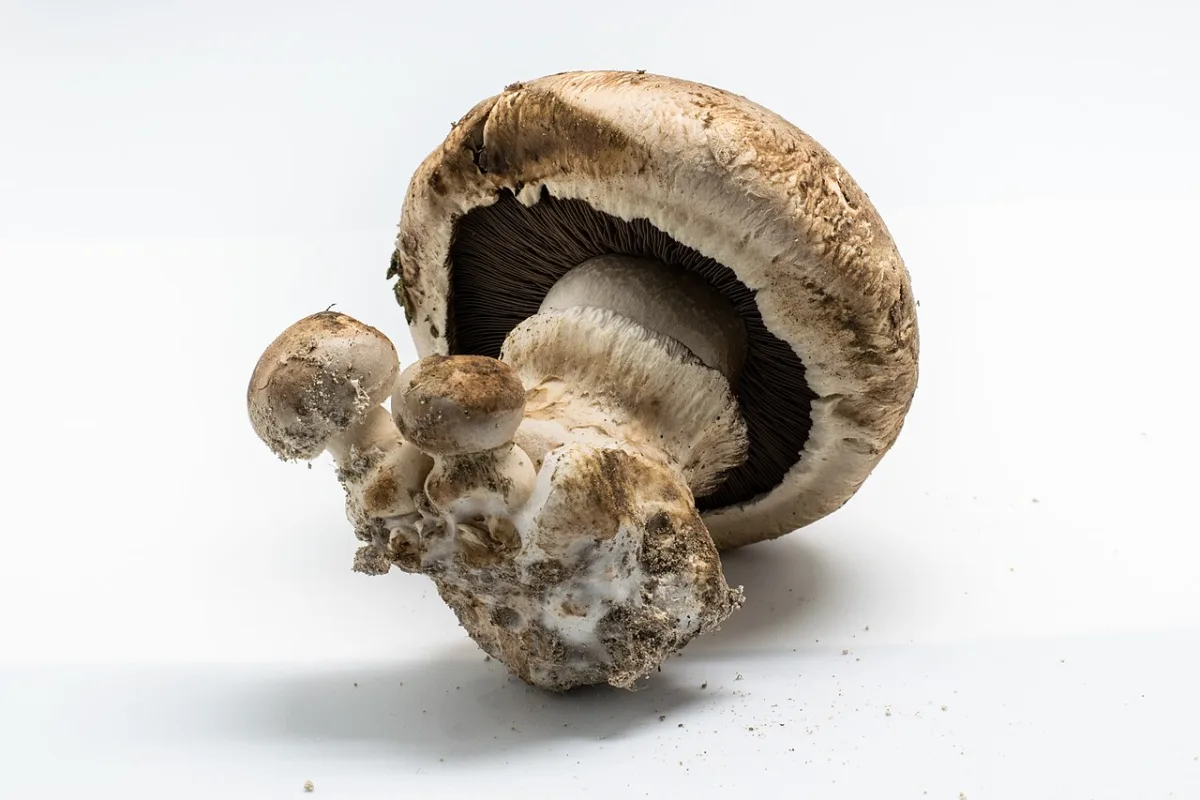
Greenhouse Cultivation and Storage Preparation
Cultivating button mushrooms allows for the efficient use of floor-space and rack-based greenhouse areas during the autumn-winter period (from August to January), when growing vegetables becomes unprofitable due to a lack of natural light. This process is economically viable: production costs for mushrooms are significantly lower, and their maintenance is simpler than that of most vegetable crops. Button mushrooms require moderate air temperatures, which noticeably reduces heating expenses. Mushrooms can grow in light, but they cannot tolerate direct sunlight, so it is sufficient to whitewash greenhouse glass with chalk or clay. It is also convenient to place them under racks simultaneously with the forcing of transplants, early greens, or flowers.
In southern regions, plastic greenhouses are more often used for mushroom cultivation, by shading the film from the inside with an opaque material with an air gap to protect against winter cold. Abandoned mines, catacombs, and limestone, gypsum, or marble quarries with good ventilation and access roads are also adapted into mushroom farms. Stable, year-round temperatures and the dimensions of the workings (5–7 m in height, 10–15 m in width) allow for the installation of multi-tiered rack systems. In this case, vertical ventilation shafts can be used not only for air exchange but also for the convenient loading of straw, manure, and other substrate components.
The humus remaining after the harvest is a ready-to-use organic fertilizer. It can be used immediately for the subsequent cucumber crop.
Freshly harvested mushrooms are sold both in bulk and packaged in boxes, trays, crates, or baskets. To maintain the marketability of button mushrooms during transport and sale, strictly follow technological standards for quality, transportation, and storage.
| Quality indicator of button mushrooms | Permissible standard |
|---|---|
| Pressure damage, cap cracks, stem fractures | Not more than 20% |
| Rust spots (with a total area up to 1/4 of the cap surface) | Not more than 2% |
| Presence of weed impurities and soil | Up to 1% |
- Consumer packaging weight — up to 1 kg
- Maximum layer height in the container — 15 cm
- Storage and transport temperature — from 0 to 2 °C
- Relative humidity — about 80%
- Shelf life from the time of harvest — up to 3 days
Protecting Button Mushrooms from Pests and Diseases
The appearance of pests or diseases at the start of cultivation can completely destroy the mycelium and deprive you of the harvest. Mushroom flies, gnats, mites, springtails, and woodlice damage the mycelium and the fruit body, making it "wormy," while mice and rats tear up the compost. Among infections, the most dangerous are wet (white) and dry rots, various molds, rust spots, and mummy disease. They deform the fruit bodies, cause dark spots, softening of the flesh, and a putrid odor. To prevent contamination through the substrate, equipment, or staff clothing, it is necessary to carry out preventive measures.
- Perform high-quality preparation and thermal treatment of the substrate before laying.
- Protect ventilation channels, windows, and doors of the mushroom house with fine mesh.
- Disinfect the premises, equipment, and special clothing with a 2–4% formalin solution before starting work.
It is strictly forbidden to use formalin during the growing season and mushroom growth! The preparation is a strong carcinogen.
If outbreaks of damage are detected, you must act immediately. Timely local measures will help stop the spread of infection throughout the greenhouse area. A specific treatment plan is applied for each type of threat.
| Pest or disease | Signs of damage | Method of eliminating the problem |
|---|---|---|
| Mushroom fly, gnat, mite | Damage to the mycelium and surface of fruit bodies | Use of the preparation Dimilin strictly according to instructions |
| Woodlice | Consumption of mycelium and fruit bodies | Laying out baits from sliced root vegetables |
| Wet or dry rot | Deformed mushrooms covered with white fluff, spots, and mold, with an unpleasant odor | Immediately remove diseased mushrooms with the adjacent compost and casing soil, sprinkle the area with salt, cover with fresh soil |
| Cobweb mold, mold fungi | Woolly-white, brown-greenish, or pinkish spots on the casing layer | Carefully remove the affected area with the top layer of soil (avoiding air movement), sprinkle with salt, spray the bed with a superphosphate solution |
| Mummy disease | Mushrooms are gray, firm, with a thickened base, elongated stems, and red-brown flesh when cut | Immediately remove diseased mushrooms, isolate the affected area with deep narrow trenches, completely stop irrigation in this area |
| Rust spots | Rust-brown spots on mushroom caps | Remove diseased specimens and increase room aeration |
As you finish the cycle of button mushroom cultivation, it is important to prevent the transfer of infection to subsequent crops and new rotations.
To prevent the spread of fungal diseases, harvest the affected mushrooms last and destroy them immediately. After work, wash your hands thoroughly with soap, and disinfect your tools and work clothing.
To expand the product range during the winter-spring period, greenhouses are used for forcing flowers for cut blooms or for potted culture. This process allows plants to be artificially brought out of dormancy and stimulates flowering during atypical periods. The rose is one of the most cost-effective crops. When growing it, the choice of cultivar is of key importance: at the initial stage, preference is given to local cultivars that are resistant to fungal diseases and undemanding regarding soil and climatic conditions.
Greenhouse preparation and thermal regime for rose forcing
Year-round cultivation and early rose forcing require high-quality preparation of the greenhouse structure. Particular attention is paid to reducing heat loss through the soil and the base of the structure.
- Foundation insulation depth — at least 50 cm
- Plinth insulation height — 20 cm above the upper heating pipe
- Resource consumption reduction — about 25 %
- Critical temperature without heating — -5 °С
For thermal insulation of the plinth and foundation, foam or polypropylene sheets are used. In seasonal greenhouses, antifreeze must be added to the heating system during the winter dormancy period. This will protect the pipes if the temperature drops below -5 °С and will allow for emergency heating to be activated if necessary.
Do not grow rose cultivars sensitive to humidity and low temperatures (10–12 °С) in greenhouses with temporary or weak heating intended only for late forcing.
Requirements for soil, fertilizers, and irrigation water quality
Rose roots penetrate to great depths, so the top 50 cm layer of soil must be loose, have a stable structure, and good aeration. Water stagnation and flooding by groundwater in the root zone are unacceptable.
- Conduct an agrochemical analysis of the soil to determine acidity, structure, nutrient reserves, and salt concentration.
- Install drainage or raise the beds if there is a risk of water stagnation or high groundwater levels.
- Adjust the soil structure by applying sand, peat, or clay based on the analysis results.
- Uniformly apply mineral fertilizers and organic matter when tilling the soil layer.
For successful rose development, the soil mixture must meet strict agrochemical standards.
| Soil indicator | Recommended value |
|---|---|
| Acidity (pH) | 5.8–6.5 |
| Carbonate content | less than 10 % |
| Organic matter | more than 5 % |
| Nitrogen | 0.3 % |
| Carbon | 10 % |
| Phosphorus | 0.5–0.9 % |
| Potassium | 0.5–0.7 % |
| Calcium | 2–4 % |
| Magnesium | 0.2–0.4 % |
When preparing the substrate, it is recommended to add the following substances per square meter of area:
- 100 g/m² of potassium sulfate;
- 100 g/m² of magnesium sulfate;
- 200 g/m² of superphosphate.
Roses respond well to organic fertilizers. In heavy cultivated soils with a 50 cm root zone depth, about 40 kg of manure per 1 sq. m is applied. If the soil mixture is dominated by semi-decomposed peat, leaf mold, and sod soil with a high organic content, the manure dose is reduced.
An excess of manure leads to toxic accumulation of manganese and boron, causing leaf chlorosis in roses (especially in cold soils). With high manganese content, reduce soil acidity by raising the pH to 6 or higher.
The quality of irrigation water directly affects plant development, so its chemical composition is regularly checked in a laboratory. Water acidity is adjusted by adding nitric acid, depending on the soil pH.
| Irrigation water indicator | Recommended rate |
|---|---|
| Sulfate | 50, 200–300 mg/l |
| Ammonium nitrate (NH₄NO₃) | 80–360 mg/l |
| Potassium (K) | 240–480 mg/l |
| Magnesium (Mg) | 30–60 mg/l |
| Calcium (Ca) | 140–280 mg/l |
| Salt content (without fertilizers) for peat soil with drainage | no more than 1.5 g/l |
| Salt content (without fertilizers) for clay soil | no more than 1 g/l |
| Acidity (pH) | below 6 |
| Chlorine and sodium content | below 150 mg/l |
Planting roses Currently, the most rational time for planting is March. At this time, the gardener has the opportunity to form good bushes and obtain two harvests with minimal energy costs. Nursery plants for greenhouse establishment can be either summer bushes or winter oculants. When establishing a greenhouse with one-year-old bushes, the nursery plants are stored before planting at a temperature of 1—2 °С in cool rooms, from which they can easily be moved to the greenhouses.
When storing nursery plants, it is important to prevent the roots from drying out and the shoots from losing water (bark shriveling). If the roots have dried out, they are placed in water for 12—20 hours. For nursery plants grown in open ground, the roots are shortened before planting, removing damaged parts; for potted, grafted, and own-root plants, an attempt is made to keep the soil ball intact. The above-ground part is also pruned before planting, leaving 2—4 strong shoots. The pruning height depends on the quality of the nursery plants. Strong shoots with a diameter of 1.5—2 cm are pruned to 3—4 buds, and medium ones to 2. Very weak plants are pruned to 1 normally developed bud and planted for further growth. Usually, after pruning, the height of medium nursery plants is 15—20 cm.
Planting holes or furrows must be deep enough so that the roots are positioned strictly vertically without bending upwards. The grafting point should be located 4 cm above the soil surface level. After planting, perform abundant irrigation; the water temperature should be 15 °С. After 2—3 days, inspect the plants and make adjustments by lifting those planted too deep and replanting those planted too shallow, then be sure to mulch the soil.
Despite the fact that rose cultivation in greenhouses has been practiced for a long time, there is no single planting methodology. In practice, there are two or more rows in a single bed. It has been established through experience that the yield and quality of cut flowers depend not on the planting scheme, 2 А 0 х 9, but on the number of plants per unit area. The optimal number of roses is on average 10 bushes per 1 m’ of usable area.
The main method of planting roses in greenhouses is the double-row method, which allows for the use of drip irrigation. In this case, the roses in the rows are planted in a staggered pattern; for convenience, if necessary, the shoots are bent to one side.
To avoid trampling the root zone, double-row plantings are raised to a height of 20—25 cm, forming beds 60 cm wide. It is also possible to pair 2 beds, forming a non-working path between them. It is into this non-working path that the shoots are bent.
Parameters of the double-row planting:
- Distance between roses in a row: 20 cm.
- Distance between rows: 30 cm.
- Row offset: one of the rows is shifted by half.
The drip irrigation system is laid along the rows in such a way that one line is placed in the center between the rows, and the other — along the sides (10—15 cm). The emitters for such planting are selected with a distance between emitters (holes in the drip lines) of 10 cm. The layout of the beds (rows) is chosen based on the growing technology and ease of operation. The width of the working path is also chosen depending on the length of the rows.
Roses are very light-loving, but they do not root well when sunlight falls not on the leaves, but on the soil around the roots. Therefore, it is advisable to mulch the plantings as quickly as possible and shade the greenhouse. The florist's further goal is to obtain as much leaf mass as possible by pinching the bud up to the 3rd order. It is known that as a result of pruning, cutting, or damage, the aerial part decreases. The same happens with the underground part, i.e., the roots. Accordingly, the most important thing is to preserve the leaf mass as well as possible.
| Period/Planting type | Soil temperature, °С |
| In spring after planting annual bushes | 10—12 |
| For winter grafts (within a month) | 15—17 |
| Further growth | 15—17 |
Air temperature during the day is about 20 °С, at night — 16—18 °С. р де а _^, а
In the fall, when the air temperature drops below 15 °С, light heating and fans are turned on in the greenhouse to reduce the risk of fungal diseases.
. Care Rose care includes maintaining the optimal temperature and light regime, irrigation, nutrition, as well as appropriate pruning and a set of measures aimed at combating diseases and pests. Irrigation and top dressing
Only drip irrigation provides an even distribution of moisture, fertilizers, and microelements. At the same time, it is also economical. But first, you need to learn how to irrigate, and not overwater, squeezing out the soil oxygen. When using drip irrigation, roses need to be fed taking into account the lack of fertilizers in the soil, i.e., according to the results of agrochemical analyses. It is necessary to consider that the amount of fertilizer applied must correspond to the removal of nutrients from the soil by the plants. Mineral fertilizers should contain a minimal amount of ballast.
To ensure good assimilation of nutrients by the plants, irrigation should be carried out with the expectation that moisture penetrates the soil to a depth of at least 35 cm. To prevent drying out, the soil surface is loosened and mulched. In autumn and spring, roses are watered only with warmed water. The greatest moisture consumption in roses is observed at the budding stage. Own-root roses are especially sensitive to disruptions in the irrigation regime.
During rooting and as soon as the leaves begin to unfold, a higher humidity of the air and soil is maintained through frequent irrigation. As the shoots grow, the air humidity is reduced to the mark of 75—80 %. On hot summer days, to prevent infestation by spider mites and to increase air humidity, it is recommended to spray the leaves with water.
In the fall, as the temperature drops, the air humidity in the greenhouses should be reduced using the following methods:
Gradual rose nutrition and chlorosis control
To obtain a high yield of high-quality roses, they require constant and balanced nutrition. A lack or excess of elements directly affects the marketability of cut flowers and the vigor of the bush. An untimely response to nutritional deficiencies leads to a loss of flower marketability.
- Basic fertilizer. Applied to ensure the active growth of young plants before the start of the first flowering.
- Inorganic top dressing. Supplied regularly through the drip irrigation system during the growing season.
- Organic fertilizers. Spread along the rows to restore plant nutrition after each wave of flowering.
Roses react sharply to a nutrient imbalance in the soil. It is important for an agronomist to timely identify nutritional deficiencies by the appearance of leaves and shoots in order to adjust fertilizer application, taking into account the shoot growth phase.
| Element | Signs of nutritional deficiency |
|---|---|
| Nitrogen | Small, rigid, light green leaves, susceptible to powdery mildew. Short shoots are observed; buds are small or absent. |
| Phosphorus | Foliage acquires a dark green or blue-green tint with red-purple edges. Necrotic spots appear, shoots weaken. |
| Potassium | Leaf chlorosis develops. Brown-black necrotic spots form along the edges of leaf blades. |
An excess of nitrogen in the solution reduces yield and impairs the quality of cut flowers. Increased doses of potassium and phosphorus may slightly improve the quality of flowers but will reduce their total number. An excess of phosphorus and calcium blocks the uptake of micronutrients, provoking the development of chlorosis.
Chlorosis manifests as stunted growth, impaired shoot formation, withering of apical buds, and discoloration of leaves and buds. The disease arises due to unbalanced nutrition, especially under conditions of excessive humidity, lack of light, low temperatures, or a shallow dormancy period. For treatment, iron or manganese salts are added to the soil, foliar top dressing is performed, and the plants are sprayed two to three times with a 0.5% solution of ferrous sulfate.
The most effective means of combating this pathology remains antichlorisin (iron chelate). When using it, it is important to monitor the soil temperature so that the preparation works to its full extent.
- Soil temperature in winter — not less than 15–16 °C
- Antichlorisin solution for irrigation — 0.1–0.25 %
- Consumption for root irrigation — 5–8 l/m²
- Solution for foliar top dressing — 0.1–0.15 %
Once per flowering wave, it is recommended to perform foliar treatment with a tank mixture of micronutrients with urea as a surfactant. To prepare the working solution, 15–20 g of urea, 1.5 g of zinc sulfate, 4 g of manganese sulfate, 3.5 g each of boric acid and ferrous sulfate, as well as 1 g each of copper sulfate and ammonium molybdate are taken per 10 l of water. Spraying is carried out in the evening or early morning, calculated based on the resulting volume per 100 m² of plantings.
Bush formation and flowering management
To obtain the maximum number of marketable roses, bending of shoots, pinching, topping, and leveling pruning are used. The productivity of photosynthesis depends not on the total mass of leaves, but on their age and position. The most active leaf zone is located directly under the bud, and the leaves must be no younger than 6 months old (thereafter their photosynthetic activity decreases).
To create powerful structural renewal shoots, a special formation scheme is applied to young plants after planting. It allows for the rapid growth of a strong assimilating apparatus without prejudice to future yield. The agronomist directs the development of the bush through successive pinching.
- Heavy pruning. Planted plants are pruned short, stimulating the sprouting of buds from the axils of the middle leaves of the structural shoot.
- First pinching. Carried out on a well-growing shoot when the apical bud reaches 3–5 mm in diameter. The shoot is pinched above the last five-leaflet leaf.
- Work with middle shoots. 1–2 pinchings are performed above the last five-leaflet leaf of the current and subsequent shoots.
- Work with weak shoots. Multiple pinching is applied to accumulate leaf mass and increase the length of the structural shoot.
Cutting flowers on under-formed structural shoots lengthens the bush formation period, reduces its growth vigor, and decreases overall productivity in the current year.
In April-May, when the bush has accumulated a sufficient volume of leaves, the most productive renewal shoots will begin to grow actively at the base. It is they that determine the yield in subsequent periods. In young grafted plants (budded plants) and one-year-old nursery plants, such shoots are set earlier and in greater numbers than in two-year-old bushes.
Read next
Greenhouses and covers For agronomists
Technological features of cultivating button mushrooms in greenhouse conditions
Plant protection For agronomists
Mummy disease and viral diseases of mushrooms: diagnosis and prevention
Plant protection For agronomists