
Application of agrotextile for protection and cultivation of garden crops
18 min read
Agrofiber is a very lightweight, durable non-woven material. It is made from polypropylene fiber — a compound that does not release toxic substances into the environment. It is absolutely harmless to humans, livestock animals, and plants.
Such material can be successfully used in garden plots. For instance, to obtain early harvests of radish, onion, and greens, it is enough to simply cover the seedbed with agrofiber (with a density of P19 or P23). The material allows moisture to pass through and does not become heavy.
The plant will grow and lift the material itself. Agrofiber is resistant to low temperatures. It will protect sowings from short-term frosts.
If you do not have space at home for raising vegetable transplants, they can be grown in hotbeds and small greenhouses covered with agrofiber (P30, P50), which allows air to pass through, ensuring uniform air circulation. Therefore, condensation does not form on the inner side, and there is no "steaming" of plants, as happens under polyethylene film. By allowing ultraviolet rays to pass through in hot weather, agrofiber provides protection from the impact of direct sunlight. Over the plants, such a covering material forms a closed space in which an autonomous world is created with an ideal microclimate for plant growth and development. Under these conditions, they grow quickly, develop well, and have a healthy appearance.
If you know in advance about approaching frosts, you can protect strawberries and young potato seedlings from them by covering them with agrofiber.
This material protects plants not only from night frosts but also from the hot midday sun. For example, for planted early cabbage transplants, it is enough to simply throw agrofiber with a density of P19 or P23 over them, or stretch a denser fabric (P30) over the plants using hoops.
Sowings covered with agrofiber are not damaged by pests. For example, this is the best method of plant protection for cruciferous crops against flea beetles, cabbage moths, and cabbage white butterflies.
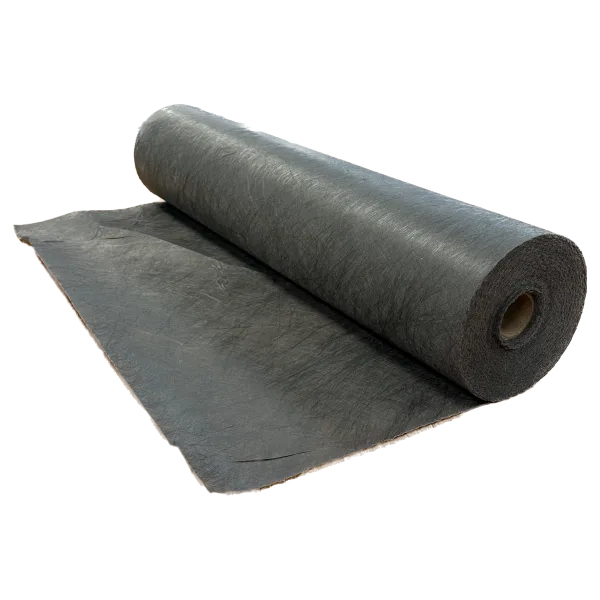
Black agrofiber is used for warming up the soil before early planting of vegetables and for mulching in the absence of sufficient organic mulch.
For instance, when planting strawberries, the material is spread on the bed, pressed tightly at the sides, and the plants are placed into the slits. Weeds do not grow as they do not receive access to light. If the spreading strawberry plants do not cover the black surface of the agrofiber in summer, these areas should be covered with a thin layer of light-colored mulch so that the material does not absorb solar rays and the soil does not overheat.
In cases where it is urgently necessary to plant a bed overgrown with couch grass, you can also use black agrofiber. Plants are placed in cross-shaped cuts, the corners of which are folded back during planting and then folded back again and pressed to the plant to restrict the couch grass's access to light. The couch grass does not grow through the material. On top, to reflect sunlight, spread a thin layer of light-colored mulch (dried grass, sawdust).
Furthermore, any agrofiber can be used to protect small fig and pomegranate trees from freezing during winter.
Polymer film is the primary material for covering greenhouses and other protected soil structures. The film is elastic, practically does not change its linear dimensions under atmospheric conditions, and is therefore suitable for rigid fastening on greenhouses.
Its advantages include:
- resistance to acids and oxidizing agents;
- water and vapor permeability;
- satisfactory transmission of oxygen and carbon dioxide;
- lack of impact from mold fungi;
- non-toxicity and lack of odor.
Film is not resistant to oils and is not durable: during the operation process, it becomes brittle, breaks, its optical properties deteriorate (it transmits less light), it becomes cloudy, and gets dusty. The aging of the film occurs due to high temperatures, ultraviolet radiation, and exposure to oxygen and moisture.
Characteristics of various types of polyethylene films:
| Film type | Service life |
| Non-stabilized (0.01 mm) | about 6 months |
| Stabilized | 7-9 months |
| Heat-retaining | 7-9 months |
Non-stabilized polyethylene film transmits up to 80% of ultraviolet radiation, 90-92% of visible radiation, and up to 80% of thermal radiation; the latter property leads to heat loss through the cover during nighttime hours.
Stabilized polyethylene film does not look different from non-stabilized film (it can only be identified by the label on the roll). Such film contains thermal and light stabilizers that provide stability during the operational process. This film is less permeable to ultraviolet rays.
1. Selecting covering material for greenhouses
High-quality cover for protected ground directly influences the temperature regime, light levels, and humidity in the greenhouse. Modern modified polymer films allow for the optimization of the microclimate according to specific farm requirements. When choosing a material, it is necessary to consider its strength, light transmission, ability to retain heat at night, and susceptibility to condensation. Proper selection of the cover reduces daily fluctuations in air and soil temperatures, which stimulates plant growth and increases their productivity.
- Thermal radiation permeability of heat-retaining film — 20–25%
- Reinforcing filament thickness — 0.29–0.32 mm
- Light transmission of copolymer film — up to 92%
- Width of fiberglass sheets — 90 cm
To create optimal conditions in greenhouses, various types of films and rigid polymer covers are used. Light-converting materials, such as "polisvetan," convert harsh ultraviolet radiation into the red spectrum useful for plants, which significantly accelerates photosynthesis. Other films are focused on maximum heat retention or increased mechanical strength under wind loads. Detailed characteristics and technological properties of the main covering materials are provided in the table below.
| Type of covering material | Service life | Properties and impact on microclimate | Effect on yield |
|---|---|---|---|
| Stabilized hydrophilic film | — | Forms flat-drop condensation that rolls down the walls without dripping. Antistatic additives prevent dust accumulation and maintain transparency. The layer of water on the inner surface and low IR-ray permeability reduce heat loss at night. | Smooths out temperature fluctuations, contributing to higher crop yields. |
| Heat-retaining film | — | Has a matte-whitish tint and reduced strength. Characterized by hydrophilicity and an antistatic effect. Due to high retention capacity, it keeps the nighttime temperature in the greenhouse 1–3 °C higher than under standard films. | Yields of vegetable crops under it are 10–30% higher than under regular stabilized film. |
| Stabilized reinforced film | Up to 24 months | Produced from stabilized film, reinforced with high-density polyethylene filaments 0.29–0.32 mm thick. Possesses increased tensile strength. Transmits 10–12% less solar radiation than regular stabilized film. | — |
| Copolymer ethylene-vinyl acetate film | Up to 36 months | Distinguished by increased elasticity, cold resistance, and resistance to wind and punctures. Condensation settles as a continuous water layer. Holds thermal radiation well. | — |
| Polyvinyl chloride (PVC) film | — | Surpasses all types of polyethylene films in elasticity and durability. Retains heat perfectly at night, diffuses direct light weakly. Attracts dust quickly but is easily washed off with water. | — |
| Roll-fed fiberglass | No less than 48 months | Manufactured based on polyester resins reinforced with glass fiber. Has high strength, transmits heat poorly, and almost completely diffuses direct light. 90 cm wide sheets are bonded only with polyester resins. | — |
| Light-converting film ("polisvetan") | — | Converts short-wave ultraviolet radiation into long-wave red light. This stimulates photosynthesis and accelerates crop development. | Tomato yield doubles, ripening is accelerated by two weeks. Harvest of lettuce, radish, cucumbers, and cabbage increases. |
Due to the high light transmission (up to 92%) of the copolymer ethylene-vinyl acetate film, dangerous overheating of plants can occur inside greenhouses on sunny days.
Polyvinyl chloride (PVC) film sags on the structure in cold weather. In windy conditions, the material tears quickly at the sagging points, so it must be tightened in a timely manner.
2. Cutting and perforating film on the farm
Polyethylene film is supplied in rolls as a folded sleeve. Carefully cutting and perforating is required to prepare sheets of the necessary size and to ready the material for mulching or creating ventilation. Mistakes during cutting can lead to material defects and a reduction in its tensile strength. Using simple tools allows for significantly faster preparation and avoids damaging the film.
- Place the roll of folded film sleeve on a clean and level horizontal surface.
- Insert the blade of the cutting tool at an acute angle directly into the fold of the sleeve.
- Unroll the roll at the required speed while simultaneously cutting the film lengthwise into sheets of the necessary length.
When using a standard utility knife, the film often tears because the tip of the blade catches on the folds of the sleeve. For productive and even cutting, use a knife with an oval thickening at the end.
To speed up the cutting process, you can build a simple device above the roll being unwound. It consists of two wooden rails with blades fixed rigidly between them at a set distance from each other. If the film is intended for soil mulching or ventilation in arched covers, holes are made in it. For perforation, use a homemade punch made from a piece of metal pipe of a suitable diameter with a sharpened end, striking directly through the layers of the roll.
To obtain a sealed sheet of the required size for covering greenhouses, individual pieces of film are welded together. A high-quality seam guarantees the structural strength under wind loads and the retention of heat inside the enclosure. In farm conditions, this task can be solved using simple improvised tools.Technology of welding sheets using an iron
To join film sheets, the contact heating method is used. The most accessible tool for this is an ordinary household iron with a thermostat. The work should be carried out on a flat table or workbench.- Welding temperature — 120–150 °C
- Overlap width of sheets — 5–6 cm
- Iron tilt angle — 4–6 degrees
- Edge protrusion from under the backing — 1.5–2 cm
- Prepare a flat table or workbench and place a wooden backing block on it.
- Lay the edges of the film sheets in an overlap on the block so that they protrude 1.5–2 cm from under the heat-resistant lining.
- Cover the area of the future joint with a heat-resistant sheet material (PTFE film, cellophane, or thick paper).
- Tilt the heated iron along its longitudinal axis by 4–6 degrees and move it slowly along the seam.
- Immediately after the iron, wipe the seam with a damp cloth to quickly cool the polyethylene.
Do not allow the film to overheat. If the seam does not hold or does not form, the iron is not heated enough or you are moving it too quickly. If the polyethylene burns or melts into holes, the temperature is too high.
Welding improvised materials with a soldering iron and a thermal roller
If there is no whole film, a sheet of the required size can be assembled from improvised polyethylene products, such as bags or pouches. For the work, you will need a soldering iron with a power of 60–90 W, a wooden ruler, a knife, and heat-resistant paper (tracing paper or parchment). First, cut off the old seams from the bags, stepping back 5–8 mm from the edge. The welding tool is made based on a soldering iron. In a simple version, it is enough to slightly file one edge of the copper tip and clean it with fine sandpaper. For more convenient work, the tip is upgraded: the point is filed off, a groove is cut in the center of the face with a hacksaw with three blades, a hole with a diameter of 5 mm is drilled, and a copper disc with a diameter of 10 mm is installed on a freely rotating riveted axis.- Select bags of the same thickness and lay them on a flat wooden surface.
- Place a strip of tracing paper 10–15 mm wide under the joint (it should be 10–15 mm longer than the seam).
- Lay the edges of the polyethylene parts with an offset relative to each other and cover the seam on top with a second strip of tracing paper.
- Press the area of the future joint with a wooden ruler, stepping back 6–8 mm from the edge.
- Apply pressure and move the heated soldering iron along the ruler following the seam without stopping.
- Remove the tracing paper after cooling and cut off the excess melted material along the ruler.
Monitor the quality of the soldering iron weld by the melt edge: a small amount of liquid polyethylene should slightly protrude from under the tracing paper while moving the tool.
When the parts are ready, rub the friction surfaces with graphite powder and assemble the device. After checking that the thermal roller works, fix it on the soldering iron tip. The roller should rotate freely, but without play. Fix this position using the second nut of the mechanical assembly.
The roller's heating is regulated by moving it along the soldering iron tip. The top screw must be loosened for this purpose.
Before welding the film, it is necessary to practice to account for the thermal roller's characteristics and to determine the optimal speed of its movement, the degree of pressure, and so on, depending on the material's thickness. It is best to weld on a smooth plastic table surface or on a sheet of glass-epoxy laminate.
If the roller overheats, tissue paper or tracing paper can be placed over the film. However, it is best to use a thin fluoroplastic film. It withstands temperatures of 150-200 °C and does not stick to the material.
'The thermal roller can be attached to a metal tube, which is placed onto the soldering iron tip. The diameter of the metal roller should not exceed 10 mm.
You can simply drill holes in the soldering iron tip and secure thermal rollers of various configurations using a pin.
It is very important when preparing the film for use on various types of covers to apply methods that allow for a significant extension of the service life of the same film.
One of the main components of the film's operational durability is its proper attachment to the structural elements of the covers.
Many years of experience in using the film have shown that during operation, it most often tears along the line of the sleeve fold. To combat this phenomenon, it is best to attach the film to the frame elements along the fold line by nailing down clamping strips. In small-sized covers, the outer edge of the sleeve fold must be placed on top. The least amount of damage from film tears along the fold line occurs when these folds are placed not along, but across the covers. This must be considered when welding film sheets.
The condition of the surface of the frame's support elements also plays a significant role in the duration of the film's service life. This surface must be smooth, without sharp corners, edges, protrusions, or roughness. It is desirable that the hoops of tunnel covers be made of galvanized wire or painted white. The use of unpainted wire leads to rapid wear of the film at the points of contact due to overheating. Studies have shown that at the contact points between the film and the elements of a metal or wooden frame not painted in a light color, the temperature reaches 60-70 °C, while between them it is 30-35 °C.
Polyethylene film for hotbed frames is lighter than glass, does not break, and is easy to cut into pieces of the required size and attach without putty. The film is simply wrapped around the frame bars and plywood or hardboard strips are nailed over it. For better heat retention, the film is stretched on both sides of the frame. However, unlike glass, the film sags, so wire is stretched crosswise before attaching it to the frame. The ends of the wire are bent at a right angle and driven into the wood.
To wooden structures, the film is attached with wooden slats or glazing beads. However, when the slat dries out, the gap between it and the structural elements increases, and the film, remaining attached only by nails, easily comes loose and tears even in a light wind.
Therefore, the most durable and reliable method is attaching the edge of the film to wooden bobbins in film hotbeds and to other structural elements using 10x20 mm slats. The edges of the film are wrapped around the slats, and then the slats are nailed down. This same method can also be used to join adjacent sheets.
2 Greenhouses, hotbeds... 33 EE EE y } UI 77 7 o 777 7 | PPP —— 6 277 -
Film attachment: a — to a wooden frame element; b — attachment to a frame (1 — film, 2 — glazing bead, 3 — slat).
When the film is attached to wooden elements not by its edge, but in the middle section, a sufficiently reliable attachment is obtained using two slats or wire with a slat. In these cases, the film is wrapped around one slat or wire, and then nailed to the wooden element with the second one in two layers.
If the farm has a metal frame for the cover, then wooden slats are first attached to it, and then the film is attached to them as indicated above.
In tunnel covers, the edges of the film are most often covered with soil. But such attachment makes plant care difficult, so vegetable grower A. Kuchko proposed an original way of attaching the film. Sealing strips 12-15 mm wide are welded in several layers along the longitudinal edges of the film sheet. At regular intervals, these strips are fastened
URALE Batten Fastening using slats and wire
BEHIND five loops made of strong twine. The sheet is put over the frame and hooked onto nails driven into the frame boards. To ventilate the cover, every second loop is released.
Year-round cultivation of many agricultural crops can be carried out in protected ground, which is equipped with structures that provide for the creation of an artificial microclimate. Primarily, these are small plot areas where, using various methods, a favorable combination of plant growth factors is created regardless of weather conditions and time of year. Intensive use of such areas ensures several harvests throughout the year. In space limited in height and area, manual labor is mainly used, some processes of which can be mechanized and automated.
Protected ground is divided into:
- warmed ground;
- hotbeds;
- greenhouses.
Warmed ground consists of simple small-sized structures for protecting plants from temporary drops in soil and air temperature in spring and autumn. Such structures allow growing vegetables or transplants for open ground 7-25 days earlier or later. They make extensive use of covering beds or sowing areas with straw mats, film, paper, or other materials, as well as heating the soil with biofuel, heated water, or electricity.
Recently, small-sized group soil covers made of film of frameless, tunnel, and tent types, which accumulate the thermal energy of sunlight, have become widespread.
A common disadvantage of small-sized warmed ground structures is that all work inside them is performed only manually.
When setting up protected ground structures, it is preferable to use southern and southwestern slopes, the south side of the plot if there are any on the north side 2* 35 IA Soil /7\It\ Soil a Soil Soil Manure = 7. 6 Sh Manure EARLIER ea. we [12 NOT OF THEM TEA 2 5: 2 o et8 V G d Manure
Simplest warmed ground structures: a, 6 — warm
Read next
Greenhouses and covers For gardeners
Application of non-woven cover material Spunbond in modern crop production
Greenhouses and covers For gardeners
Frame covers and modern agrotextile materials for plant protection
Greenhouses and covers For agronomists