
Water culture method in modern agrochemical studies of plant nutrition
11 min read
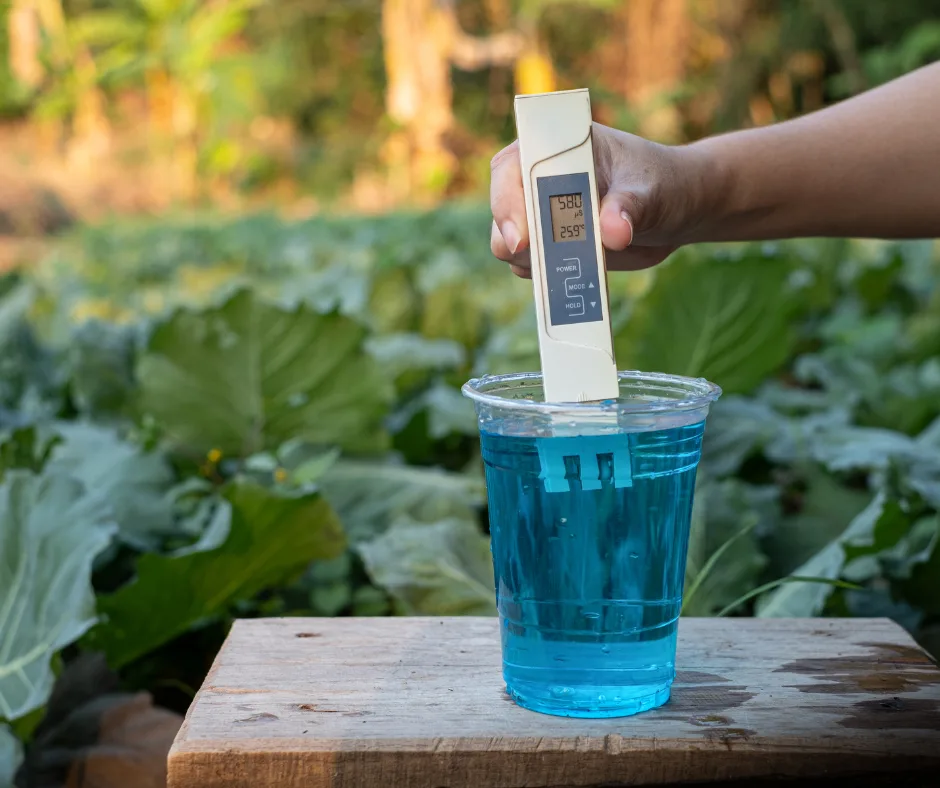
The water culture method allows for the study of root plant nutrition in a controlled environment. Using this method, agrochemists determine which elements are critical for crop viability, how they influence growth and biochemical processes, and during which phases of the growing season plants have the maximum need for nutrients to reach their potential. This helps to optimize fertilizer application schemes for greenhouse and open-field soils.
- Volume of vessels for cereals and grasses — 3–5 l
- Volume of vessels for beet and cotton — 6–8 l
- Thickness of wooden lids — 2 cm
- Bending angle of the aeration tube — 100–120°
- Optimal pH range of the solution — 5.5–6.5
Preparation of equipment and vessels
Glass or plastic vessels of various capacities are used for experiments. In experiments with cereals, grain legumes, oilseed crops, and grasses, 3- and 5-liter containers are applied. Larger vessels with a volume of 6–8 liters are required for cotton, sugar beet, tobacco, and rutabaga. To support the plants, wooden discs 2 cm thick are placed on the vessels, or plastic cylinders with a mesh bottom made of sparse nylon fabric, filled with gravel or granulated polyethylene, are used.
Planting holes with a diameter of 1.5 to 5–10 cm are made in the wooden lids, depending on the crop. Additionally, 2–3 holes with a diameter of 1 cm are drilled to attach the frame and for the glass tube through which the solution is aerated. The tube is bent at an angle of 100–120° and lowered into the vessel so that it does not reach the bottom by 2–3 cm.
- Select the necessary number of vessels of the same volume and corresponding lids according to the experimental design.
- Wash the containers thoroughly, clean the stoppers, and coat them with molten paraffin.
- Put double-layered covers (white on the outside, black on the inside) on the vessels to protect the roots from overheating and algae development in the light.
- Fill the vessels with distilled water to 3/4 of their volume.
- Add the nutrient mixture using a pipette or measuring cylinder, fill with water up to the mark 1 cm below the edge of the vessel, stir thoroughly, and close with the lid.
Selection and adjustment of nutrient mixtures
The concentration of salts in the solution directly regulates the intensity of element uptake. High concentration hinders water absorption but stimulates the intake of nutrients into the roots, altering their synergism and antagonism. The composition of the nutrient medium must be adapted not only to the specific crop but also to the individual phases of its development.
The reaction of the nutrient medium must constantly remain within the pH range of 5.5–6.5. Deviations from this range disrupt normal growth of the root system and nutrient uptake.
Ready-to-use Knop, Olsen, Geisler, and Tsintsadze nutrient media are suitable for water cultures. Each has its own application specifics:
- Knop mixture. Has an initial pH of about 5.7, which shifts towards the alkaline side to 7.2 during the growing season. The content of phosphorus and potassium in it is practically the same, while nitrogen is 2.5 times higher. It is best suited for cereals.
- Tsintsadze mixture. Contains ammonium and nitrate nitrogen, calcium phosphate as a source of phosphorus, and is rich in calcium and sulfur. The acidity of this mixture remains stable throughout the entire experiment. It is recommended for cereals, grain legumes, buckwheat, and soybeans.
- Geisler and Olsen mixtures. Contain a full set of macro- and microelements; iron in them is added in the form of a citrate salt. They are most often used for growing plants in hydroponics.
| Period of pH measurement in Tsintsadze mixture | pH value |
|---|---|
| Beginning of the experiment | 5.6 |
| End of the experiment | 5.7 |
When choosing a nutrient mixture, the experimenter has the right to change the ratio of elements and test other forms of compounds for specific research objectives.
Methods for seed germination for water cultures
In vegetation experiments using water culture, plants are planted at the seedling phase. The accuracy of the entire agrochemical study depends on the quality of nursery plant preparation: uneven emergence or damaged roots distort the experimental results. Nutrient solutions are prepared in the same way as for sand cultures and are added according to the experimental design, calculated per 1 liter of water.
To germinate seeds on quartz sand, they are sown into a prepared substrate. As soon as the seedling roots reach a length of 2–3 cm, they are carefully transferred to nets placed on crystallizers with tap water. The water in the crystallizers must be changed daily. After 8–12 days, when the plants have formed several true leaves and the root length is 5–7 cm, the most uniform specimens are selected for transplanting into the working vessels with the nutrient mixture.
The germination method in paper rolls allows for obtaining clean roots without residual substrate and with minimal risk of damage during transplanting. The roll preparation process consists of the following steps:
- On a moistened half of a sheet of regular writing paper, place sprouted seed along one edge at a distance of 0.5–1.0 cm from each other and 0.5 cm from the edge of the sheet.
- Place the next sheet of paper on top and arrange the seed again using the same pattern. Repeat the procedure several times to obtain the required volume of seedlings.
- Cover the last layer of seed with a sheet of paper, carefully roll all sheets into a tight cylinder, and tie it with thread.
- Place the roll vertically in a glass vessel, pouring water to 1–2 cm below the top edge of the paper so that moisture rises to the seed via capillary action.
As the roots grow, gradually lower the water level in the jar. If faster seedling development is required, after emergence, replace the plain water in the vessel with a diluted nutrient solution.
Under no circumstances use filter paper to form the rolls. Fine roots will grow through its pores, and extracting them during transplanting without critical damage is impossible.
For mass preparation of cereal and grain legume seedlings, a modified roll method is convenient. Place seed that has been soaked in water onto a moistened paper strip 6–7 cm wide and up to 20 cm long. Orient the grains across the strip, pointing the embryo toward the bottom edge of the future roll, with a 1–2 cm margin from the top edge of the strip. Then, roll the tape into a tube and stand it vertically in a vessel with 1–2 cm of water.
The capacity of the rolls depends on the size of the seed of the crop being grown:
| Crop | Number of grains per roll, pcs. |
|---|---|
| Wheat, rice, buckwheat | up to 20 |
| Peas, corn | 6–8 |
If seedlings are used at the first-leaf stage, mineral nutrition is not required. For longer cultivation, transfer the plants to a nutrient solution when the roots begin to emerge from the bottom end of the roll. For this, use a 2–3-fold Knop's nutrient mixture. Pour the solution in a thin layer so as not to block oxygen access to the roots, and change it every 2–3 days. To keep the level of the evaporating solution stable, use automatic drinkers made from inverted wide-mouthed flasks with water, set on small spacers.
Planting in vegetation vessels and plant care
For transplanting into permanent vessels, select the most uniform plants with identical stem length and an equal number and length of roots. This ensures the comparability of test results across all scheme variants.
- Root length when transferring to a mesh — 2–3 cm
- Root length for planting in vessels — 5–7 cm
- Seedling thinning period — after 10–15 days
- Paper strip width for rolls — 6–7 cm
- Solution layer height for cassettes — 3–5 cm
- Concentration of Knop's mixture for rolls — 2–3-fold
Plants can be secured in vessels in several ways:
- In cotton plugs. Wrap the selected plants (two specimens) with cotton wool around the seeds and fix them in the holes of the plugs. After 10–15 days, perform thinning, leaving one most typical plant per hole.
- On foam separators. Place plants across a foam strip, which is inserted into the slots of a separator frame. The strip should be 1.5 times wider than the slot. Cereal grains should be located below the foam (in the air gap above the solution), dicots should be immersed up to the cotyledons, and pea seeds should be clamped directly in the foam.
- In cassettes. This method is ideal for small-seeded crops, as well as medium and low-growing cereals. Place the assembled cassette with three rows of plants into a tray with nutrient solution.
Regular renewal of the nutrient solution provides plants with nutrients in an accessible form and prevents acidification of the environment. Perform solution replacement according to a schedule depending on the developmental phase of the plants:
| Plant growth period | Nutrient solution replacement frequency |
|---|---|
| Before flowering | Every 2 days |
| From the start of flowering and later | Every 4 days |
Further care consists of timely thinning (leaving strictly one plant per nest) and support for tall crops. To prevent lodging, tie such plants to special frames or sticks rigidly fixed in the lid or the vessel itself. Roots of plants in water cultures critically need oxygen. Without forced aeration, the root system quickly rots; therefore, the nutrient solution must be blown with air daily. The oxygen supply regime depends on the developmental phase of the plants.
- Duration of aeration for young plants — 5 min
- Duration of aeration during peak growth — 10 min
- Optimal air supply rate — 2–3 bubbles/s
Before harvesting, aeration of the vessels is stopped completely. Technically, the process is organized via tubes permanently fixed in the vessels using automatic compressors, or manually in small-scale experiments using a rubber bulb.
Aeration is not required if the roots are not fully submerged in the solution (approximately 1/3 of their length is in the air) or if the plants are secured in shallow, wide vessels.
As the solution evaporates, distilled water is regularly added to the vessels up to the mark to maintain the initial salt concentration.
Solution acidity control and chlorosis management
It is necessary to monitor the reaction of the medium in the vessels 2–3 times a week using pH meters or indicator paper. In case of strong acidification or alkalization, the pH can be adjusted by adding a weak acid or alkali solution drop by drop, but it is more practical to completely replace the nutrient mixture. To maintain a stable pH level of 6.5, chalk is added to the solution.
A shift in the reaction towards the alkaline side blocks the uptake of iron, which leads to leaf chlorosis. The availability of various chemical forms of iron directly depends on the acidity of the solution:
| Solution pH | Available form of iron |
|---|---|
| up to 5.0–5.5 | Mineral form |
| 6 and lower | Citrate salt |
| up to 7 | Complex compound with chelate (Fe-EDTA) |
Iron chelate can be prepared independently by mixing ferric chloride with Trilon B (sodium ethylenediaminetetraacetate).
At the first signs of chlorosis in plants, follow this procedure:
- Add a few drops of iron citrate to the nutrient solution.
- If chlorosis does not disappear, prepare a temporary therapeutic solution of ferric sulfate or ferric chloride at a rate of 1–2 g of salt per 1 L of water.
- Transfer the plants into this therapeutic solution for 3–6 hours.
- Return the plants back to the growing vessels.
Do not exceed the maximum time limit for keeping roots in the therapeutic salt solution (6 hours), otherwise the plants will suffer chemical burns.
Pesticides are used as needed to control pests and diseases. During the growing season, the nutrient mixture in the vessels is completely changed 2–3 times. Harvesting and yield assessment are carried out according to standard methodology, but the root mass must also be recorded.
Read next
Agrochemistry For students
Method of isolated plant nutrition in agrochemical research and experiments
Agrochemistry For students
Methodology for the preparation and application of sterile crops in agrochemical research
Agrochemistry For students