
Methodology of planning and technique of conducting field agrochemical experiments
86 min read
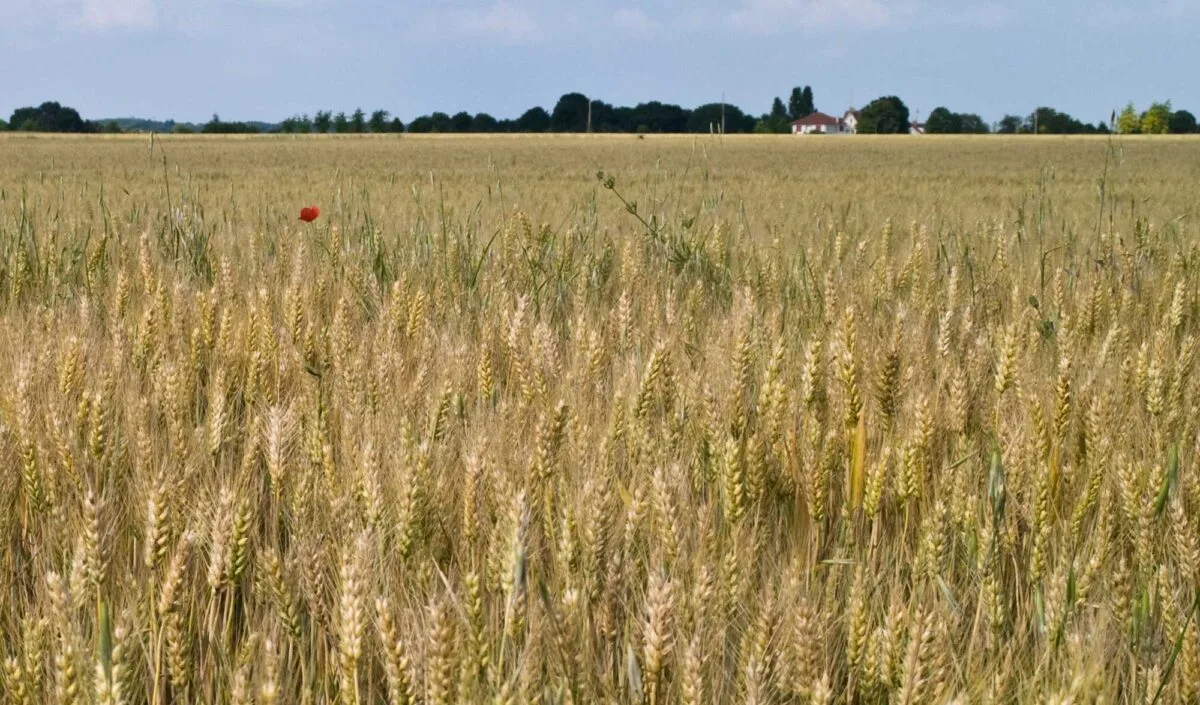
Research planning is the most critical stage in a researcher's work. Experiment planning begins with selecting a topic and defining the objectives and the object of study. Then, the current state of the issue is studied and critically analyzed, based on which a working hypothesis is formulated, a research program is drafted, and methodologies are selected.
Selection of a topic. The list of problems that agrochemists are working to solve is extensive. The choice of a topic is determined by the scientist's intuition and the needs of agricultural production. For successful experiment planning, the topic must be clearly formulated, i.e., the research objective must be set and the objects identified.
Study of the problem state. In order to ensure that the issues being studied are not duplicated or repeated, it is necessary to study the scientific literature on the subject and conduct patent research. Knowledge of the literature on the subject makes it possible to create a working hypothesis and develop a research program and methodology.
Creation of a working hypothesis. A proposition is formulated upon which the explanation of the results expected in the set experiment will be based.
Research program. The program outlines the methods for testing the working hypothesis. A research program is a project of the intended path of the experiment. The program clearly defines the goal and objectives of the research, presents the experimental schemes, describes the conditions and methods of their implementation, and provides a list of all observations, records, and analyses, indicating the methodology and timing of their completion. The research program is drawn up for the entire duration of the study, with detailing by years. During the implementation of the research program, especially in long-term experiments, the need may arise to supplement or partially change it. All changes made must be carefully documented.
Basic elements of field experiment methodology. The methodology of a field experiment refers to the set of elements that compose it: the number of variants, plot size, their shape and orientation, replication, the system of placing replicates, plots, and variants in the field, the method of harvest recording, and the organization of the experiment over time.
A field experiment is always set up according to a specific scheme.
The field experiment scheme is the totality of all variants included in the experiment and compared with each other. Each of them is characterized by a modification of the factor being studied in the given experiment. An example of the simplest experimental scheme can be a two-variant scheme; for instance, the first variant – without fertilizer, the second – with fertilizer. A correctly compiled scheme, observing the principle of the single difference and the identity of other conditions, allows for the evaluation of each experimental variant and their comparison with one another. Compiling a field experiment scheme is the most responsible task that an experimenter has to solve. The experimental scheme is determined by the goal and objectives of the research.
An experimental variant is a specific set of crop cultivation practices carried out on one plot or on several so-called replicate plots. A variant is a specific type or gradation of the influencing factor studied in the experiment. Depending on the content of the experiment, the number of all variants necessarily includes one or several variants as units of comparison, which are called control (standard) variants, or controls. They allow for the determination of the degree of sensitivity of plants to the factor studied in the experiment. A practice that has proven itself in practice should be taken as the control variant so that, during the research, an even better one can be found. The experimental variants are placed on the plots of the experimental site according to a specific plan.
The number of variants in any experimental scheme is determined by its content, goal, and objectives. The number of variants and the method of their placement on the area can affect the accuracy of the experiment, because, all other conditions being equal, an experiment with a larger number of variants will occupy a larger area, which increases the possibility of errors and deviations associated with the spatial variability of soil fertility. When planning an experiment, one should strive to have no more than 12–16 variants in the experiment. An experiment with a larger number of variants generally requires more complex setup methods. If there are few variants, higher replication is required to have a sufficient number of observations for a correct assessment of the experimental error.
Spatial replication of an experiment refers to the number of identical plots for each variant. The part of the experimental site area occupied by a full set of plots of all variants of the experimental scheme, located next to each other, is called a replication of the experiment. The necessary number of replications in an experiment depends on the typicality of conditions, the heterogeneity of the site, and the required accuracy of the experiment. The heterogeneity of soil conditions of the land plot is established according to the data of fractional recording or visual assessment of the uniform sowing. As replication increases, especially up to 4–6 times, the experimental error decreases noticeably; further increases in replication are accompanied by a less significant reduction in error. Increasing the number of replicate plots reduces the experimental error more significantly than increasing the size of the plot. The effectiveness of replication is manifested most clearly if entire replications, i.e., the entire set of studied experimental variants, are placed within even strongly differing, but internally sufficiently homogeneous parts of the land plot.
An experimental plot is a fundamental component of an experimental site of a specific size and shape, where all studied crop cultivation techniques are carried out according to one of the variants of the experimental design. Within the plot, one distinguishes between areas: the sowing area (the plot as a whole) and the record area, which is assessed when studying an experimental variant. The sizes of plots in the specific conditions of a field experiment depend on the nature of the issue under study, the degree of soil heterogeneity, the specifics of agrotechnology, and the machinery and implements used in the experiment.
A block is a part of the field experiment area divided into plots, on which variants of the experimental design are placed using random methods. A block can be complete, in which case it is equivalent to a replication, or incomplete – where a block contains only a portion of the variants; in the latter case, several blocks constitute one replication.
Selection of the site. When choosing a site for establishing a field experiment, it is necessary that it corresponds to the conditions under which the results of the experiment are intended to be used: the properties and soil fertility, as well as the topography common in the given region, i.e., they must be typical and representative. The second requirement for an experimental site is the uniformity of its soil cover, which ensures sufficient accuracy of the experimental results.
Topography. The presence of a level surface is one of the main conditions for the suitability of a site for an experiment. However, in some regions, finding such a site is difficult. Therefore, due not only to the difficulty of choosing a site without a slope but also for reasons of representativeness, the presence of a moderate slope (2.5 m of drop per 100 m of linear length) on the experimental site is permissible. The slope should be one-sided and uniform in steepness, and it should not have areas facing different cardinal directions, especially closed depressions, i.e., hollows or basins. When locating an experimental site on a slope, plots are arranged with their long sides along the slope so that each plot encompasses the diversity of conditions in different parts of the slope as fully and as similarly to others as possible. These requirements for topography do not, of course, apply to cases where the influence of topography is itself the subject of study (experiments on the study of the influence of slopes of various steepness and exposure, experiments on the study of the influence of erosion).
Soil. Soil survey of an experimental site can have a dual task: a) to provide a soil characteristic of the site as a whole in order to make it possible to extrapolate the results of the experiment to similar soils; b) to help in the best possible way to position the experiment, placing it entirely within one soil variety or, if this is impossible, within a complex of the most similar varieties, provided that this complex is as uniform as possible for all variants of the experiment (Shcherba S.V., Yudin F.A., 1975).
Experimental plots must be located within a single soil variety. If this cannot be achieved (due to high heterogeneity of the soil cover), one has to limit oneself to the requirement that there are no sharply different soil varieties within the area where the experiment is placed. The plots are arranged in such a way that each of them encompasses the entire complex of soil varieties present within the experimental placement area. This is most easily achieved with elongated plots.
History of the experimental site. It is necessary to ensure that for the last 3–4 years, the entire site was sown with the same crop in accordance with crop rotation, and that a single system of fertilizers and tillage was applied. Those agrotechnical techniques that sharply and for a long period change soil fertility must be uniform – liming, systematic application of mineral and organic fertilizers, deepening of the plough layer, drainage, and the sowing of grain legumes. If there is information about the application of one of these techniques on any part of the site, it cannot be used for establishing an experiment without prior fractional yield accounting, even if more than 2 years have passed since the application of this technique.
The site allocated for the experiment should not have severe or uneven weed infestation, especially with clearly defined patches of noxious weeds, traces of earthworks, filled-in pits and ditches, stumps and large roots, remains of buildings, former threshing floors, livestock housing areas, sites for the transport and storage of manure, or former dirt roads. The experimental site should not be located near water bodies, tree plantations, buildings, or fences, which create uneven lighting due to shading, unequal conditions of soil moisture and humidity due to increased evaporation or excessive snow accumulation, wind obstruction, and also the possibility of damage and contamination of the experiment. It should be at a distance of at least 200 m from water bodies, 40–50 m from solid forest and individual buildings, 25–30 m from individual trees, and 10 m from dense fences. To avoid damage to the experiment and the influence of road dust, the site is placed at a distance of 10–20 m from a thoroughfare and is isolated by a sown protective strip.
Studying the history of an experimental plot is also dictated by the need to have a characterization of the plot's typicality — both natural (relief, soil genetic features) and economic (level of cultivation, availability of available nutrient forms, soil reaction). It should be emphasized that the pursuit of plot uniformity, in areas with high soil cover variability, violates the requirement for typicality. However, a plot that fully satisfies the requirements of typicality may not fully ensure the required accuracy of the experiment. Therefore, in each specific case, it is necessary to reconcile the requirements of typicality and accuracy, compromising, within acceptable limits, either the typicality of conditions or the accuracy of the results.
To characterize the experimental plot, it is necessary to carry out its geodetic, soil, and economic survey. A soil map, results of chemical soil analyses, a leveling plan, the economic history of the field, and in some cases (virgin land or long-fallow land) a map of natural vegetation distribution allow, by comparing them, to establish the degree of soil cover variability and to draw up a plan for the layout of the field experiment on a specific site, to outline the size, shape, and arrangement of plots, and the placement of replicates.
Any field experiment with fertilizers will be accurate only if the initial soil fertility on the experimental plot is as uniform as possible. Otherwise, the natural variability of the soil cover will distort the results, and you will receive incorrect data on the effectiveness of the preparations. To solve this problem, special field preparation is carried out before setting up the experiment: leveling and reconnaissance sowings.
Leveling sowings: how to neutralize the history of the plot
A leveling sowing is a continuous planting of one crop over the entire area of the future experiment. The main goal of this technique is to smooth out differences in soil fertility remaining from predecessors, uneven application of fertilizers, or past tillage. The care of such a crop is carried out at a very high agrotechnical level, performing all operations as carefully and uniformly as possible.
Leveling sowings effectively eliminate only that soil variability which is created by man. Against natural heterogeneity — relief or natural differences in soil types — this technique works significantly less effectively.
Depending on the degree of field variability, preparation can last several years. For this purpose, special preparatory crop rotations are created, where, depending on the tasks, the level of soil cultivation is either systematically increased with manure and mineral fertilizers, or its excess is depleted without any top dressing at all. On waterlogged lands, drainage is carried out in parallel with closed drainage or open channels. In this case, the plots are located so that an equal number of drains pass under each, and all plots adjoin open ditches strictly in the same way — by their narrow ends.
Reconnaissance sowings and the technique of fractional recording
To identify hidden variability in soil fertility, reconnaissance sowing with continuous fractional harvesting is used. Most often, it is combined with the last leveling sowing before setting up the experiment. In this case, the harvest is collected and weighed not from the entire field at once, but from small elementary plots in order to compile an accurate map of the plot's productivity.
When choosing a crop for reconnaissance sowing, give preference to spring cereals (oats), root crops, or potatoes. The variability of winter crops stands is superimposed by the conditions of their overwintering, which distorts the real picture of soil fertility.
- Size of an elementary plot — 10 m²
- Width of boundary furrows — 10–20 cm
- Area of large plots — Several hundred square meters
The layout and harvesting of the reconnaissance sowing are carried out strictly according to the technology. This ensures that random errors during work do not distort the recording results. All operations are performed in strict sequence.
- Divide the field area into elementary plots. For cereal crops, marking is done before the stem elongation phase, for row crops — immediately before harvesting, based on the number of rows and plants.
- Install pegs at the corners of the plots and lay out boundary furrows between them using a hand marker, a hoe, or a stretched cord.
- Mow the edges of the experimental field manually or with small machinery to give the plot a regular geometric shape.
- Perform harvesting of the plots manually or with a small self-propelled combine, maintaining the direction of the header movement along a stretched marker rope.
- Weigh and record the harvest from each elementary area separately for subsequent analysis of the plot's variability.
How to evaluate the variability of the plot and calculate replication
Data from fractional recording allow for a visual assessment of the heterogeneity of the experimental field. For this, the cartographic method is used, which helps to divide the working area into homogeneous zones.
- Plot the actual harvest weighing results from each elementary plot onto the layout map of the area.
- Group the obtained data with an interval of 0.5–1.0 kg.
- Color the cells on the plan: the higher the yield of the group, the darker the shade of the cell should be.
- Identify homogeneous zones on the scheme and exclude sharply different anomalous spots.
The resulting map shows the boundaries of zones suitable for the experiment. For a mathematical evaluation, a Gaussian curve is constructed: the more it deviates from a normal distribution, the more important it is to discard defective parts of the plot or divide it into several independent blocks.
Next, the plot shape and the number of replications are determined to compensate for soil heterogeneity. The standard error (m) for plots of different sizes is calculated using the formula m = σ / √n, where σ is the standard deviation and n is the number of replications. This same formula allows calculating the minimum number of replications required so that the experimental error for the selected plot size does not exceed the specified limit while minimizing field area costs.
Detailed recording of a reconnaissance sowing is extremely laborious work. In practice, it is often replaced by a soil survey, topographic leveling, field history study, and visual assessment. For annual crops on new land, it is simpler to increase the number of replications in the first year and then calculate soil heterogeneity based on the results of harvesting.
Experimental Layout and Selection of Plot Size
The main task when setting up an experiment is to minimize the influence of soil heterogeneity on the comparison of variants. Minor agricultural management flaws, micro-relief, and uneven fertilizer application in previous years can be smoothed out by changing the plot size. If the plot has a pronounced macro-relief, different predecessors, or zones with different natural soil fertility, these factors are eliminated by the correct relative arrangement of plots and an increase in the number of replications.
The plot area is chosen based on the purpose of the experiment, crop biology, the level of soil heterogeneity, and available machinery. Experimental accuracy increases with the plot area only up to a certain limit. Further enlargement increases the total experimental area, which causes soil macro-heterogeneity to distort the results more significantly.
- Harvest grouping interval on the scheme — 0.5–1.0 kg
- Optimal plot area limit — up to 100 m²
The minimum plot size is always limited by the dimensions of agricultural machinery used for sowing, maintenance, and mechanized harvesting. The choice of area is also influenced by the following biological and technological factors:
- Crop biology. The higher the plant density, the smaller the plot area that can be used. Therefore, plots for broadcast crops are made smaller than for row crops.
- Subject of the experiment. If tillage, sowing, and maintenance are carried out identically across the entire field, plots can be small. However, if methods of fertilizer application or top dressing in rows are being studied, each plot is treated separately, which requires an increase in its size.
- Duration of the experiment. For long-term research, plots are laid out with an area buffer. This is necessary in case it becomes necessary in the future to divide them into parts to introduce new variants or apply new nutrient backgrounds.
Plot Sizes, Shape, and Guard Strips
To carry out all work effectively — from sowing to harvesting — and obtain reliable yield data within tight deadlines, do not inflate the plot area beyond the optimum. Excessively large areas increase the consumption of seed, fertilizer, and labor, which makes the experiment more expensive. At the same time, very small plots are difficult to cultivate with standard machinery due to the lack of compact equipment.
| Type of experiment and crop | Recommended plot area, m² |
|---|---|
| Broadcast crops in fertilizer experiments | 50–100 |
| Row crops | 100–200 |
| Long-term experiments | 200–300 |
| Experiments with separate treatment of each plot and mechanized fertilizer application | 300 or more |
| Laboratory-field experiments (horse-drawn cultivation, broadcast sowing) | 20–25 |
| Laboratory-field experiments (manual cultivation) | Less than 20 |
The shape of the plot directly affects experimental accuracy, especially in heterogeneous soil. Elongated plots better smooth out site unevenness because they cover its heterogeneity more thoroughly. Orient them along slopes or across strips with different soil fertility. For row sowing, make the plot width a multiple of the seeder’s row spacing, and for separate treatments, arrange them in a single row for the convenience of machine turning.
If the plot length exceeds the width by more than 10 times, its perimeter becomes too large, and guard strips occupy excessive area. In limited plots with a size of less than 50 m², it is better to use a shape close to a square and increase accuracy by increasing the number of replications.
Guard strips are necessary to exclude the influence of neighboring variants and protect the experimental recording zone of the plot from damage. Side strips are laid along the long sides of the plots to isolate them from adjacent variants and eliminate the edge effect. End strips protect crops from accidental breakage and serve as a place for tractors and combines to turn during mechanized operations.
- Width of side buffer strips — 0.5–1.5 m
- Width of end buffer strips — at least 2 m
- Optimal share of buffer strips — about 25% of the plot area
Replication of the experiment: calculating the required number of plots
Repeatedly testing each variant at different points in the field is the most reliable way to account for soil heterogeneity. Several small replicate plots provide higher accuracy than one large plot of the same total area. Furthermore, without replication, it is impossible to mathematically assess the margin of error of the results. For any field experiment, replication is mandatory.
The required number of replications is established individually for each experimental field, taking its heterogeneity into account. It is best to perform the calculation based on the results of a fractional yield assessment of a reconnaissance sowing. For this, a standard step-by-step algorithm is used.
- Determine the coefficient of variation of yield (V, %) based on fractional assessment.
- Set the desired accuracy of the experiment (m, %). A field experiment usually does not capture a yield difference of less than 5%, so set the accuracy indicator within 5%.
- Calculate the number of replications (n) using the formula: n = (V / m)².
Example of calculation: the coefficient of variation (V) for 100 m² plots is 10%. The target accuracy of the experiment (m) is 5%. The required number of replications will be: n = (10 / 5)² = 4 replications.
If there is no data from a fractional assessment, an agronomist must rely on previous experience working in similar fields. In such cases, the soil heterogeneity of similar adjacent areas is taken into account. The results of previously conducted trials in similar soil and climatic conditions are also considered.
How to choose the replication frequency and avoid losing results
The number of replications in a field experiment directly determines the accuracy and reliability of the data obtained. In practice, an agronomist must balance the quality of the experiment with resource costs. Too large a number of plots complicates the work: it becomes more difficult to perform technological operations simultaneously across the entire area, and labor costs and material consumption increase.
- Accuracy of the experiment on 50–100 m² plots — 2–4%
- Area for small-plot experiments — 10–20 m²
- Minimum area for a production experiment — 1000 m²
The choice of replication depends on the area of the experimental plots and the purpose of the research itself. The smaller the plot area, the higher the replication frequency should be to compensate for soil heterogeneity. For planning convenience, use the following standards as a guide:
| Type and area of the plot | Recommended replication | Expected accuracy of the experiment |
|---|---|---|
| Small-plot experiments (10–20 m²) | 6–8-fold | — |
| Stationary field experiments (50–100 m² and more) | 4-fold (less commonly 6-fold) | 2–4% |
| Preliminary and demonstration experiments | 2–3-fold | — |
| Production experiments (more than 1000 m²) | 2–3-fold | — |
The minimum permissible replication in experiments is twofold. However, using it in practice is risky. If one plot is lost due to accidental causes, the entire experimental variant will have to be rejected. Furthermore, if there is a strong discrepancy in data between two parallel plots, it is impossible to determine which result is closer to the truth. For reliability, set at least three-fold replication.
Methods of plot placement: dealing with soil heterogeneity
The main task when placing an experiment in a field is to ensure that each variant passes through different zones of soil fertility. This allows for an objective comparison between them. By the method of organizing space, experiments are divided into methods of unorganized and organized replications.
With full randomization (unorganized placement), plots are scattered across the field without being combined into blocks. In practice, this method is rarely used, as it is almost impossible to find a large area that is perfectly uniform in soil fertility. The method of organized replications is used more often, where plots are combined into compact blocks. Such blocks can be placed in two ways:
- Continuous placement — all replications are located in a single array in one or several rows with shared boundaries.
- Scattered placement — individual replications are scattered across different parts of the field or even across different fields.
The scattered method is helpful when there is no continuous uniform area of the required size in the field. It is also necessary if it is required to test the performance of fertilizers across a wide range of conditions: on different preceding crops or contrasting soil types.
Within each replication, variants can be placed in a standard, systematic, or random (randomized) way. With standard placement, an increased number of control plots are laid out in the field. This simplifies the calculation of yield increase and helps eliminate the influence of soil non-uniformity.
Among the standard methods, several schemes are distinguished:
- Iambic method (iamb-method) — control plots are sown every other experimental plot. The increase is calculated by comparison with the average value of two adjacent controls.
- Dactylic method (dactyl-method) — control is set every two experimental plots. Comparison is made via interpolation between adjacent controls.
- Checkerboard order — controls are placed in a row every other one and shifted by one position in each subsequent row. This method is indispensable for multi-row small-plot experiments, as it provides maximum estimation accuracy: each experimental variant is compared simultaneously with three or four control plots.
Standard and systematic arrangement: simplicity versus land overuse
When planning an experiment, it is important to correctly choose the plot layout scheme on the field. The traditional method of measuring plots assumes that the control (standard) variant is placed after every two experimental plots. In this case, comparison is made with the average value of three adjacent controls: two of them are in contact with the experimental plot by their sides, and the third only by its corner. With multi-row arrangement, a "knight's move" scheme is used, comparing the variant with the average of two adjacent controls, where one is adjacent by its side and the other by its corner. This allows for slight space saving, but still requires large land resources.
The main disadvantage of standard schemes is a sharp increase in the area occupied by the experiment and a decrease in accuracy when comparing plots that are distant from each other. Due to inefficient land use, such methods are rarely used in modern agricultural chemistry.
| Standard arrangement scheme | Area occupied as a percentage of the total experiment size |
|---|---|
| After every two experimental variants | 40 % |
| After every one experimental variant | 50 % |
Systematic arrangement of plots provides for a strictly identical sequence of variants in all replications. With single-tier placement in a field, the simplest, sequential scheme is used. The order of the plots is tied to the organizational and technical processes on the field:
- primary and pre-sowing tillage;
- application of mineral and organic fertilizers;
- sowing of the crop;
- care for plants during the growing season;
- mechanized harvesting.
If replications of the experiment are placed in several tiers, a staggered scheme is used. Variants are oriented in one direction, but in each subsequent row, the beginning of the scheme is shifted by one, two, or more plots, moving the end of the row to its beginning. Systematic methods are attractive for their simplicity, but have a hidden trap: natural waves of soil fertility can coincide with the plot arrangement step. This leads to the accumulation of systematic error, due to which the mathematically calculated experimental error will differ significantly from the real one.
With any systematic arrangement schemes, it is strictly forbidden to allow territorial proximity of identical variants in adjacent replications.
Randomized arrangement: how to exclude the influence of soil heterogeneity
To statistically prove the effectiveness of fertilizers or technologies, it is possible only with random (randomized) distribution of plots. Variants are distributed across the field using a draw or random number tables so that each of them has an absolutely equal chance of being on any plot. This balances the influence of soil heterogeneity within each replication, turning hidden systematic errors into random ones.
In practice, complete randomization (method of unorganized replications) or the method of randomized replications is used. Complete randomization is effective only on fields with uniform soil fertility and a small set of studied factors. In this case, one can abandon the control, since mathematical accuracy is compensated by an increase in the number of degrees of freedom. However, if there are many plots, the distances between them increase, soil heterogeneity begins to have a stronger influence, and the efficiency of the method drops.
- Number of variants for complete randomization — 2–4
- Area for standards after two variants — 40 %
- Area for standards after one variant — 50 %
The method of randomized replications involves the random distribution of variants strictly within the boundaries of each individual replication. It is important to ensure that soil conditions within one replication are as homogeneous as possible.
To improve the comparability of variants with any spatial arrangement of plots, try to make the overall shape of each replication close to a square.
The Latin square method consists in the fact that the number of replications (n) in the experiment is equal to the number of variants, and the total number of plots is equal to n2. When placing an experiment using the Latin square method, an experimental field of a square or rectangular shape is divided into horizontal and vertical rows according to the number of variants. A full set of all variants is placed in each horizontal and vertical row; this is possible only when identical plots are not repeated twice in either the horizontal or vertical row. Inside these rows, variants on the plots are located by lot; here we have randomization with two restrictions. Within the Latin square, a systematic staggered arrangement of variants on the plots is also possible. The Latin square method is used for a number of variants from 4 to 7. If there are more variants, setting up experiments by this method becomes difficult and it can be replaced by a Latin rectangle.
1 2 3 4 5 6 3 5 2 1 4 6
2 3 4 5 6 1 2 6 5 4 1 3
3 4 5 6 1 2 1 4 6 3 2 5
4 5 6 1 2 3 6 2 4 5 3 1
5 6 1 2 3 4 4 1 3 6 5 2
6 1 2 3 4 5 5 3 1 2 6 4 a b
Fig. 110. Arrangement of experimental variants using the Latin square method a – systematic; b – randomized
The Latin rectangle method provides that the number of variants in the experiment is a multiple of the number of replications. The number of variants must be divisible by the number of replications without a remainder. The quotient of their division gives the number of plots into which the column of the corresponding Latin square must be split. Variants across the plots are randomized so that the row and column have a full set of variants (Fig. 111; Dospekhov B.A, 1979).
Statistical processing techniques for experimental results using the Latin square and Latin rectangle design allow for the significant elimination of the influence of systematic changes in soil fertility in two mutually perpendicular directions and reduce experimental error.
The split-plot design is an experiment in which the plots of one experiment are used as blocks for another (Fig. 112; Dospekhov B.A., 1979). This method is used to establish multifactorial or long-term experiments. Split-plot designs are also used in cases where it is necessary to introduce additional variants into a stationary experiment while maintaining all the original ones. The essence of the method lies in the fact that the experiment is divided into main plots (e.g., tillage or previous crop); then each main plot is divided into sub-plots (e.g., timing of fertilizer application – foliar top dressing during the tillering and heading stages), and the sub-plot is divided into sub-sub-plots (fertilizer application rates). Variants for main plots and sub-plots are arranged randomly. In this case, the variants of the main plots are randomized independently for each replication, while the variants of the sub-plots and subsequent orders are randomized separately for each main plot anew in each replication.
Fig. 111. Layout of experiments with 15–20 variants using the Latin rectangle design
Fig. 112. Layout of a two-factor experiment with 15 variants (5╳3) using the split-plot design, 4-fold replication
The setting up of experiments using the split-plot design is also dictated by the technical conditions of the experiment. For example, when studying the effectiveness of nitrogen fertilizer application rates against different backgrounds of phosphorus-potassium fertilizers, the background is created on the main plots. The background parameters are presented in the table:
| Р30К30 |
| Р60К45 |
| Р90К60 |
Then, nitrogen fertilizers are applied to each background. Technically, this methodology is much easier to implement than the full randomization method. It is worth noting that the accuracy of such a comparison will also be slightly higher, as the compared plots will be located closer to each other, which increases the probability of them being placed on soil with similar soil fertility.
As previously noted, a field experiment with fertilizers, in addition to spatial replication, must have temporal replication. In this regard, a problem arises in ensuring the same crop rotation sequence annually. Such experiments, as a rule, are set up within a specific crop rotation. For this purpose, research institutions establish a typical crop rotation with large fields, on which several experiments are placed simultaneously. Each experiment is set up annually on a new field in accordance with the crop rotation.
The main disadvantage of this method is the distance between individual segments and crops of each experiment; this reduces the comparability of data across different years. However, with this method, tillage, pest and weed control, as well as other general agricultural practices that are not the subject of the study, can be carried out mechanically, which saves labor and time.
To eliminate the drawback of such a crop rotation, a method was proposed in which a special crop rotation is allocated for each long-term experiment. This creates greater uniformity of all segments and allows for better adaptation of the crop rotation to the specifics of the experiment. However, this method causes some difficulties with the cultivation of individual fields.
If tillage practices are not being investigated in the experiment, S.V. Shcherba and F.A. Yudin (1974) suggest combining the described methods. In such a combination, one experimental crop rotation is allocated for several experiments with fields of an elongated shape located parallel to each other. The fields of individual experiments run in a perpendicular direction across all fields of the crop rotation. The combined method makes it possible to simultaneously carry out identical mechanized tillage of the same segments of the crop rotation for all experiments. At the same time, it territorially unites all segments of each experiment, which creates better comparability of its data across different years due to their greater uniformity.
The deployment of a crop rotation suitable for fertilizer experiments should take place gradually. Each year, a new segment is introduced into the experiment, starting each year with a specific crop. There can be as many segments in the crop rotation as there are fields (and crops), but no fewer than 3–4. This is especially important when setting up experiments to study various variants of the fertilizer system in a crop rotation, since the application of individual fertilizers must follow a strictly defined sequence, which is determined by the need to study the effectiveness of both individual elements (the studied variants) of the fertilizer system and its various variants as a whole over the rotation period.
Before proceeding with the plot layout for an experiment, the researcher, based on data from leveling and reconnaissance sowing, and taking into account the area and size of the experimental plot, selects the sowing area of the plot and the arrangement of replicates. Before starting the layout of the experiment in the field, it is necessary to plot the planned arrangement of crop rotation wedges and experimental plots on a schematic plan of the site and carry out the layout based on it.
To lay out the plot, you will need:
- Optical square
- Steel measuring tape
- Sazhen (measuring rod)
- Surveying poles
- Stakes of various sizes
- Hoe
- Hammer
- Cord
- Pencil
The layout of the plot begins by marking the general outline of the experiment. It is carried out with particular care, as the points established during this process will serve as reference points for all subsequent layouts. The permissible discrepancy during the layout of the general outline should not exceed 5–10 cm, depending on the total length of the perimeter.
The layout is carried out as follows. Step back from the edges of the plot by the distance of the protective strip and secure the left corner of the contour with a stake. From it, lay out a horizontal line, stretch a cord, and make a furrow with a hoe. Measure the length of the experimental outline with a steel measuring tape and mark its end with a stake. From both ends, in a perpendicular direction, lay out vertical lines along which the width of the experimental outline is measured. Secure the ends with stakes.
With correct corner setting at the four points, the length of the opposite sides of the contour must be the same. The permissible deviation is shown in the table:
| Parameter | Permissible deviation |
| Per 100 m | up to 10 cm |
If it is greater, the corners must be reset. The success of the layout depends on the accuracy of constructing right angles. Setting right angles is most often performed with an optical square, and an octagonal optical square is more convenient to use and more accurate than a mirror one. Right angles can also be constructed using a measuring tape and a cord. Such methods are less accurate and should not be recommended, however, one should be aware of them.
Using a measuring tape, the layout of the experimental plot is carried out as follows. Lay out a horizontal line, along which the length of the experimental contour is measured. Its ends are secured with stakes: in Figure 113, they are marked as points A and B. From point A, in a perpendicular direction, measure 3 m (point C1), and along line AB – 4 m (point B1). If the angle is a right angle, then in accordance with the Pythagorean theorem (the square of the hypotenuse is equal to the sum of the squares of the legs), the straight line connecting points C1 and B1 must be 5 m. Otherwise, the AC line is moved to the left or right until a right angle is established. Then, lay out the vertical line of the contour (AC). The other three corners are set in exactly the same way.
Fig. 113. Constructing a right angle using a measuring tape
A right angle can also be constructed using a cord. Having laid out the front side of the experiment AB, place a stake at point A; along the laid-out line AB, measure 6 m in both directions from point A and place stakes. Take a cord 20 m long (or two 10 m long) and tie a twine exactly in the middle (10 m). Then, tie the ends of the cord to the stakes. Stretch the cord in the direction of the side opposite to AB, and in the resulting angle, at its vertex, place a stake A1, which determines the direction of the AC line at a right angle. For greater accuracy, the right angle is also set in the opposite direction, where a second surveying pole A2 is placed. If the angle is set correctly, points A, A1, and A2 should be located in a straight line at a right angle to AB.
Fig. 114. Constructing right angles using a tape measure and a 20-meter cord
After setting the general contour, proceed to dividing the experimental plot into plots. This work is performed with a measuring tape or a tape measure. When arranging the experiment in a single tier, measure the width of the plots on both sides of the area and mark their boundaries with stakes. The width of the last plot should be the same as the others; otherwise, the work must be redone.
With a 2-tier or multi-tier arrangement, first mark the tiers, including the paths between them, if they are provided. The division into plots can be performed by the following methods:
- for each row individually;
- by marking the width only along the edge lines, followed by placing stakes at intermediate boundaries or paths by laying out straight lines.
Field marking and reliable boundary fixation
The accuracy of field experiment results directly depends on the geometry of the plots. If the experimental plot has a large area and the surveying poles on its boundaries are poorly visible, stretch a layout cord or set up intermediate markers. If a small error occurs during the final layout, do not try to shift the end plot — distribute this difference evenly over the entire length of the experimental plot.
The boundaries of the plots are marked with wooden pegs driven into the soil. The plot numbers are written in graphite pencil strictly on the leftmost pegs, counting from left to right. In a multi-tier layout of the experiment, maintain the same numbering direction in each tier — this reduces the risk of mixing up variants during fertilizer application. Although for subsequent observations it is more convenient to use the shuttle numbering method, for field work the continuous method from left to right is safer.
When establishing a stationary experiment in a crop rotation, first stake out the external contour of the entire array. Then, divide it into crop rotation wedges, providing paths for machinery to pass between them. Only the wedge where the experiment is being established in the current season should be divided into plots.
To restore plot boundaries after ploughing or tillage, be sure to establish permanent reference points. For this, at least two main lines of the experiment should be extended beyond the field being worked — onto road shoulders or the edges of ditches — and fixed there with permanent markers. Exact distances from the reference points to the temporary corner pegs should be recorded in the field logbook.
The most practical type of reference point is a metal pipe with a 60 cm wire welded to it. The pipe is buried in the ground to a depth of 30 cm, and the ends of the wire are brought to the surface. Such a marker does not damage the working parts of soil tillage machinery and allows for the quick location of plot corners.
In long-term experiments, not only the corners of the field but also the boundaries of each plot are fixed with permanent pegs. Sturdy wooden stakes are driven almost flush with the ground in the separation paths, and a metal plaque with the plot number is attached to the top. This allows for quick restoration of the layout in the following season without having to re-measure the entire field.
Calculation of doses and preparation of fertilizers for application
All planned fertilizers must be applied within a single daylight period. Uneven spreading or an error in the mass of the weighed portion will distort the plot yield, reduce the accuracy of the experiment, and lead to latent errors that cannot be corrected or identified mathematically. Calculations are performed strictly based on the active ingredient: nitrogen (N), phosphorus (P₂O₅), and potassium (K₂O).
Standard formulas are used to calculate the mass of fertilizer for one plot (X). If the plot area is greater than 50 m², the result is calculated in kilograms using the formula: X = (a × c) / (100 × b). For small plots of 50 m² or less, the mass of the portion is determined in grams: X = (10 × a × c) / b. In these equations, a represents the application rate of the active ingredient in kg/ha, b is its percentage content in the fertilizer, and c is the plot area in square meters.
The accuracy of weighing portions depends on their final mass. To ensure the reliability of the experiment, use the following standards:
| Mass of portion | Weighing accuracy | Type of scale |
|---|---|---|
| Less than 1 kg | up to 1 g | Technical analytical |
| From 1 to 10 kg | up to 10 g | Technical |
| More than 10 kg | up to 100 g | Technical |
Preparation and packaging of fertilizers are carried out according to a strict algorithm to eliminate confusion in the field:
- Crush all caked fertilizers. Sift powdery fertilizers through a 3 mm mesh sieve, and granulated ones through a 5 mm sieve.
- Measure the portion on a scale of the appropriate accuracy class.
- Pack the portion into a single-use paper or plastic bag.
- Label the package: indicate the type of fertilizer and the mass of the portion (for large bags, insert a label inside and duplicate it on the outside).
- Group the packages by plot, tie them together, or place them in crates for transport to the field.
Calcium nitrate and sodium nitrate must not be mixed with other fertilizers for long-term storage. Due to their high hygroscopicity, these mixtures quickly become damp and cake. Portions of pure ammonium nitrate also should not be stored in pre-packaged form for longer than 2–3 days.
Mixing different types of fertilizers into one package is permitted 2–3 days before work. You can safely combine portions of ammonium nitrate, ammonium sulfate, and urea with superphosphate and potassium salts, if provided for by the experimental scheme. Such advance preparation will save significant time on the day of sowing.
- Length of stakes for plots — 50–60 cm
- Installation depth of wooden reference points — 50–75 cm
- Mesh size for sifting powders — 3 mm
- Mesh size for sifting granules — 5 mm
- Storage period for ammonium nitrate portions — up to 2–3 days
Layout of plots and technique for mineral fertilizer application
Proper field preparation before fertilizer application eliminates the mixing of experimental variants. The work begins with the precise marking of boundaries and verification of the prepared portions. Any error at this stage can distort the research results.
- Mark the boundaries of the plots using a stretched cord or by cutting shallow furrows.
- Lay out the bags with fertilizer portions on the corresponding plots.
- Re-count the bags: their number must exactly match the number of plots, which eliminates any error in the layout.
For manual spreading, use round or oblong metal basins. Small fertilizer portions should be pre-mixed with dry soil taken from the same plot, adjusting the mixture to the same volume for all variants. Perform the spreading in two passes, walking along and across the plot. Always leave a small remainder of fertilizer in the basin to distribute it evenly at the end of the pass.
When working on large plots, divide their area and the fertilizer portion into several equal parts. If there was not enough fertilizer for at least the edge of the plot, it is considered spoiled. Compatible fertilizers are best applied as a mixture, while incompatible ones should be applied strictly separately.
Mechanized application on large plots is performed with small fertilizer drills. To do this, the experimental plots are arranged in a single tier, made elongated, and their width is calculated as a multiple of the drill's working width. First, all replicates with one fertilizer variant are processed, then the drill is thoroughly cleaned, the application rate is reset, and the work proceeds to the next variant. When studying foliar top dressing on plots, solutions are applied manually, while in production trials, aircraft are used.
Specifics of handling organic matter and soil incorporation
The dosage of organic fertilizers per plot is calculated based on the rate per hectare. To increase the accuracy of the experiment, the portion is determined by dry matter using the formula: X = (a × c) / (100 × b), where a is the fertilizer rate in kg, c is the plot area in m², and b is the content of active ingredient in percent. An analysis of the chemical composition is also necessary for the subsequent calculation of nutrient removal and assessment of changes in soil fertility.
If an analysis is not required to calculate the portion, an average sample can be taken directly during weighing by taking portions from each cart or barrow. Before taking samples and portions, organic fertilizers should be thoroughly mixed until completely homogeneous. Weighing is carried out on platform scales in wooden boxes or barrows. Peat and composts are spread with shovels, and semi-decomposed manure is spread with forks.
- Time for taking organic samples — 2–3 days before application
- Minimum plot area for a manure spreader — 500 m²
- Deadline for fertilizer incorporation — on the day of application
All fertilizers for tillage primary tillage of the soil are incorporated with a plough, cultivator, or disc harrows simultaneously across the entire experimental site. Furrows and ridges from ploughing must not fall within the record area of the plots. They are directed to buffer strips or tier boundaries to exclude the influence of terrain irregularities on yield.
Do not leave applied fertilizers on the soil surface. Incorporation must be carried out strictly on the day of application — a delay of even 1 day is unacceptable, especially for organic matter.
To maintain the accuracy of the experiment, the incorporation depth, packing, and harrowing must be absolutely identical on all plots. All work is performed simultaneously using the same implement.
Soil preparation and sowing technique
If tillage or the method of fertilizer incorporation is not part of your research program, treat the entire experimental site or crop rotation block simultaneously. Perform all technological passes of implements strictly across the plots. This will allow for leveling out possible ploughing errors and differences in furrow depth across all experimental variants.
During soil preparation, use only headland ploughing, and turn the tractor outside the experimental site. In stationary experiments, roads between crop rotation fields are used for turns; in standard sowing, free end tracks are used. Any stopping of equipment within the experimental boundaries is strictly prohibited.
| Site element or technological operation | Recommended size |
|---|---|
| Minimum width of turning tracks at the short ends of experimental sites | 10–12 m |
| Width of the dividing track in the center of the site for plough passage | 1–2 m |
| Width of buffer strips to prevent ridges and furrows on the record area | not less than 2 m |
| Distance from the plot boundary for engaging and disengaging the seed drill | no closer than 1 m |
The direction of ploughing depends on the shape of the plots. On elongated plots, the soil is cultivated along the length of the site (across the plots); during the first tillage, the furrow slice is turned in one direction, and during the second, in the opposite direction. On square plots with multi-row placement, ploughing is carried out in two mutually perpendicular directions.
To prevent ridges and furrows from falling into the recorded area of the plots during multi-row placement, plough two rows of plots at once. In this case, the ridge or furrow will fall exactly on their boundary.
Sowing or planting is carried out in one day. Seeders are adjusted to an application rate calculated based on the planned stand density, the weight of 1000 seeds, their germination, and their commercial quality. Sowing is conducted across the long sides of the plots of the entire replication in a single pass — this way, a randomly clogged coulter will affect all variants equally. The first pass of the seeder is made along a stretched string or a marker furrow.
When studying granular fertilizer rates, their application and seed sowing are carried out simultaneously using combined seeders. In such experiments, the plot width is selected to be a multiple of the seeder's working width. The work is performed in a strictly defined sequence:
- Mark the trajectory and stretch the string along which the tractor operator will guide the implement to prevent driving onto adjacent variants.
- Sow the plots along their length, passing through all replications with the first fertilizer rate, then with the second, and so on.
- Monitor the seed sowing rate — it must remain strictly identical across all experimental variants.
- Turn the sowing mechanism on and off outside the experimental site — no closer than 1 m from the plot boundary.
For experiments involving top dressing, it is convenient to use small-scale breeding seeders, which simplify plot layout. When using them, it is sufficient to mark only the front side and the right edge of the experimental field. Sowing is conducted strictly in one direction.
Edge effect and defining the recorded area
Growth conditions for plants at the junctions of plots always differ from those in the center. During ploughing, irrigation, or fertilizer application, a portion of the nutrients inevitably moves to adjacent areas. Furthermore, plant roots can penetrate beyond their own plot.
The edge effect is most pronounced in control plots without fertilizers. Plants on the border of variants can consume nutrients from adjacent, more heavily fertilized areas, which artificially inflates the control metrics.
To compensate for the influence of this factor, the harvest is collected only from the central, recorded part of the plot. The larger the plot area, the more the edge effect is smoothed out and the lower the experimental error. Field layout is planned so that the length and width of the plot are multiples of standard row spacing and plant-to-plant distances.
After completing the sowing, it is mandatory to perform border sowing on the free area around the experiment. Border sowing is performed strictly outside the protective strips of the outermost plots. This helps to equalize the conditions of light and nutrient supply for the edge plants of the experimental variants.
Protective strips are marked out on both sides of the plot boundaries. The dimensions of the protective strips are determined not only by the potential spread of the edge effect (usually, a higher nutrition level does not spread beyond two or three outer rows for grain crops and one row for row crops, whereas fertilizer migration at the border of two plots can cover a wider strip, especially in long-term experiments), but it is also essential to account for the dimensions of the machinery used for fertilizer application, tillage, sowing, plant care, and harvesting.
The minimum width of protective strips is:
| Experiment type | Width from one plot | Total width (from two adjacent) |
| Long-term | 1 m | 2 m |
| Annual | 75 cm | 1.5 m |
Protective strips are tilled, fertilized, and sown along with the entire plot. Plants are cleared from them immediately before harvesting the recorded plots.
For row crops, recorded plots are marked out before harvesting by counting several outer rows and plants. 2–3 days before harvesting and calculating yield, a string is stretched from the stakes defining the plot boundaries, and a specific number of plants are excluded.
For solid-seeded crops, it is more convenient to fix their boundaries in advance. Such marking is performed after emergence, while the plants are still small:
- Measure the width of the protective strip on both sides of the stake separating adjacent plots.
- Drive in stakes on the front and opposite sides of the plot.
- Stretch a twine (thin wire) or use a hoe to strike a 15–20 cm wide strip along the boundary between the recorded plot and the protective strip (towards the protective strip).
A protective strip is mandatory when a plot touches unsown paths, which are often arranged between the sides of plots, tiers, and on the front side of the experiment.
Fig. 115. Layout of protective strips
Border sowing of the experiment also serves as a protective strip. Its width can vary within a wide range, from one to two tens of meters. It is harvested before the plot protective strips or simultaneously with them.
After marking out the protection strips, labels indicating the plot number are installed in front of each plot. A label indicating the research topic is placed at the front of the experiment. There are no specific requirements for labels; they must be painted and of such size that they are clearly visible and can accommodate the necessary information.
Plant care on experimental plots must comply with the crop cultivation technology. All work provided for by the technology is carried out in accordance with the agrotechnical requirements for them. All work must be completed on time, with high quality, and simultaneously (within one day) across the entire experiment or at least within each replication.
Special attention is paid to the control of weeds, pests, and diseases, the development of which significantly affects the results of the experiment. In agrochemical experiments, when controlling plant pests and diseases, it is necessary to choose methods that do not affect the soil nutrient regime and the intensity of nutrient uptake by plants. Thus, in phosphate experiments, one must not use superphosphate to control field slugs or Thomas slag to control flea beetles.
In addition, the following special tasks are performed on the experimental field:
- maintaining pathways and headlands in a clean state;
- trimming plot ends along a cord after seedling emergence.
Pathways and roads on the experimental field, both between individual experimental plots and between crop rotation wedges, are either kept as bare fallow or sown after the completion of spring work with a crop, most often a vetch-oat mixture. Some experimental institutions practice keeping the pathways under sod. This is convenient for driving and walking, but sodded pathways can serve as a breeding ground for all kinds of pests, in particular wireworms.
For a reasoned interpretation of the experiment results, additional data on plant growth and development, soil nutritional regime, and plant growth conditions are necessary. The observations and records carried out to obtain them are called ancillary. Ancillary observations are determined, first of all, by the agricultural crop on which the research is being conducted and the tasks set. The timing and methodology for conducting them are determined at the research planning stage and are reflected in the work program.
A correct explanation of the field experiment results is possible only if there is information about the weather conditions during the experiment. Such information can be obtained from a meteorological station. If the weather station is located in the immediate vicinity of the experimental field, its data can be used for short-term experiments. However, if it is at a significant distance, as well as for long-term experiments, it is necessary to organize basic instrumental observations of the weather.
On permanent experimental plots, observations are primarily organized for the following parameters:
- precipitation (throughout the year);
- air temperature and humidity;
- snow cover (from falling to melting);
- soil surface temperature (during periods when temperature drops that negatively affect seedlings are possible).
Droughts, dry winds, high-intensity precipitation (downpours), hail, and ice crusts must be recorded. Meteorological observations are conducted according to local mean solar time in strict accordance with the methodology of the Hydrometeorological Centre of the Russian Federation.
Weed infestation assessment: from seedling counting to soil excavation
In agrochemical experiments, weeds act as a strong competitive factor, which directly affects the crop's nutrient uptake. Usually, when evaluating the effect of fertilizers, it is sufficient to determine the number and mass of weed vegetation per unit area. However, if the experiment aims to study the influence of nutrition on the infestation itself, botanical composition, or nutrient removal by weeds, the assessment is carried out in detail. In this case, the species composition, projective cover, abundance, character of distribution across the plot, and weed stratification are evaluated.
- Sampling frame size — 0.25 or 0.3 m²
- Plot density — 1 unit per 10 m² of the plot
- Minimum for small plots — 3 sampling points
- Mass of the grass sample sheaf — 5–6 kg
Quantitative accounting is carried out by placing rectangular or square sampling frames. The frames are distributed across the plot in a randomized (random) way. On small plots, counts are performed in at least three places. During visual estimation, the degree of weed plant spread is converted into points according to the projective cover scale.
| Score | Share of plot area occupied by weeds |
|---|---|
| 1 | up to 1% |
| 2 | 1–5% |
| 3 | 5–25% |
| 4 | 25–50% |
| 5 | more than 50% |
Weed stratification is determined visually in relation to cultural plants: above them, on a level with them, up to half the height, or below the cutting level of the harvesting machine. The height of weeds is recorded by dominant species. The mass of the above-ground part is expressed in grams per 1 m² in three values: fresh mass (living plants), air-dry mass, and absolutely dry mass.
To conduct a detailed analysis of the potential weed infestation of the topsoil, the reserve of weed seeds and vegetative reproductive organs in the soil is evaluated. Samples are taken using a Shevelev auger, after which the seeds and fruits are isolated using chemical solutions. When working with perennial grasses, crop infestation is determined using a 5–6 kg trial sheaf sampled during hay yield calculations. During the assessment process, it is mandatory to note the weed development stages: emergence, rosettes, stem elongation, budding, heading, flowering, seed ripening, or drying.
If the research program does not provide for the study of the influence of fertilizers on weed vegetation, all weeds from the experimental plots must be removed regularly to avoid distorting the results of the experiment.
Phytopathological control and phenological observations
Diseases and pests can significantly reduce the responsiveness of plants to fertilizers and distort the results of the experiment. Standard methodology for conducting a field experiment requires mandatory implementation of plant protection measures. However, if the purpose of the research is to study the effect of nutrition on crop resistance to pathogens, the intensity of their development is evaluated in detail.
For a detailed assessment of crop damage by diseases and pests, it is advisable to involve specialized experts in plant protection. The diagnosis of pathogens and the counting of their populations require specific knowledge of the biology of harmful objects.
The prevalence of diseases and pests is evaluated at different plant development stages using a sampling method, usually visually. It is expressed as a percentage of affected organs (ears, panicles, cobs) or as a percentage of the area occupied by diseased plants. In case of mixed crop damage by several types of harmful objects, a single five-point scale is used.
| Score | Degree of crop damage and infestation |
|---|---|
| 0 | No damage |
| 1 | Individual plants damaged (up to 10%) |
| 2 | 10% to 25% of plants damaged |
| 3 | 25% to 50% of plants damaged |
| 4 | 50% to 75% of plants damaged |
| 5 | Over 75% of plants damaged |
Observations of growth and development make it possible to track how various fertilizer options affect the speed of passing through growing seasons. For this purpose, regular recording of the onset of phenological phases is carried out. Accurate accounting helps to assess shifts in crop ripening under the influence of nutrients.
- Take the beginning of a phase as the day when visual signs are observed in at least 10% of the plants in the plot.
- Register the mass onset of a phase on the day it occurred in 50% (for some crops — 75%) of plants.
For cereal crops (grains, corn, rice), the following phases must be recorded: emergence, tillering, jointing, heading or panicle emergence, flowering, as well as milk, wax, and full maturity. For winter crops, dates of the end of autumn and the beginning of spring growing season are additionally noted. In crops of perennial grasses, the beginning of spring regrowth during repeated use, harvesting maturity, and senescence (end of growing season) are monitored.
How to properly record phenological phases and growth dynamics
Phenological observations allow for evaluating the nature and duration of the effect of fertilizers on a crop. By comparing experimental options with each other and with the control, the agronomist sees how nutrition affects the speed of passing through individual development phases. For each type of crop, a specific set of stages mandatory for recording is defined:
- Legumes (peas, beans, broad beans, lentils, vetch): emergence, beginning of lateral shoot formation, inflorescence formation, flowering, ripening. For forage legumes, harvesting maturity and plant senescence (end of growing season) are additionally noted; for perennial ones — also the resumption of growth in spring.
- Sugar beet and other root crops: emergence (cotyledon stage), first pair of true leaves, third true leaf, beginning of hypocotyl thickening, leaf canopy closure in rows, canopy closure between rows, canopy opening between rows, wilting of outer leaves.
- Potato: emergence, inflorescence formation, end of flowering, wilting of tops.
- Soybean: emergence, first true leaf, third true leaf, lateral shoot formation, flowering, ripening.
- Castor bean: emergence, first leaf, third leaf, inflorescence formation, flowering, ripening.
- Sunflower: emergence, head formation (upon reaching a head diameter of 20–25 cm), flowering, yellow head, ripening.
- Tobacco: emergence, first true leaf, third true leaf, inflorescence formation, flowering.
- Buckwheat and hemp: emergence, beginning of stem growth (not noted for buckwheat), inflorescence formation, flowering, ripening.
- Flax: emergence, beginning of stem growth, inflorescence formation, flowering, green and full seed maturity.
- Mustard: emergence, rosette, budding, beginning of flowering, end of flowering, beginning of ripening.
- Cotton: emergence, third leaf, budding, flowering, opening of the first bolls, cessation of growing season.
Record any differences in plant development immediately, as they may level out over time. For example, seed treatment of rice with micronutrients stimulates vigorous early growth and produces dense emergence. However, due to subsequent competition, some plants die, and by the time of harvesting, without early observations, this positive effect might simply go unnoticed.
In addition to the main development phases, be sure to record visual changes in crop condition: changes in leaf color, wilting and drying, abscission of fruit set, as well as lodging.
Methodology for quantitative assessments and damage evaluation
To accurately assess the effect of fertilizers, quantitative indicators of plant development are required. These include field emergence, plant density, number of productive stems, plant height, root length, and dry matter accumulation dynamics. These parameters are measured on specifically marked plots at several points within each experimental unit.
- Length of adjacent rows for grain crops counting — 111 cm
- Sample size for determining plant height — 20–50 items
- Area of plots for dry mass sampling — 0.25–1.0 m²
- Critical plant loss for discarding a plot — more than 50%
Density counts are conducted after emergence, before harvesting, and for grasses — after each cut (for perennial grasses, also after the resumption of the growing season in spring). The area of the recording plots is chosen based on soil heterogeneity and the size of the experimental units. For grain crops with standard row spacing, counting is performed in three locations of the unit on two adjacent rows 111 cm in length, after which the average value is converted to 1 m².
- In autumn, before plants enter winter dormancy, count their number in the rows marked with pegs.
- In spring, after the resumption of the growing season, recount the number of surviving plants in the same areas.
- Calculate the percentage of surviving plants relative to the autumn count to assess winter hardiness.
- Measure all patches of winter-killing, soaking, or freezing and map their boundaries on the experiment plan.
The average plant height is determined by measuring 20 to 50 specimens. The dynamics of dry matter accumulation are tracked according to development phases or strictly according to calendar dates (every few days, week, or decade). Samples are taken from test plots or rows with an area of 0.25–1.0 m² with subsequent calculation of dry weight per 1 m² or per plant.
In case of adverse weather conditions or mechanical damage, the proportion of affected plants is estimated as a percentage of the plot area or their initial number. If more than half of the plants have died in a plot, it is completely excluded from yield estimation. The degree of crop lodging is evaluated using a special scale of suitability for mechanized harvesting.
| Rating, points | Crop condition characteristics |
|---|---|
| 5 | Plot is suitable for mechanized harvesting, harvested completely without losses |
| 4 | Mechanized harvesting is partially hindered |
Assessment of lodging and wintering monitoring of winter crops
Crop lodging significantly complicates harvesting and directly leads to harvest losses. To accurately plan the harvesting campaign and assess the condition of plants in experimental units, unified rating scales are used. The first scale determines the technical feasibility of mechanical operations, and the second records the proportion of lodged plants.
| Point | Possibility of mechanized harvesting |
|---|---|
| 3 | Harvesting is possible with special attachments for lodged crops, but yield losses are likely |
| 2 | Mechanized harvesting is possible only in one direction with an attachment for harvesting lodged crops |
| 1 | Mechanized harvesting is impossible |
| Point | Proportion of lodged plants in the plot |
|---|---|
| 5 | No lodging, plants are standing vertically |
| 4 | Less than 25% of plants are lodged |
| 3 | Between 25% and 50% of plants are lodged |
| 2 | More than 50% of plants are lodged |
| 1 | Plants are completely lying on the ground |
The winter period is a critical stage for winter crops and perennial grasses. Crops can perish from freezing, smothering (winter-kill under snow), soaking, ice crusting, as well as wind and water erosion. Freezing occurs more frequently during dry autumns, absence of snow cover, and low temperatures, and in spring — during late frosts. Smothering threatens plants when a thick layer of snow settles on warm, unfrozen soil.
Soaking of crops due to stagnant meltwater and rainwater in low-lying areas or rising soil moisture levels is dangerous due to oxygen deficiency. Without air access, plants die quickly, so such patches must be recorded separately.
To monitor wintering, an exact count of plants in the plots is conducted before they enter winter dormancy — this is the baseline for all subsequent calculations. Plant viability during winter months is monitored using the monolith sampling method.
- Size of monolith — 25╳25 cm
- Depth of monolith — deeper than the plough layer
- Timelines for winter crops — from December 25, monthly
- Timelines for perennial grasses — from December 10, monthly
The extracted monoliths are brought to the laboratory and grown under optimal temperature, humidity, and lighting conditions. Viability is assessed by the percentage of regrown plants. In spring, the condition of the crops is re-checked by counting live and dead plants in the marked areas.
Methodology for sampling plant material during the growing season
To evaluate the effect of agrochemical practices on plants during the growing season, plant samples are collected. A composite sample must reflect the actual state of the crops in the experimental plot. Therefore, samples are taken only from typical areas where there are no gaps, thinning, or local waterlogging not related to the factors being studied.
Samples are collected from all experimental variants and replicates. In large-scale trials, it is permissible to take samples from only two non-adjacent replicates or to limit sampling to the most contrasting variants.
- In the selected plots, mark out four areas of at least 4 m² each with pegs.
- Position the areas along the edges of the plot, staying at least 0.5 m away from the guard strip.
- Cut samples in 0.25 m² squares. For wide-row sowing of grain crops (with 15 cm row spacing), collect samples from two rows 0.83 m in length.
- Carefully remove the plants from the soil, maintaining their complete integrity, shake or wash the soil from the roots, and tie them into a sheaf with a label.
- Combine all four sheaves from the plot into one general sheaf representing 1 m² and attach a final label indicating the development phase and the date.
In the laboratory, weeds are removed from the delivered sheaves, counted, and the fresh and dry mass of the weed component is weighed. Afterward, the number of crop plants is counted, and their height and tillering capacity are measured. If provided for by the research program, the plants are separated into vegetative and generative organs, weighed fresh, and dried in an oven until a constant mass is reached.
If the fresh mass of the sheaves from one plot differs by more than 50%, sampling for this variant must be repeated on the same or the following day.
After drying and weighing the sheaves, a composite sample weighing 200–250 g is formed for chemical analysis. To obtain accurate biochemical data, it is recommended to separate fresh plants into leaves, stems, ears (panicles or cobs), and grain immediately after field collection. In this case, the ratio of organs is determined in both fresh and dry form, and chemical analysis is conducted for each part separately.
Rules for soil sampling in the experimental plot
To assess the dynamics of soil fertility and correctly interpret experiment results, regular chemical analysis of the soil is necessary. The first background samples are collected immediately after dividing the area into plots, but strictly before fertilizer application. Subsequently, the state of the soil is monitored throughout the growing season and at the end of the experiment, comparing new data with baseline indicators to record any positive or negative changes.
Collection of soil and plant samples for analysis is strictly prohibited on the record area of the plot intended for yield determination. To avoid increasing the total area of the experiment, combine measurements: for example, on the same plants, one can assess height, dynamics of dry matter accumulation, and conduct chemical analysis of biomass.
The methodology for the geographic network of fertilizer trials mandates a strict sampling scheme. Before fertilizer application, soil is taken from every single plot without exception. After fertilizer application, sowing, or planting, samples are collected from at least two non-adjacent (non-touching) replicates, while on the remaining replicates, 4–6 additional samples are taken, distributing them evenly across the experimental area. If the research program includes simultaneous plant sampling, then soil samples are taken directly from under the root system of the dug-up plants.
- Arable layer depth — 0–20–25 cm
- Mass of composite soil sample — 300–400 g
- Sampling points per plot — from 5 to 10
- Number of individual auger penetrations — from 5 to 20
For this work, stick augers or Osipov soil augers (models BOP-30-140 and BOP-30-70) are used. In their absence, standard spade shovels may be used. In this case, the technique of manual soil mixing must be strictly followed to obtain a representative sample.
- Dig up soil with a shovel at the marked point of the plot and pour it onto a plastic sheet.
- Thoroughly mix the soil and take a composite sample of a strictly defined volume into a bag or box.
- Repeat the procedure at 5–10 points distributed evenly along the entire length of the plot.
- Combine all individual samples into a total mass, mix it thoroughly, and separate a composite mixed sample weighing 300–400 g.
Preparation and conducting of harvest recording
Yield is the main integrated indicator of the effectiveness of any factor being studied. The reliability of the entire experiment depends on the accuracy of harvesting, so the slightest negligence at this stage can completely devalue the results of the work. The main requirement when harvesting experimental plots is adherence to the principle of simultaneity and uniformity of all operations.
- A few days before the start of harvesting, inspect the experimental plots and clearly mark the boundaries between the recorded area and the guard strips using cords or markers.
- Harvest the guard strips first: mow or reap the plants of broadcast crops, and for row crops, remove the plants from the edge guard rows.
- Completely remove the mowed mass of the guard strips from the field to exclude any accidental contamination or mixing with the harvest from the recorded plots.
- Re-inspect the recorded plots immediately before harvesting to identify and register damaged plants.
If localized damage is detected on the plots, "cut-outs" are performed — the affected parts of the area are excluded from the records. If more than 50% of the recorded plot area is damaged by random factors, it is completely discarded. Such measures are resorted to only in the presence of documented force majeure circumstances.
The basis for a cut-out or discarding a plot can only be objective external causes recorded in the logbook at the time they occurred: waterlogging of the soil, damage by rodents, birds, or livestock, as well as technical errors during sowing or fertilizer application. It is strictly forbidden to discard plots based on a subjective opinion about the "unevenness" of the stand.
How to adjust data for sparse crops
If part of the plants on a plot died during the growing season, these losses must be compensated for when calculating the yield. For broadcast crops, damaged areas are marked with pegs and string and measured. It is more convenient to make rectangular cut-outs, excluding a fixed part of the plot — half, a third, or a quarter — from the records. If the plot area is less than 20 m², cut-outs are not performed; instead, it is discarded entirely (provided there is a sufficient number of replicates). The mass mowed from the damaged areas is removed from the experiment, and the yield is calculated based on the actually harvested area.
Yield adjustment due to plant loss can only be performed if the sparseness is not related to the effect of the studied factor and does not exceed 20–30%. In cases of more severe plant loss, the plot is completely excluded from the records.
For row crops, all surviving and lost plants are counted before harvesting. The adjustment method depends on when exactly the plants died. If the loss occurred shortly before harvest (late loss), neighboring plants do not have enough time to compensate for the vacated nutritional area. In this case, one of two recalculation methods is used, both of which yield the same result.
| Calculation parameter | Method 1: by plant productivity | Method 2: by actual area |
|---|---|---|
| Planned number of plants per plot (Pp) | 500 units | 500 units |
| Actual number of plants at harvest (Ph) | 462 units | 462 units |
| Mass of actually harvested yield (A) | 452 kg | 452 kg |
| Total plot area | — | 100 m² |
| Nutritional area of 1 plant at full density | — | 0.2 m² (100 / 500) |
| Actual recorded area | — | 92.4 m² (462 × 0.2) |
| Final adjusted yield | 489.2 kg (452 × 500 / 462) or 48.9 t/ha | 48.9 t/ha (452 / 92.4 × 100) |
In the case of early plant loss, neighboring specimens receive additional nutritional area, light, and soil moisture, so they develop stronger than usual. Recalculation by average weight in this case will give an overestimated result. To avoid error, all plants that were directly bordering empty spaces in the rows are completely removed from the plot before harvesting. Only those plants that developed under standard nutritional conditions are counted. Their average weight is multiplied by the planned number of plants, restoring the true yield of the plot.
If plants did not die in isolated points, but in whole patches or rows, adjustments based on average weight or nutritional area are not applied. In such cases, standard rectangular cut-outs are made.
Direct and indirect methods of yield recording
Two approaches are used to determine yield: direct (harvesting the entire plot area) and indirect (taking an average sample). The choice depends on the technical capabilities and the goals of the experiment. The direct method of harvesting begins when the crop is fully mature across all variants, unless the rate of maturation is the subject of the study. One should strive to complete all work in one day, or in extreme cases, harvest by full replicates.
- Sparsity threshold for adjustments — 20–30%
- Minimum plot area for cut-outs — 20 m²
- Size of sample sheaf from harvest mass — 1–2%
- Accuracy of sheaf weighing — 10 g
With manual direct harvesting, it is crucial to maintain a consistent cutting height and work cleanliness. To achieve this, the entire team moves sequentially from one plot to another, or a single laboratory assistant harvests an entire replicate. With mechanized harvesting, the entire experiment is mowed by the same machine with unchanged adjustment and speed settings. If variants mature at different times, they are harvested as they reach full maturity.
The indirect method using a sample sheaf allows for avoiding the threshing of the entire green or grain mass from the plot. It is sufficient to determine the ratio of grain to straw in an average sample, and then recalculate the total mass. The technology for selecting a sample sheaf consists of the following steps:
- Mow the plants on the recorded area of the plot and leave them at the cutting site.
- Walk diagonally across the plot and manually select plants for an average sample. It is important that this selection on all experimental plots is performed by the same person (a laboratory assistant or an agrochemical technician).
- Tie the selected plants into one or two sample sheaves. The second sheaf is formed independently as a backup in case the first one is lost or damaged.
- Tie and weigh the remaining plant mass on the plot together with the sample sheaf to determine the total harvest weight. After this, the bulk mass can be sent for farm use.
- Weigh the sample sheaf separately on specialized scales with an accuracy of up to 10 grams, pack it into a bag, and send it for analysis and threshing.
Sample sheaves with labels are placed in bags or other containers and taken to a special room or under a shed, where they are dried to a constant mass. To determine the threshing time, the sheaves are periodically weighed. Final weighing and threshing are performed after the loss in weight ceases. Depending on the weather, the sheaves dry in 7–14 days. If drying was carried out in dryers, it is necessary to keep them in a shed for 1–2 days again before the final weighing so that they reach a constant weight. After the sample sheaves have dried to an air-dry state, they are weighed together with the bag, threshed by any available method, and the grain and the bag are weighed. The straw mass is determined by the difference between the total mass and the grain. All weighings are recorded in a field journal, and the harvest of the sample sheaf is recalculated to the harvest of the recorded plot and per hectare. The grain (straw) harvest from the recorded area (Y) is calculated using the formula:
Y = A·B/C, kg/plot, where: A – total harvest mass from the recorded plot, including sample sheaves, kg;
B – total mass of the raw (weighed in the field during selection) sample sheaf, kg;
C – mass of grain (straw) from the sample sheaf after drying, kg.
The harvest from the plot is recalculated per 1 ha.
Other indirect methods of harvest recording are based on taking sample plots, strips, furrows, etc., within the experimental plot, which characterize the harvest of the entire plot with greater or lesser accuracy. Their fundamental difference from the sample sheaf method is that the plants remaining on the plot are not harvested separately, i.e., they are harvested for farm use for all plots together. Essentially, everything comes down to reducing the size of the plot's recorded area. All these harvest recording methods have low accuracy and are almost never used in stationary experiments.
The most common modifications of the indirect method are yield recording by sample plots, strips, furrows, and rows. Recording the harvest by sample plots is carried out as follows. Frames limiting 0.5 or 1 m2 of the crop are laid out diagonally across the recorded area. The total area of such plots should be 5–10% of the total plot area. The plants mown from the plot are combined into one sheaf, a label is attached, and they are taken to a drying shed. After drying to a constant mass, the sheaf is weighed, threshed, the grain is weighed, and the straw mass is determined by the difference. The harvest from the sample plot is recalculated per 1 ha.
When recording by sample rows and furrows (the linear meter method), 1-meter-long rulers are placed diagonally or in a checkerboard pattern on the recorded area of the plot. Plants from two adjacent rows located along the ruler are harvested. The harvested plants are dried, threshed, weighed, and the harvest per linear meter of the row is determined. By multiplying the harvest from 1 row by the row spacing, the recorded area is determined, and then it is recalculated to the yield per 1 hectare. You can use the formula:
Y = A/B 10000 kg/ha (c/ha, t/ha), where: A – grain mass from 1 row, kg (c, t);
B – row spacing, m.
The main advantage of indirect harvest recording is the ability to avoid the need for large rooms to store plot-specific harvests until threshing, as well as a reduction in labor and financial costs for harvesting. It is indispensable when conducting a large number of experiments in production conditions and allows for transporting sample sheaves over a considerable distance and processing them in a suitable environment. There is no consensus on the accuracy of such recording. Due to the reduction in losses, it usually yields slightly higher absolute figures (closer to the potential productivity). Indirect yield recording provides a sufficiently accurate assessment when the experiment is set up on large plots. If the plot area does not exceed 10–20 m2, only direct yield recording is mandatory.
For all methods of assessment, yield is recalculated to standard moisture and purity indicators. For instance, the grain yield of cereals is adjusted to 14% moisture and 100% purity. The following formula is used for the recalculation:
U f (100 H f)(100 P)
100 (100 - H st) where U – grain yield at standard moisture, centners/ha (t/ha);
Uf – grain yield at actual moisture during harvesting, centners/ha (t/ha);
P – grain impurity, %;
Hf – actual moisture of grain during harvesting, %;
Hst – standard moisture of grain, %.
Cereals and other solid-sown crops. When harvesting with a reaper, sickles, or scythes, the mown mass is left on the plot. Using a reaper makes sense if the plot size is at least 200–300 m2. Each plot is harvested separately in one or more passes. It is more convenient to harvest several plots in a row (in one pass of the reaper), for example, one replication. It is necessary to ensure that the harvest does not move from one plot to another.
The harvest from each experimental plot is tied up immediately, the sheaves are counted and stacked into stooks. On the labels, of which there must be at least 2, the following is written with a graphite pencil:
- name of the experiment;
- variant;
- replication;
- plot number;
- sheaf number;
- total number of sheaves.
If the weather permits, the sheaves are dried in the field. Otherwise, they are immediately transported to a sheaf shed. When transporting the harvest to the shed, caution must be exercised to prevent losses. It is advisable to place the sheaves from one plot into a separate bag or box. When transporting harvests from several plots simultaneously, they must be covered with a tarpaulin to prevent losses and the mixing of grain.
When storing sheaves until threshing, all measures should be taken to eliminate the possibility of harvest losses, the mixing of grain from different plots and experiments, and destruction by birds and rodents. This requires special premises (sheaf sheds) with a large number of compartments or bins, ensuring not only the storage of sheaves but also their final drying.
Harvesting cereals: manual threshing and combine operation
Accurate harvest assessment on experimental plots requires strict adherence to the protocol to prevent the mixing of grain from different variants. In traditional harvesting using the sheaf method, the total harvest is weighed immediately before threshing, ensuring the number of sheaves is checked against the records on the labels. Small-scale selection threshers are used for threshing, which are adjusted for maximum separation of grain from straw and minimal seed injury.
- Check the actual number of sheaves against the records on the plot label and weigh the entire sheaf mass before threshing.
- Adjust the thresher to the optimal operating mode for the specific crop, ensuring clean grain separation and minimal losses.
- Run the thresher at idle after each plot (the time is determined empirically) and clean it completely of residual grain to avoid mixing variants.
- Clean the grain mass on a winnower with a minimal set of sieves if the thresher is not equipped with a built-in aspirator.
- Weigh the clean grain and take an average sample for laboratory analysis.
Straw and chaff are generally not weighed separately under the sheaf method. Their total mass is determined by calculation, subtracting the weight of clean grain from the initial weight of the sheaf before threshing. If, due to the conditions of the experiment, it is impossible to use a combine on standing crops, the plants are mown by hand, and the combine is used as a stationary thresher.
- Standard grain moisture — 14–15%
- Average grain sample for analysis — 2–3 kg
The use of small-scale self-propelled combines significantly speeds up harvesting, eliminates manual transportation of sheaves, and reduces experimental error. The main condition is that the width of the plot's harvest area must correspond to the cutting width of the header or be a multiple of it. The established speed and technological mode of the combine's operation must be strictly maintained throughout the entire harvesting of the experimental site.
Before starting the combine harvest, be sure to mow all buffer strips: around the experiment, between replications, and between plots. With randomized plot placement, turn the combine around outside the experimental site and be sure to maintain an idle run pause when moving from plot to plot until the grain has completely stopped entering the receiving hopper.
Harvesting of grasses, potatoes, and root crops
When assessing the harvest of annual and perennial grasses (vetch, clover, meadow mixtures), the methodology is chosen based on weather conditions. In dry weather, the mown mass is dried directly on the plots and the finished hay is weighed right in the field. During rainy periods, an indirect method is used: the entire raw mass of the plot is weighed immediately after mowing, a trial sheaf is taken, its botanical composition and the ratio of components are determined, and the dry mass yield is calculated after drying this sheaf.
When harvesting potatoes and root crops, all plants are dug up from the recorded plot area. Before weighing, the moist produce is spread out in a thin layer for several hours to dry, and then cleaned of adhering soil by shaking on a hand-held screen. The harvest is weighed directly on the plots using crates or special stretchers with a crate, which minimizes the risk of confusing labels.
If the weighing of potatoes is moved to a storage facility, the bags are marked with two labels written in pencil: one label is placed inside the bag, and the second is securely tied to the outside. The labels must indicate the name of the experiment, plot number, treatment, replication, bag number, and the total number of bags from that plot.
To determine the net weight of the harvest when tubers or root crops are heavily soiled with soil, the sample washing method is used. The weight of such a technological sample is strictly regulated by the experimental methodology. After washing the sample with water, the net yield is calculated excluding the adhering soil.
| Object of study | Sample mass for net yield determination, kg |
|---|---|
| Potatoes and root crops | 20 |
To carry out supporting quality analyses, an average sample of tubers or root crops is taken. It is formed so that the ratio of large, medium, and small fractions precisely corresponds to the structure of the harvest collected from the plot. The average sample mass for potatoes is 10–15 kg, and for root crops — several dozen roots. If the experimental program provides for recording the haulm, it is weighed separately, taking samples for humidity if necessary due to uneven drying of leaves across different treatments.
In the indirect method of harvest recording, the number of plants on the entire recorded plot area is counted. At least 20 plants are harvested. Excess soil is cleaned off, and the haulm and productive part (tubers, root crops) are weighed. By determining the mass of 1 plant and multiplying by their number, the yield from the recorded plot area is determined.
Recording the harvest of multi-harvest vegetable crops (cucumber, tomato, cauliflower, pepper, melon, watermelon) is carried out as follows. As the fruits ripen, they are collected and weighed. To determine the total yield, the harvest of all pickings during the growing season is summed up. During harvesting, vegetable crops are sorted into marketable and non-marketable produce.
Recording the harvest of fiber crops (flax, hemp) is generally similar to recording grain crops and can be carried out both by total mass and by a test sheaf. However, if the fiber yield is to be determined from this average sample, it must be at least 30 kg (in a raw state) and tied into several sheaves rather than one. Therefore, recording by test sheaves is meaningful for these crops only on plots with an area ≥100 m2. The straw of fiber crops must be weighed immediately after threshing, rather than determined by difference.
Primary processing of digital material. A prerequisite for the correctness of all calculations for the experiment is the presence of high-quality and orderly source data obtained directly when weighing harvests in the field and in the sheaf shed or laboratory. All weighing results are recorded in the field logbook, where appropriate columns are allocated for them. The yield for each plot is converted into centners per hectare. Then, for each treatment, they are summed up by replications.
These data are subjected to mathematical processing using methods of variation statistics provided for in the program. 1006
Documentation. The primary documents for each field experiment are the "Field Work and Observation Diary" and workbooks. All work and observations, as well as data from all records, are recorded in the diary; all necessary records of mass observations, analyses, and accounts are kept in the workbooks. Entries in the "Field Work and Observation Diary" are made in pencil; all corrections must be specified.
The main document including all information about the field experiment: topic, rationale of the experiment and objectives, scheme, program, plan, characteristics of the experimental site, research methodology, records of all agronomic operations, processed results of observations and analyses, yield data, results of statistical processing of yield data, and other information, is the field logbook. The logbook is kept on the premises, and all entries in it are made in a timely manner, filling it out based on primary documentation with dark ink.
On rice crop rotations, field experiments are conducted on large plots (checks and blocks) and calculated in such a way as to protect the crops of associated crops from flooding, waterlogging, and death. One of the main requirements when establishing field experiments is the uniformity of the plot in terms of soil fertility. The latter is most important, as rice cultivation is preceded by careful field leveling ±5 cm, and when setting up experiments, even ±3 cm is desirable. In this process, the natural soil fertility is disturbed. In places where the arable soil horizon is cut, it decreases, and the more so, the deeper the cut. Even the use of baffle leveling works does not completely eliminate the patchiness of soil fertility due to the capital leveling of rice fields.
Consequently, the main requirement for an experimental plot, namely its uniformity in terms of soil fertility, is often not met in rice cultivation, and this must be accepted as an inevitable evil. To improve the accuracy of experimental work under these conditions, it is necessary to use only the strip method of land leveling on rice fields allocated for experimental plots.
Before establishing small-plot agrotechnical and stationary experiments, uniform sowing of rice is required, with harvest accounting carried out in fractional areas, which provides a full characterization of the irrigation check according to the level of soil fertility:
| Accounting area | 50–100 m2 |
Nitrogen fertilizers applied to rice in the form of ammonium sulfate, as well as phosphorus and potassium fertilizers, are well absorbed by the soil and localized at the points of application. Therefore, when setting up short-term experiments with fertilizers, no differentiation between experimental variants is required.
In long-term stationary experiments with annual tillage (its partial displacement), as well as as a result of constant manipulation of the water layer during the irrigation period of rice and associated crops of the rice crop rotation, and due to water discharge during the application of herbicides, the migration of fertilizers becomes significant. Under these conditions, it is necessary to:
- provide reliable separation of variants and replicates with earthen ridges or synthetic material;
- separate variants in small- and micro-plot experiments with growth regulators and pesticides.
When studying experimental rice crop rotations (in space), it is necessary that fallow and grass fields are protected from flooding by groundwater and seepage water in order to prevent waterlogging and the death of associated crops. This is achieved by setting up experiments on large areas, lining irrigation canals, and having an effectively operating drainage system (discharge canals, collectors).
Read next
Agrochemistry For students
Organization and methodology of conducting agrochemical field experiments
Agrochemistry For students
Methodology of analysis of variance for three-factor field experiments in agronomy
Agrochemistry For students