
Pruning techniques for fruit trees and rules for using garden tools
3 min read
The quality of pruning directly affects the speed of wound healing and the proper development of the tree canopy. Errors in cutting technique lead to bud desiccation, shoot deformation, and general weakening of the plant. To avoid these problems, it is necessary to strictly follow technical parameters for each operation — from shortening annual growth to removing skeletal branches.
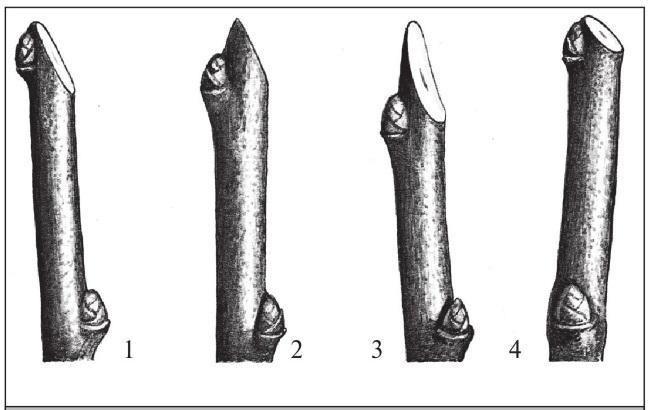
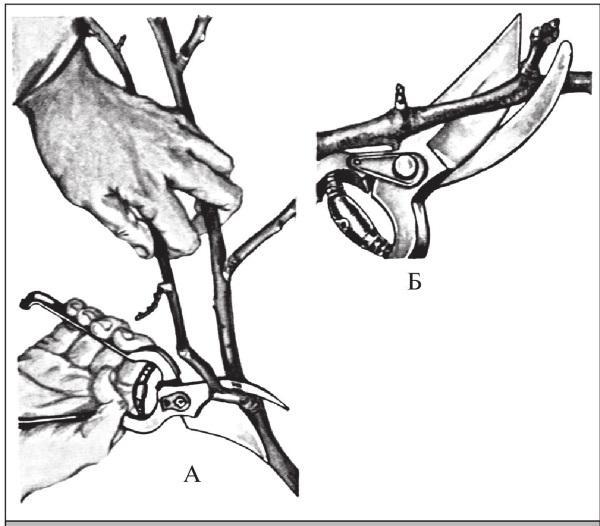
When shortening shoots, a cut is made to a bud at an angle. Its lower edge should be slightly above the base level of the bud, and the upper edge should be at the same distance above its apex. Any deviations from these rules disrupt the distribution of nutrients and interfere with the normal growth of the new shoot.
- Cut angle — 45°
- Lower edge above the bud base — up to 2 mm
- Upper edge above the bud apex — up to 2 mm
Do not start the cut too low, otherwise, the wound will be elongated, and the bud will dry out or produce a weak shoot. If the cut is too high, the new shoot will deviate from the vertical, and the remaining stub will dry out and hinder wound healing. On branches where deviation is undesirable, a stub should not be left; it is kept only during winter pruning to protect the bud from frost or when creating protective links.
Selection and rules for using garden tools
Small branches are shortened and removed at the collar using a garden knife or pruners. The tool must be sharply honed; otherwise, it will crush the plant tissues and prolong the tree's recovery period. When using a garden knife, it is important to secure the branch properly and make smooth, jerky-free movements.
- Slightly bend the branch to be removed in the direction opposite to the start of the cut.
- Support the branch being pruned with your left hand below the cut site.
- With your right hand, make the cut with a sharp motion toward yourself.
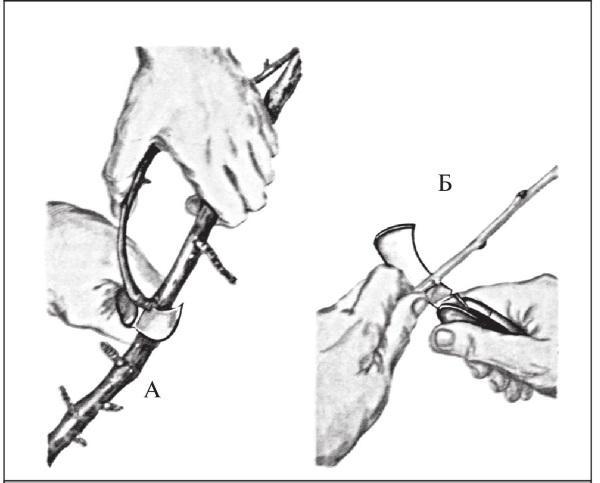
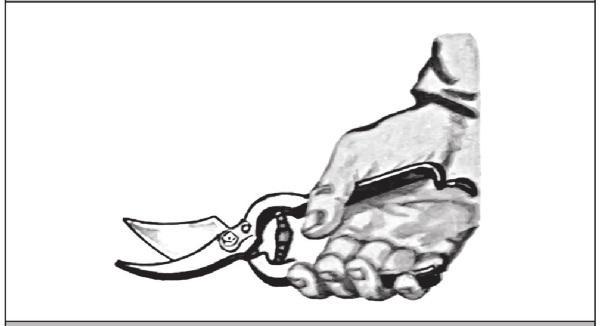
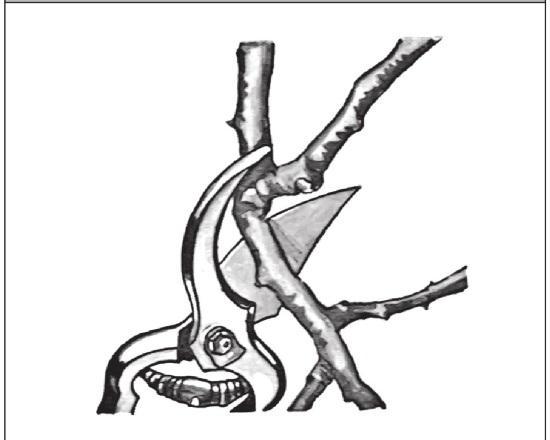
When using pruners, ensure the tool does not skew or twist in your hand. Always direct its wide, sharp part toward the part of the branch that is being left. The counter-cutting blade of the pruners is thicker than the blade and inevitably crushes the tissues, so all damage must remain on the part of the branch being removed.
Never direct the pruner blade along the wood grain to avoid splitting the branch. In all cases, make the cut strictly across the grain.
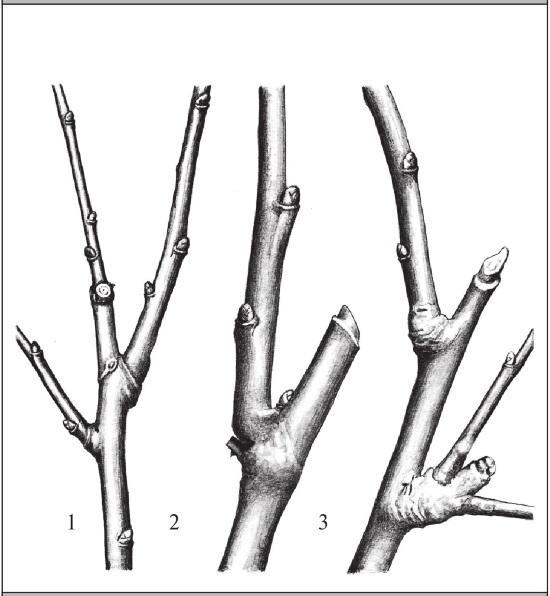
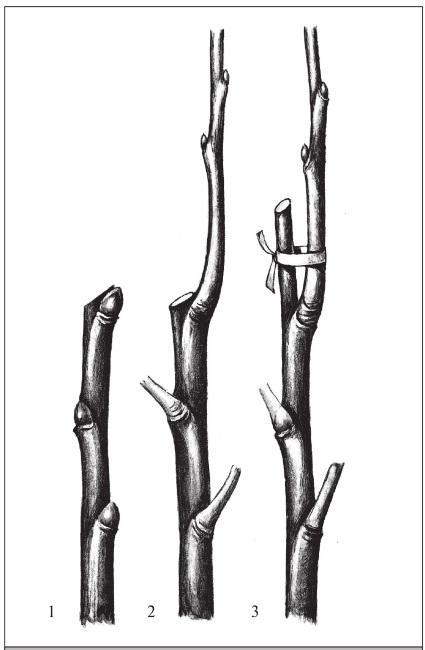
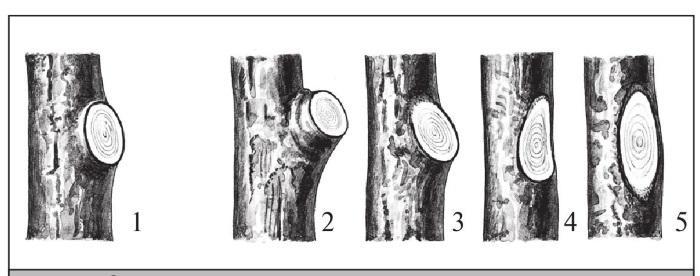
Large branches must not be removed with a knife or pruners to avoid jagged wounds that rot slowly. Such branches should be sawed off with a garden saw strictly along the top of the branch collar. It is sufficient to support a thin branch with your free hand while sawing, whereas a heavy one is removed in several stages. Following the three-step sawing technique prevents dangerous bark and wood tearing, which creates massive non-healing wounds on the trunk.
- Make the first cut from below at a distance of 25–30 cm from the base of the branch and continue until the saw blade begins to bind.
- Make the second cut from above, 3–5 cm closer to the trunk relative to the first cut, and remove the main part of the branch.
- Carefully saw off the remaining stub along the branch collar while supporting it with your hand.
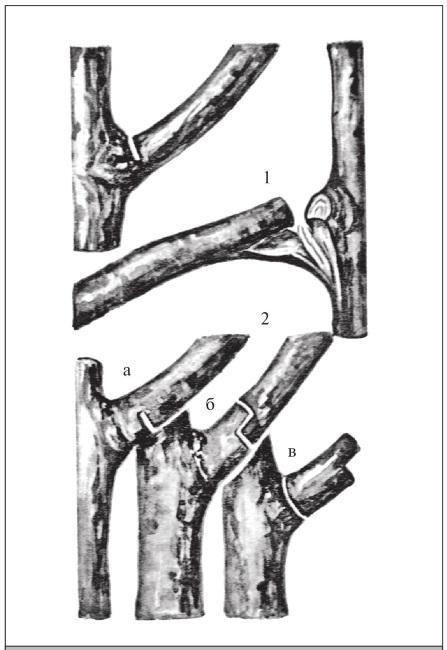
You must not leave stubs on the central leader and at the base of the main branches, as they rot and promote the formation of cavities. Also, do not make the cut parallel to the trunk – in this case, the wound becomes larger and heals with difficulty.
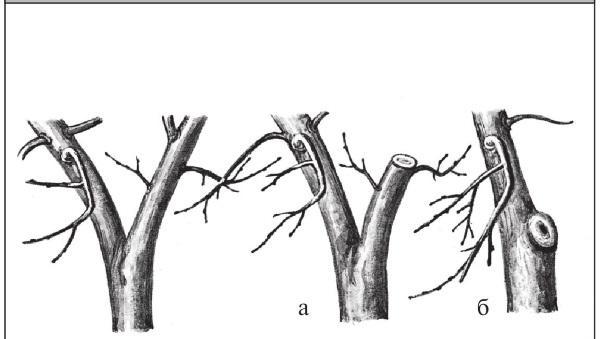
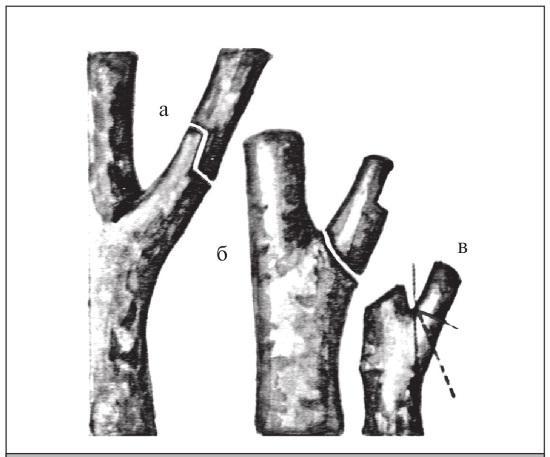
In case of a narrow crotch angle, a branch collar usually does not form. To correctly determine the cut location, two lines are conventionally drawn at the base of the branch to be removed: one parallel to the trunk (or the supporting branch) and the other perpendicular to the axis of the branch being removed; the cut is made along the line that bisects this angle.
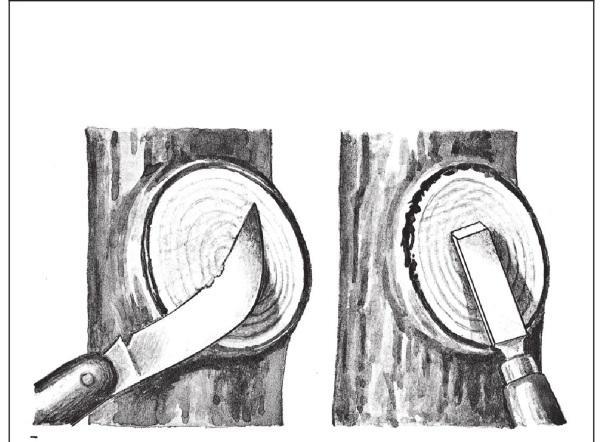
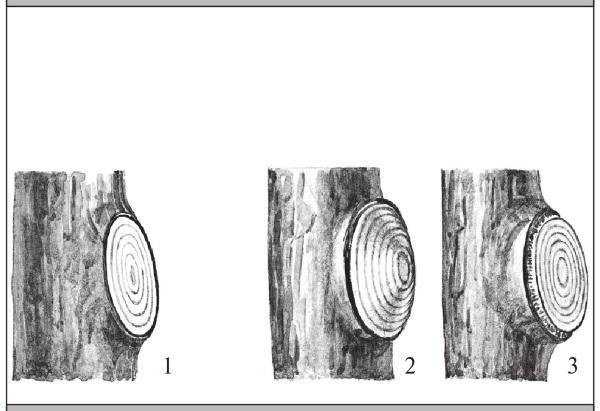
The rough surface of cuts made by a saw should be smoothed with a sharp knife or chisel so that water does not accumulate on the wound surface and it is easier to cover it with wound dressing. The dressing should be applied 1–2 hours after pruning and in any case no later than 24 hours after the cut.
Read next
Pruning and training For gardeners
Technologies for shaping nursery plants of fruit trees in a nursery
Pruning and training For agronomists
Methods for forming columnar and spindle-shaped canopies of fruit trees
Pruning and training For students