
Features of selection and operation rules for arch and gable greenhouses
15 min read
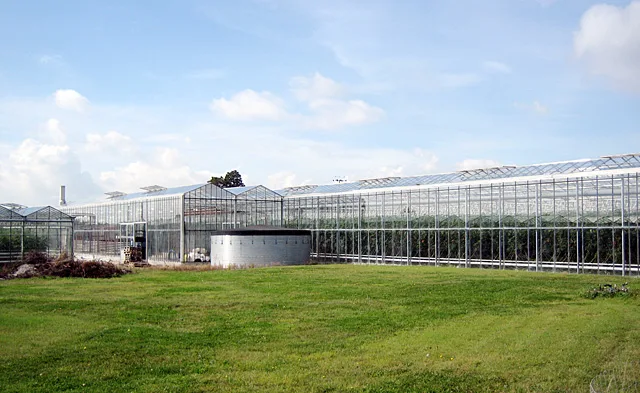
Greenhouses are usually of two types: arched and ridge-roofed.
An arched greenhouse usually has the following dimensions:
| Width | 2 m, 2.5 m, or 3 m |
| Length | from 1.9 m (in 1.9 m increments) |
In my opinion, it is more convenient to use greenhouses about 6 m long and 3 m wide.
An arched greenhouse has two wide doors and two transoms above them located at the ends. There is a certain ventilation protocol:
- As soon as the night temperature stays above freezing, the transoms can be left open at night.
- During warm weather, both doors should be opened early, before the temperature inside the greenhouse rises to 10 degrees or higher.
So, do not oversleep this time. Even if the outside temperature is only 8–10 degrees, the temperature inside the greenhouse may be around 20 degrees. If you open the doors at this time, the temperature inside and outside will begin to equalize.
Fig. 1a
In other words, in the morning, when the sun comes out, the temperature in the greenhouse rises rapidly to 20 degrees, and when you open the door, the temperature will start to drop rapidly and will only then slowly begin to rise again as the outside air warms up.
What happens to the plants during this? They stall in anticipation of a stable temperature regime. The fact is that chlorophyll in a green leaf reacts not so much to temperature, but to its gradient, that is, the rate of temperature change. If there is a rapid change in temperature, chlorophyll suspends its activity for an hour and a half to two hours.
Thus, by opening greenhouses in the late morning, when you finally wait for the air temperature to reach 12–15 degrees, you are effectively forcing the plants to stop their growing season during the most beneficial morning hours: first, at the time when the temperature inside the greenhouse is rising rapidly, and then when it drops sharply after the greenhouse is opened. The greenhouse should be opened early, while the outside air temperature differs from the internal greenhouse temperature by no more than 2–3 degrees.
Fig. 1b
The latest model of arched greenhouses has arches of different heights. Transoms located along the entire length of the greenhouse usually open automatically as soon as the temperature inside rises above a set limit. In such greenhouses, there is good ventilation, and there is no excessively high temperature at which plant pollen becomes sterilized, which prevents fertilization. It is most convenient to arrange three beds in an arched greenhouse, as shown here.
Fig. 1c
Ridge greenhouses usually have a width of 2 m and an arbitrary length. Vertical posts along the walls are usually placed every 50–60 cm for glass glazing and somewhat less frequently (70–80 cm) when using film or polycarbonate. Two beds are placed inside, along the walls.
Fig. 2a
Fig. 2b
It must be said that arched greenhouses provide better lighting to the plants planted in them, but snow slides off them poorly; gardeners have to constantly remove it themselves because such greenhouses do not handle snow loads well and simply collapse under them. In addition, the condensation forming on the ceiling does not drip down onto the tops of the plants, which they do not like at all, but rolls down the walls.
Snow slides off the roofs of a ridge greenhouse easily on its own, so it does not require removal, but the vertical walls provide poor lighting; the main flow of light comes through the roof, and therefore the lighting inside the greenhouse is significantly worse than in an arched one. Gardeners noticed the difference immediately as soon as arched greenhouses appeared: everything grows much better in them.
Glass is usually used for permanent cover of greenhouses, which is only suitable for ridge greenhouses. Glazed greenhouses have a drawback: glass does not transmit the ultraviolet spectrum of light well.
A new covering material is polycarbonate, which is also used for permanent cover and transmits the entire spectrum of sunlight. It is much lighter and cheaper than glass, yet just as durable. In addition, polycarbonate, having a cellular structure, retains heat much better than glass.
However, glazed greenhouses also have their own advantage: glass is easy to wash in the spring, which improves lighting. And polycarbonate has a certain disadvantage. Since it is practically double-layered, in the autumn, small earthworms, slugs, and other small creatures easily penetrate it as a place to overwinter. In addition, bacteria and plant microorganisms colonize the inside, which eventually causes the polycarbonate to turn green, and therefore the transparency of the material decreases over the years.
For temporary cover of greenhouses, different types of film are usually used. Here, arched greenhouses have the advantage, as covering such a greenhouse and removing the cover from it is much easier than with a ridged one.
Modern greenhouse production requires materials that not only protect plants from the wind but also actively influence the microclimate. The "Svetlitsa" polymer film from the "Shar" company differs from standard polyethylene and PVC in its increased durability and elasticity. It effectively retains heat and solves the problem of condensation: moisture does not drip onto the plants but runs down the walls, reducing the risk of disease development due to cold night dew.
- Guaranteed service life — 7 years
- Illumination increase — almost 1.5 times
- Distance between arches — no more than 50–60 cm
- Acceleration of tomato ripening — by a week
- Earlier ripening of berries — by 5–7 days
Rules for using "Svetlitsa" film on arched and ridged frames
On arched greenhouses, "Svetlitsa" film can be used year-round without dismantling for 5–7 years. It is important to maintain the rigidity of the structure: the distance between the frame arches must be no more than 50–60 cm. It is not necessary to remove the material from such structures for the winter.
It is better to remove the film from ridged greenhouses for the winter. Under the weight of wet snow, even with frequent placement of slats (about 60 cm), the material begins to stretch near the greenhouse walls, forming depressions between the strips. If accumulated snow melts and then freezes, the film can be destroyed by the impact of ice blocks during strong winds.
When seasonally dismantling and storing the film, its tendency to stick must be taken into account. To preserve the elasticity and integrity of the sheet, follow the storage rules:
- Interleave the film sheets with newspapers when placing them into storage.
- In the spring, separate the stuck layers with some effort. The uneven stretching that occurs during this process is fully compensated for and leveled out immediately after tensioning the material onto the frame.
The film's ability to retain heat is confirmed by practical tests. At an ambient air temperature of minus 4 degrees, the indicators in different types of covers were as follows:
| Type of cover | Temperature inside |
|---|---|
| High ridged greenhouse with "Svetlitsa" | minus 2 degrees |
| Low arched hotbed with "Svetlitsa" | minus 1 degree |
| Large hotbed (with Lutrasil) | zero |
| Low hotbed (with Lutrasil) | plus 1 degree |
During the night, the temperature in greenhouses under "Svetlitsa" is on average 2–3 degrees higher than under regular polymer film, and 1–2 degrees higher than under polyvinyl chloride film or glass. In terms of temperature regime, the material is similar to cellular polycarbonate.
Use of reflective and opaque films in production
In regions with insufficient sun and frequent cloudiness, the lack of lighting is compensated for using reflective films. Two types of such materials are produced: double-sided white and combined black-and-white film. Their use provides an increase in illumination of almost 1.5 times.
Black-and-white film is used for soil mulching. It is laid directly on the beds, with transplants planted in cut holes. This completely prevents weed growth and reduces moisture evaporation, cutting down on labor costs for weeding and irrigation.
In greenhouses with dense planting, the reflective material is stretched along the side walls to a height of 50–60 cm (both inside and outside). The white side should face the inside of the greenhouse to reflect light onto the plants, and the black side should face outward to accumulate heat. In experiments on plots with such a screen, red tomato fruits appeared about a week earlier, and the harvest of black currant and strawberries ripened 5–7 days faster.
Reflective film is also effective when growing transplants indoors. It is spread on tables or stretched behind boxes of plants opposite a window. Reflected light compensates for the lack of natural lighting for seedlings in the second and third rows from the glass.
To combat weeds on uncultivated plots, black opaque film is used. It is used to cover areas where perennial weeds spread for two years. Black film is also used to cover the sides of unedged beds and is spread under bushes and trees.
When growing strawberries, it is advisable to use black spunbond or Lutrasil instead of black film, as these materials allow water and air to pass through.
"Shar" company films must not be burned in a fire or furnace.
Among other polymer films, the most effective is the "Stabilen" film, created by the St. Petersburg scientist I. N. Kotovich. It also possesses significant durability, and most importantly, it transmits "soft" ultraviolet rays that are beneficial for plants and animals while blocking harmful "hard" ultraviolet rays. This film has an advantage, like all polymer films, in their disposal. They can be burned in a fire, as during combustion, polymer films (but only polymer ones) decompose into carbon dioxide and water, and no dioxins are released. Other films, such as the widely used PVC (polyvinyl chloride), release dioxins when burned — chemical compounds that are highly harmful to our body, and therefore residues of PVC films should never be burned on the site.
In addition to ridge and arched greenhouses, dome greenhouses were created several years ago. They are easy to make yourself using thick reinforcement bars, which are sold in any hardware store. You will need just three rods, which usually have a length of six meters.
- Two people take them by the ends and begin to come together, forming arches.
- After drawing a circle of the required diameter on the ground, you evenly insert them along the circumference into the soil to a depth of approximately 40–50 cm.
- It is possible to go less deep, provided that you dig shallow holes, insert the ends of the rods into them, and fill them with a cement solution (using, as usual, cement and sand in a 1:3 ratio and water until it reaches the consistency of thick sour cream).
The result is a frame of six arches. You throw lutrasil or film over them and tie the base with a rope so that the cover is not blown away by the wind. The greenhouse is ready.
However, these greenhouses did not become widespread because it is impossible to use the area under them effectively. For comparison, here are the parameters:
| Circle radius | Area |
| 75 cm | 1.66 sq.m |
If you make a 50 cm wide path in this space, you will get only two semi-circular, low-productivity beds. And although the lighting in them is maximal and snow slides off them on its own, dome greenhouses have not taken root in garden plots.
Fig. 3a
About a dozen and a half years ago, there was a big boom regarding pyramid-shaped greenhouses. They have very good lighting, even better than in an arched greenhouse. But most importantly, experts on Egyptian pyramids claimed that mental energy is concentrated inside these structures. People who are in the center of such a pyramid feel a surge of unusual vigor, their health improves, many diseases, depression, and so on and so forth go away. Immediately, the idea arose to grow plants in pyramidal greenhouses, but not just any kind, but specifically those in which all dimensions are in the same proportion as the Great Pyramid of Giza. At the base of this pyramid lies a square with side a, the pyramid height h = 0.66a, or, conversely, if you set the pyramid height h, then the side of the square at its base will be a = h/0.66 = 1.66h, that is, the ratio between the height and the side of the pyramid base is connected by Fibonacci numbers. All lovers of numerology saw some kind of omen in this, but they could not really substantiate anything.
Fig. 3b
Nevertheless, such a glass pyramid was built in a suburb of Leningrad, and a large queue still forms to sit inside it. The curiosity of the suffering would have been satisfied long ago. Therefore, it is not just about curiosity, since the interest in the pyramid has not yet waned.
Fig. 4a
Gardeners, as a curious people, immediately built such pyramids on their plots and began to conduct their own experiments. The spread of results was large, but one thing is certain: these pyramids have a positive influence on plants, although not as grandiose as originally assumed. I think, since the area of the pyramid base cannot be used effectively, this deterred many gardeners from building pyramidal greenhouses.
Personally, I used such a pyramid to grow peppers, and I used dense lutrasil as a covering. The peppers clearly liked growing in it, and the harvest ripened 5–7 days earlier than in a ridge greenhouse. Since I placed feeding bottles near each plant (so as not to climb into it on all fours often) and the summer near St. Petersburg was successful for nightshade crops, a pure experiment did not result, and it turned out to be difficult to say whether the pyramid itself influenced the result and to what extent.
You, of course, have a question why I had to crawl into the pyramid on all fours? Simply because I allocated little space for the pyramid – I set aside a 1.5 ´ 1.5 m square. The height turned out to be 0.66 ´ 1.5 m = 0.99 m, that is, about 1 m, so I had to crawl inside.
If you show curiosity about building such a pyramidal greenhouse, I will tell you how to do it. Let's say you can allocate a 2´2 m plot for it, then its height will be only 1.32 m. To be able to enter it, you will have to place the pyramid on a base with a height of at least 40–48 cm, then the structure's height will be 1.8 m. On this base, opposite each other, you fasten two triangular frames with equal sides of 2 m, which you fasten obliquely at the vertices of the triangles, and the bases of the triangles are fastened to the two sides of the square stand located opposite each other using a staple gun. It is more convenient to arrange beds inside.
From a sheet of lutrasil at least 1.7 m wide and 4.4 m long, cut out the faces of the pyramid. Turn triangles 1 and 3 over and sew the cover (along the sloped lines), leaving the vertical segments 6 and 7 (the entrance) unsewn. Place the resulting cover over the top of the frame. Now all that remains is to attach the cover to the wooden parts of the frame using an ordinary stapler (tacker). Additional sheets 6 and 7 are needed to close the entrance. But if you have a zipper about 2 m long (for example, from an old sleeping bag), you will not need additional sheets 6 and 7: simply sew the zipper into the cut between sheets 4 and 5. There is no need to ventilate such a greenhouse, as lutrasil allows air to circulate freely inside, while retaining heat well.
Fig. 4b
It is elementary to make waterers and feeders from two-liter plastic bottles. Make holes along the side surface from the bottom to a height of 15 cm using a hot thick nail. In this case, the nutrient solution will be supplied directly to the root zone. Dig the bottles into the ground in advance near the planting holes so that all the holes are in the soil. Turn them in the soil a few times so that an earthen plug forms in the holes, and fill the bottles with the nutrient mixture. I prefer to use a solution of "Uniflor-buton" at a rate of 1 teaspoon per 2 l of water.
Fig. 4c
If you use azofoska, you must dissolve 1 tablespoon of azofoska in 1 l of hot water and leave it for 5–10 hours so that the superphosphate included in the azofoska dissolves. After that, stir and strain through one layer of cheesecloth. An insoluble residue will remain on the cheesecloth – filler, usually gypsum, which makes up about 40% of the fertilizer. Pour the solution into 9 l of water, add 1 tablespoon of potassium fertilizer (preferably chlorine-free), then stir well and pour into the bottles. The bottles should be left open. You will have to refill the solution in the bottles (without removing them from the soil) no more than once every 2–3 weeks. It is convenient to pour the solution from an old teapot. It is better to use dark bottles because the solution will heat up well in them during the day and release heat at night, balancing the temperature.
Fig. 4 g
Fig. 4d
Fig. 4e
With a pyramid base side of 3 m, it will occupy an area of 3 ´ 3 m = 9 sq.m. The height will be 1.98 m, that is, practically 2 m, and, generally speaking, it is not necessary to lift it onto a frame. But to make more effective use of the narrow beds along the perimeter of the base, the pyramid should be raised on a frame at least 25 cm high (a board placed on its edge).
Fig. 5
Communal greenhouse. How to grow high yields of tomatoes, peppers, eggplants, and cucumbers under one roof
Read next
Greenhouses and covers For gardeners
Advantages and specific features of using polycarbonate greenhouses in allotments
Greenhouses and covers For gardeners
Design and structural features of modern winter gardens
Greenhouses and covers For gardeners