
Sowing technology for ornamental crops and seed application rates
13 min read
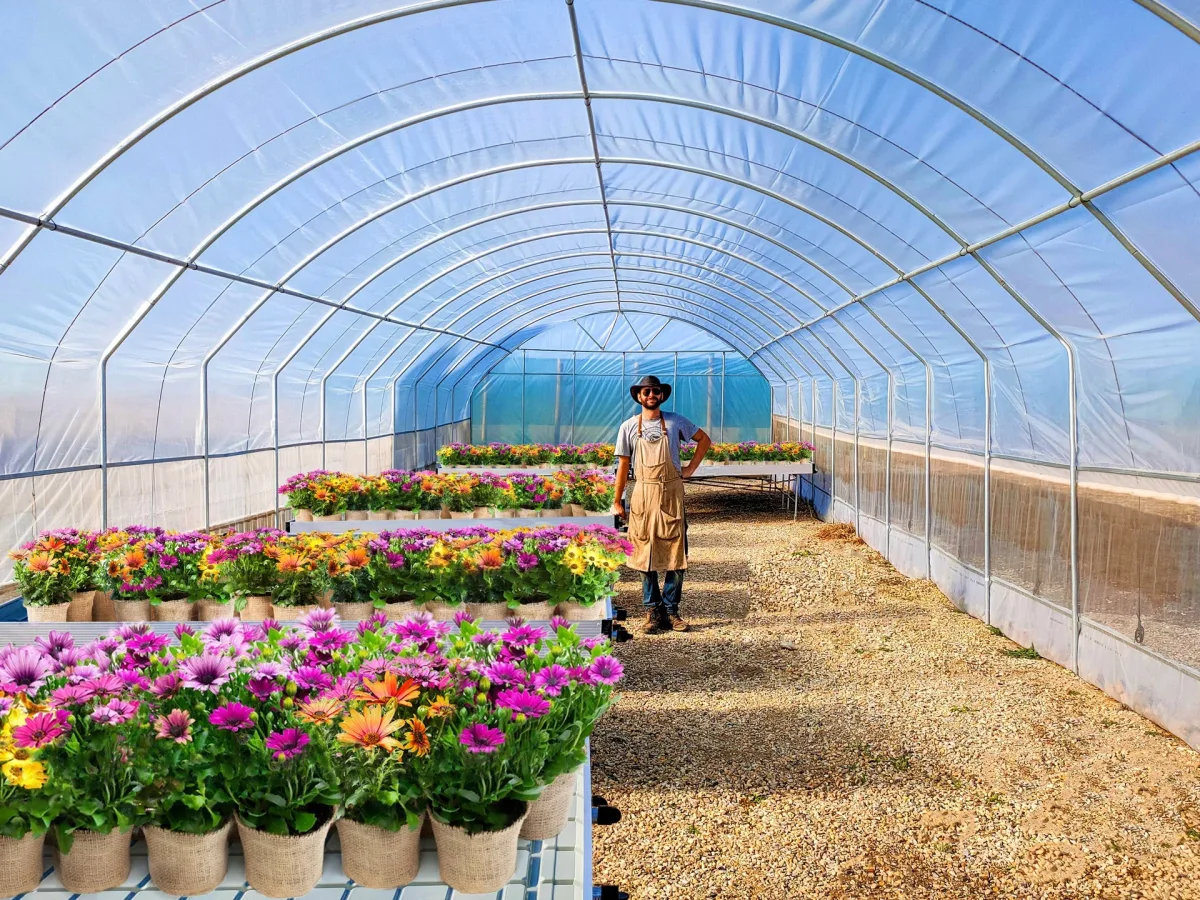
The correct choice of sowing method and application rate of ornamental crops directly affects the quality of seedlings and production costs. Errors at this stage lead to seed wastage or the emergence of weak, elongated seedlings. It is important for an agronomist to consider the biological characteristics of the crop, seed size, and growing conditions.
- Rate for petunia — 0.02 g/m²
- Rate for antirrhinum — 0.5 g/m²
- Rate for viola — 3 g/m²
- Rate for marigold — 25 g/m²
- Rate for calendula — 40 g/m²
Sowing methods and seed placement depth
For drill sowing, seeds are distributed along furrows prepared lengthways or across the beds. In hotbeds, the furrows are 1.5–2 cm deep with a row spacing of 5–10 cm, while in open soil, the distance is increased to 15–20 cm. For large-scale production, multi-row ribbon sowing is used with an interval of 8–10 cm between rows. The distance between such ribbons is 25–40 cm, which allows for efficient use of mechanization.
Cluster sowing is used for large and medium-sized seeds in open and protected soil. Large seeds (nasturtium, sweet pea) are sown 2–3 per hole, medium seeds — up to 10–15 per hole. In protected soil, holes are spaced according to a 3×3 to 5×5 cm pattern, and their depth should not exceed two to three times the seed diameter. Broadcasting involves the uniform distribution of seeds over the surface, followed by seedling pricking out.
For uniform distribution, small seeds are mixed with dry sand or soil. Dark seeds, such as antirrhinum (snapdragon), are mixed with crushed chalk, and the smallest ones are sown over a thin layer of snow or a light neutral material. Sowing is carried out by hand from a packet, using a curved piece of cardboard, directly from the hand, or with the help of manual seed drills.
Placement depth of seeds">The depth of seed placement depends on their size, soil type, and timing of the work. The optimal depth is considered to be equal to or slightly greater than the thickness of the seed itself. The smaller the seed material, the closer to the surface it is placed during sowing.
- Very small seeds (begonia, lobelia, petunia) are not covered with soil but only slightly pressed into the substrate using a board.
- Medium-sized seeds are sown at a depth of 0.5–1 cm.
- Large seeds are sown at a depth of 3 cm.
The placement depth is adjusted according to external conditions. In light and dry soils, seeds are sown deeper than in heavy and moist ones. For winter (autumn) sowing, the depth is increased for protection against rodents and frost, and in spring, they are sown shallower than in summer. If the crops are provided with irrigation and plastic cover, the placement depth can be minimal.
Sowing rates and seedling technology
With the seedling method, seeds are sown in protected soil at various times, usually from February to June. This method is necessary for annuals and biennials with a long growing season, as well as for perennials with a poorly branched root system and valuable breeding material. The resulting seedlings are suitable for both planting in flower beds and for growing potted or cut products (cyclamen, gloxinia). Sowing is carried out in wooden boxes, shallow trays, pots, or directly into the hotbed soil.
- Sowing seeds in protected soil at optimal times.
- Transplanting (pricking out) the resulting seedlings.
- Growing seedlings for subsequent planting in flower beds or greenhouses.
Standard wooden boxes are used for growing seedlings. Before use, the containers must be disinfected with a 40% formalin solution in a 1:300 ratio. This allows for the destruction of disease pathogens on the container walls before filling with substrate.
| Container type | Dimensions (cm) |
|---|---|
| Wooden boxes | 30×60×5 |
The approximate rate of seed sowing is calculated per unit area of the hotbed or per single seedling box. With direct sowing in open soil, the consumption of seed material increases significantly. In this case, an agronomist requires 2–3 times more seeds than when growing seedlings in greenhouses or hotbeds.
| Sowing conditions | Seed size | Estimated sowing rate |
|---|---|---|
| Hotbed (per 1 m²) | Very small | 2 g |
| Small | 10 g | |
| Medium | 18 g | |
| Large | 30 g | |
| Seedling box (30×60×5 cm) | All seed groups | 0.5–5 g |
Do not exceed sowing rates to avoid seedling elongation. In dense crops, plants form a weak aerial part and an undeveloped root system. At an insufficient rate, the crops turn out sparse, as weak seeds struggle to reach the surface on their own, which leads to increased costs.
Substrate preparation and seedling care
To grow high-quality transplants of flower crops, a soil mixture that is light in mechanical composition, permeable to water, and neutral in reaction is required. It is usually prepared based on peat, humus, sand, turf, and leaf soil. Before use, the finished substrate must be disinfected by thermal or chemical methods. When filling pots, the drainage holes should be covered with a crock, convex side up, and a 2–3 cm layer of drainage material such as expanded clay, sand, gravel, or broken brick should be added.
In sowing boxes, the soil is filled level with the edges, then compacted with a light tamper to 3 cm below the rim. A 1–2 cm layer of light, nutrient-rich soil is sifted on top through a fine sieve, the substrate is well moistened, and sowing is performed. In hotbeds, the soil mixture is laid in a 10–12 cm layer, having been pre-warmed, leveled, and moistened. In this case, it is important to strictly observe the distance from the soil surface to the hotbed frame.
| Type of sowing in a hotbed | Distance to the frame, cm |
|---|---|
| For primary sowing | 8–10 |
| For pricked-out seedlings | 20 |
Failure to observe the distance to the hotbed frame leads to plant death: in cold weather, the transplants will freeze, and in hot weather, they will suffer from burns.
Care for seedlings consists of regular ventilation, maintaining the lighting regime, and careful fine-drop irrigation. Before emergence, the air temperature is maintained in the range of 16 to 25–30 °C. With the appearance of the first shoots, the temperature is lowered, and the containers are moved closer to the light to prevent the seedlings from becoming leggy. At first, seedlings must be shaded from direct sunlight, ensuring uniform soil moisture without waterlogging or drying out.
- Irrigation with warm water — 20–25 °C
- Germination of seeds from temperate climates — 16–18 °C
- Germination of subtropical seeds — 20 °C
- Germination of tropical seeds — 30 °C
- Exceeding soil temperature over air temperature — by 2–3 °C
- Decrease in air temperature after emergence — by 2–3 °C
Technology and rules for pricking out seedlings
Pricking out increases the feeding area and stimulates the development of a branched root system. The work is carried out in the cotyledon phase or upon the appearance of 1–2 true leaves. With sparse sowing, pricking out can be skipped to save labor. However, this will lead to the formation of a weak root system and will require larger areas in protected ground for the same yield of finished transplants.
A delay in pricking out is extremely dangerous. Overgrown seedlings take root poorly in a new place, which can lead to their death.
A wooden dibber is used for the work. Seedlings can be planted into boxes measuring 30×60×7 cm, pots with a diameter of 7 or 9 cm, or directly into the soil of hotbeds. For compact and fast-growing crops, plastic trays (e.g., Dutch Multitrey) are perfectly suitable. Transplants grown in them with a closed root system are practically disease-free and take root quickly. Usually, one pricking out is performed, and only very small or slow-growing seedlings are pricked out 2–3 times at intervals of up to one month.
For pricking out, nutrient mixtures similar in composition to the sowing ones are prepared. With each subsequent pricking out, denser and more fertile soil mixtures are used, simultaneously increasing the feeding area of the plants.
The planting scheme is set individually for each species and cultivar, taking into account the size of the transplants and their growth rate. When pricking out into boxes or hotbeds, seedlings are placed strictly in rows in a staggered pattern. This ensures uniform access to light and optimal conditions for the development of each plant.
Seedling care and hardening before planting out
After pricking out, it is necessary to create conditions for rapid rooting. Plants are sprayed with water and shaded from direct sunlight for a few days, maintaining the initial temperature. After 2–3 days, the air temperature is lowered by 2–5 °C to stimulate the development of the root system.
For the successful development of transplants, keep the soil loose and free of weeds. Protect the seedlings themselves from drafts, and regularly water and spray them.
To save time, transplants of fast-growing crops can be grown without pricking out. For this, seeds are sown in hotbeds in rows.
10–15 days before moving the transplants to flower beds, hardening of the plants begins to adapt them to temperature and humidity fluctuations. In hotbeds, ventilation and access to direct sunlight are gradually increased, first by removing the frames or film only during the day, and then by leaving the plants open all night. This allows for the production of sturdy nursery plants that easily withstand transplanting.
- Temperature reduction after picking — by 2–5 °C
- Hardening period for transplants — 10–15 days
- Interval between thinning — 10–15 days
- Seed consumption in open soil — 2–3 times higher
Technology and timing of sowing in open soil
Direct sowing in soil is indispensable for landscaping forest parks, recreation areas, roadside plots, and residential areas. Flowers grown without transplanting develop a deep taproot system, which efficiently extracts soil moisture and provides high resistance to drought and cold. Nevertheless, the non-transplant method only complements the classical method, as it does not allow for obtaining flowering beds at the earliest possible dates.
Soil sowing is suitable for fast-growing annuals (nasturtium, godetia), cold-resistant species (eschscholzia, calendula), as well as late-flowering flowers (aster, stock). Perennials whose seeds quickly lose germination (astilbe) or require stratification (aconite, iris, lily, rose) are sown in open soil, as are crops with sensitive root systems that poorly tolerate transplanting (gypsophila, lupine, poppy, mignonette).
Sowing is carried out on light, thoroughly leveled soils. In large operations, seeders are used, sowing seeds in rows or bands — for example, in three-row patterns with a distance of 20–30 cm between rows and 60 cm between bands. In flower beds, seeds are sown in clusters with a spacing provided for a specific cultivar and covered with sand or well-weathered humus.
| Seed size | Quantity per cluster, pcs. |
|---|---|
| Small | 10 |
| Medium | 7 |
| Large | 5 |
To form an optimal feeding area, seedlings are thinned 2–3 times:
- Before starting work, water the beds abundantly.
- Perform the first thinning in the 1–2 true leaf stage, removing the weakest plants (healthy extra seedlings can be transplanted elsewhere).
- Perform the second and third thinning in the 5 true leaf stage at an interval of 10–15 days.
- After the final thinning, leave 1–2 of the most developed plants in each cluster.
- Water the plantings abundantly again after completing the procedure.
Keep in mind that with direct sowing in open soil, seed consumption increases by 2–3 times compared to growing via transplants.
The timing of soil sowing depends on the biological requirements of the crops:
- End of April (early spring period): cold-resistant annuals (cornflower, calendula, eschscholzia), fast-germinating perennials (lychnis), and seeds of other perennial crops that have undergone stratification are sown. Dates are adjusted so that seedlings are not damaged by spring frosts.
- First ten days of May (late spring period): heat-loving annuals (marigolds, nasturtium, zinnia) are sown.
- June (summer period): biennial flowering crops, such as sweet William and forget-me-not, are sown.
Specifics of late-autumn and winter sowing of flowering crops
Sowing in late autumn and during the winter period allows for growing strong and hardy flowering crops. This agricultural practice completely eliminates the need for storage of seeds and their artificial stratification. Plants obtained in this way develop stronger compared to transplants, and they bloom significantly earlier than those sown in the spring.
In autumn, freshly harvested seeds of perennials are sown — astilbe, columbine, and aconite. Cold-resistant annuals, such as snapdragon, calendula, and callistephus, are sown later. For these, late-autumn sowing is used in late October — early November immediately after the soil freezes, or winter sowing in December — January directly onto the snow cover on pre-prepared plots.
- Snow depth for winter sowing — 25–30 cm
- Mulch layer thickness — 0,5–2 cm
- Acceleration of flowering relative to spring sowing — by 7–10 days
Soil for winter and late-autumn sowing is prepared in advance. After distributing the seeds, the plots must be mulched with humus or peat in a layer of 0.5 to 2 cm to protect the planting material from freezing.
To control cultivar purity, each row is marked with wooden or plastic sowing labels. They indicate the name of the crop and cultivar, batch number or seed packet number, and the sowing date. Additionally, all information about the work performed is transferred to a sowing log.
| Controlled sowing parameters | Data on care and accounting |
|---|---|
| Plant species and cultivar | Seed batch or packet number |
| Quantity of sown seeds (g) | Size of occupied area (sq. m) |
| Date of emergence | Date of transplanting seedlings |
| Number of grown plants | Other information |
Read next
Farm machinery For agronomists
Technological foundations and methods of crop sowing
Floriculture For students
Classification of ornamental crops by temperature requirements for cultivation
Floriculture For students