
Cultivation and propagation of rhubarb in open field and protected soil
5 min read
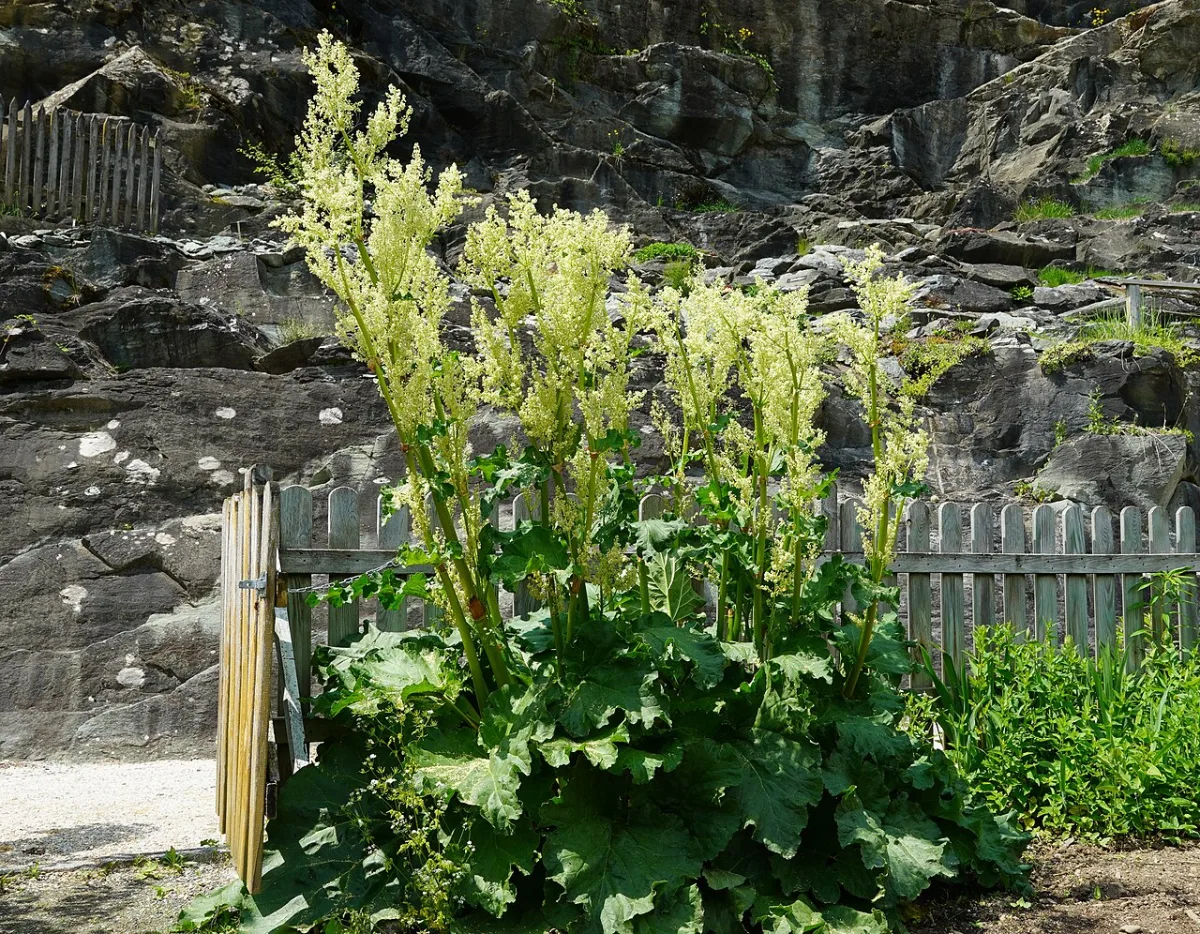
Rhubarb: plantation establishment, propagation and forcing
Rhubarb is a long-lived, cold-hardy and moisture-loving crop that grows successfully in one place for up to 10–15 years. Root system of the plants withstands severe frosts down to -30 °С, while the optimal temperature range for the growing season is 16–20 °С. For placing the plantation, the edge zones of the plot and wide row spacings are best suited, where the robust bushes do not interfere with the tillage of other crops.
- Growing period in one place — 10–15 years
- Optimal growth temperature — 16–20 °С
- Rhizome cold hardiness — down to -30 °С
- Seedling forcing period — 60–80 days
- Harvest acceleration under plastic cover — by 10–15 days
Do not allow air overheating and moisture deficiency under plastic covers. High temperatures combined with dry soil lead to the shrinking of rhubarb petioles and the accumulation of pronounced bitterness in them.
The crop is propagated vegetatively (by rhizome division) or by seeds. Division is preferable: it fully preserves cultivar traits and accelerates the plants' entry into the technical maturity phase. With the seed method, seedlings are prepared 60–80 days before the planned planting in open ground.
- Prepare the planting material in spring or during the summer-autumn period, using healthy 3–4-year-old bushes.
- Divide the rhizome with a knife so that each separated fragment has 1–2 viable buds.
- Place the divisions into prepared 30x30 cm holes, maintaining a distance of 70–80 cm between bushes.
- Deepen the rhizome strictly level with the soil surface.
- Water the plantings abundantly, compact the soil around them and mulch with a 1.5–2 cm layer of humus or dry soil.
Before sowing for seedlings, rhubarb seeds are soaked in water for two days. Emergence occurs in 2–3 weeks, and the first top dressing is carried out one week after their appearance. The seedlings are fertilized for the second time 2–3 weeks after the first application. The finished young plants are planted in a permanent location, after which the soil is regularly loosened, weeded and irrigated as necessary.
Upon the onset of stable winter frosts, the plantation is covered with a 4–6 cm layer of peat. In spring, this mulch is pulled back from the root crown to stimulate rapid soil warming by the sun. In the second year of the plants' life, starting in autumn or in the first days of April, portable plastic covers or greenhouses are installed over them. The soil around the sprouting bushes is cleared of melted soil residues, distributing it in the row spacings. It is recommended to remove the protective film in the second half of May.
| Operation / Application phase | Dosage and fertilizer application conditions |
|---|---|
| Basic soil preparation for the plantation (per 1 m²) | Humus or manure — 8–10 kg, ammonium nitrate — 35–40 g, superphosphate — 30–35 g, potassium chloride — 25–30 g (ploughing/tillage depth — 30–35 cm). |
| Application in the hole during planting of divisions (per 1 plant) | Compost — 4–5 kg, superphosphate — 20 g, potash salt — 25 g. |
| Seedling top dressing (1st and 2nd, per 1 m²) | Ammonium nitrate — 10 g, potassium chloride — 10 g, superphosphate — 15 g. |
| Liquid top dressing of growing plants (per 10 l of water) | Ammonium nitrate — 15–20 g, superphosphate — 15–20 g, potassium chloride — 20–25 g. |
Asparagus: seedling method, maintenance and obtaining blanched shoots
Asparagus is a cold-hardy crop that winters perfectly under snow cover but is sensitive to late spring frosts. In case of the death of the first young shoots from spring frosts, the rhizome compensates for the loss and produces new sprouts. For normal development, asparagus requires light, fertile soils with neutral acidity. The crop is light-loving, but technological features allow it to be grown in the dark to obtain a delicacy product.
- Plantation service life — 10–15 years
- Seed germination temperature — 25–30 °С
- Optimal shoot growth temperature — 10–12 °С
- Seedlings ready for planting — after 60–70 days
- Acceleration of shoot development in hotbeds — by 15–20 days
In the 3rd–4th year of cultivation, it is recommended to cover asparagus with a black film. Without access to sunlight, the shoots do not turn green, remaining tender-white and softer in structure.
The seedling method is considered the primary way of propagating asparagus. Seedlings ready for planting are obtained in greenhouses within two months. Planting is carried out in deep furrows, which are pre-filled with a mixture of organic matter and mineral components. Since the plantation is established for 10–15 years, the preparation of planting sites should be treated with maximum care.
- Soak the seeds with a thick seed coat in warm water at a temperature of 30–35 °С for 3–5 days.
- Spread the swollen seeds on a damp cloth and leave for germination for 4–5 days.
- Sow the germinated seeds in a greenhouse in late April — early May.
- During the seedling cultivation process, carry out 2–3 weeding sessions with thinning, and water and fertilize the seedlings until planting.
During the first two years after planting, the inter-row spaces are regularly loosened, and the plants are irrigated during dry periods. Top dressing is carried out with a liquid solution applied to the roots, using a fixed volume for each bush. Every year in autumn, dry asparagus stems are cut to the ground level, and the beds are covered with a layer of humus to protect them from freezing. The first harvest of the commercial crop begins in the third year of the growing season.
To obtain early produce, portable hotbeds are installed over the beds in the first half of April. Inside them, an additional cover made of black film is set up, which accelerates the emergence of shoots by 15–20 days and protects them from greening. Cutting is carried out in measured amounts, controlling the load on the bushes depending on the age of the plantation. After the end of the season, the covers are removed, the bushes are un-hilled, and a restorative dose of fertilizer is applied.
| Operation / Phase of application | Fertilizer dosage and planting scheme |
|---|---|
| Top dressing of transplants in a greenhouse | Irrigation and top dressing with a urea solution (20 g per 10 l of water) or manure slurry in a 1:6 ratio. |
| Planting transplants in furrows | Furrow depth — 20–35 cm, distance between plants — 30–40 cm, inter-row spacing — 120–150 cm. Humus, manure, or hotbed soil are applied into the furrows, along with superphosphate — 30 g, potassium chloride — 20 g. |
| Top dressing in the first 2 years (per 1 m²) | Urea — 12–15 g or manure slurry (1:6). Irrigation rate — 1.5 l of solution per each plant. |
| Autumn mulching of bushes (annually) | A layer of humus — 8–10 cm after cutting the above-ground part of the plants. |
| Mineral top dressing after harvesting (per 1 m²) | Urea — 20 g, superphosphate — 20 g (or nitroammophoska — 50–60 g), potassium chloride — 15 g. Conducted after removing the film covers. |
| Autumn application of organic matter (per 1 m²) | Humus or manure — 5–6 kg. |
Read next
Vegetable growing For gardeners
Agrotechnology of cultivation and propagation methods for sorrel and rhubarb
Greenhouses and covers For gardeners
Cultivation technology for asparagus lettuce and radish in protected soil
Greenhouses and covers For gardeners