
DIY construction of greenhouses from window frames and metal profiles
8 min read
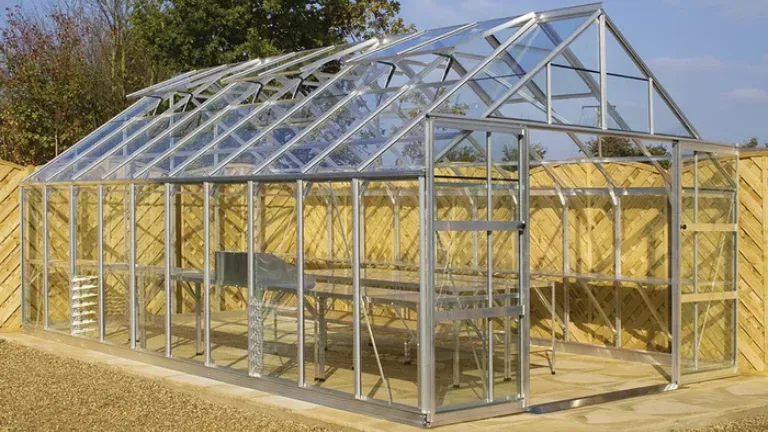
Greenhouses from window frames and metal profiles: assembly of rigid structures
Using old window frames is a simple and cost-effective way to build a glass or plastic film greenhouse. The structure proves rigid and durable if the wooden frame is assembled correctly. Both glazed frames and empty frames, which are covered with thick polyethylene film after installation, are suitable for the work. Construction begins with preparing the foundation, onto which the wooden base is laid.
| Material | Dimensions |
| Timber | 50x50 mm |
| Board | 40 mm (thickness) |
The frame consists of vertical posts, as well as lower and upper wall plates made of the same board. The posts are positioned at a distance corresponding to the width of the prepared window frames. To ensure the roof withstands winter snow loads, it is made gable-style using sturdy timber and reinforced with additional supports under the ridge.
- Lay the lower wall plate on the foundation and install the vertical posts.
- Secure each frame on four sides (from the outside and inside) using nails and screws.
- Fill all gaps between the frames with spray foam to prevent drafts.
- Cover the roof with polycarbonate or polyethylene film for maximum illumination.
- Install a door made from a window frame at the end of the greenhouse.
If you decide to make the roof from glass frames, install them before assembling the side walls. Otherwise, a tool accidentally dropped during work will break the glass installed below.
A more modern and flexible option is a frame made of galvanized metal profiles. It allows for building a greenhouse of any shape and dimensions, oriented to the standard sizes of polycarbonate sheets. For the work, you will need metal shears, a tape measure, a level with a plumb line, and a screwdriver. The structure is assembled from individual sections connected by an upper beam and attached with self-tapping screws to the tracks on the foundation. The spacing between the sections should be equal to the width of a polycarbonate sheet divided by 3 or 4 to ensure rigidity under wind and snow loads. The front and back walls are reinforced with vertical posts, one of which is used to hang a door frame made of profile.
Lightweight hotbeds from polypropylene pipes: quick assembly
To create an optimal microclimate in small areas, a hotbed made of polypropylene pipes is an excellent choice. This material is cheap, durable, does not rot, and allows for the assembly of an arched structure of any size in just a couple of days. The only significant drawback of such a greenhouse is its low weight, so the frame requires a reliable wooden base. The location for the hotbed is chosen in full sun, away from trees and outbuildings.
- Polypropylene pipe diameter — 16.6 mm
- Depth of rods in the soil — 50 cm
- Rod installation spacing — 0.5 m
- Height of the rod above the ground — 25 cm
- Assemble a rectangular base from cut boards on the selected plot, securely joining the corners at a right angle.
- Drive metal rods into the ground at the corners and along the long sides of the frame to a depth of 50 cm with a spacing of 0.5 m.
- Slide the plastic pipes onto the ends of the rods protruding from the ground on opposite sides, forming arches.
- Install transverse stiffening pipes along the top of the arches, securing the joints with tees or steel wire.
They are assembled from timber, which is pre-treated with antiseptic agents. The cladding is attached to the timber using battens and self-tapping screws.
Another option for manufacturing the ends is using polypropylene pipes. Accurate measurements must be taken and they must be installed vertically on the structure. The material is attached to the arch with special tees, and at the bottom — to the rods. After this, the door is installed.
If you need to make a structure with straight walls, it is recommended to follow these work stages:
- Make the lower wall plate from boards and metal rods.
- Install pipes of the required size vertically onto the reinforcement.
- Install the rafters. Transverse parts allow for achieving reliable roof stability.
Most often, film is used for cladding, but experts recommend buying polycarbonate sheets. This material is durable and also ensures an optimal microclimate in the greenhouse.
To avoid deformation during temperature fluctuations, the sheets must be fastened using rigid fasteners. Polycarbonate is fixed to the structure using press-washers and self-tapping screws.
It is better to dismantle the structure for the winter. But if it is intended to be left outdoors, snow must be regularly cleared to avoid sagging of the cladding material. If an ice crust appears on the material, it is not recommended to clear it; otherwise, the appearance will be spoiled due to scratches.
Drawing of a DIY polycarbonate and polypropylene pipe greenhouse
As noted above, a hotbed made of plastic pipes has a low weight, so it is necessary to build a secure foundation to prevent it from being blown away by the wind. After marking out the area, drive in metal rods onto which the pipes are mounted. The frame is fastened with self-tapping screws.
As a result, an arched shape is formed, which is reinforced with stiffening ribs. These are secured with a plastic tee or wire.
The ends are assembled from timber, which is treated with protective agents against rot. At the next stage, the frame is covered with polycarbonate using self-tapping screws. If necessary, ventilation openings can be made on the roof to maintain optimal conditions inside the hotbed.
As you can see, constructing a greenhouse frame from plastic pipes with your own hands is not difficult at all; the main thing is to carry out all the work in stages.
Metal drywall profile is an optimal option for building a hotbed. The material has a low price. Almost anyone can handle the installation, as the profile is easy to cut and bend. It is recommended to use polycarbonate for covering, as it allows for creating favorable conditions in the greenhouse for growing crops.
- Assembling the structure is cheaper compared to ready-made greenhouses.
- The installation of the material should not cause difficulties. If necessary, the greenhouse structure can be dismantled during the winter period.
- It is recommended to make the roof detachable so that snow does not put a load on the structure in the cold season.
- The frame is installed on a foundation, which provides additional strength.
Before starting the installation, it is necessary to decide on the shape of the future hotbed; it can be:
When purchasing a metal profile for drywall, you need to try to bend it. If the material returns to its original shape, it is of high quality. Otherwise, it is not recommended to buy it.
It is also necessary to consider which version of the hotbed will be assembled: summer or winter. Experts recommend making the first structure in a summer version. If necessary, in the autumn, heating can be installed in the greenhouse facility.
At the next stage, you need to prepare a drawing with all the dimensions. When developing the design, you need to take into account the dimensions of the polycarbonate so that you do not have to dispose of the excess.
All materials are purchased according to the prepared project, with a 10% reserve. To erect the structure, the following materials must be prepared:
- Metal profile.
- Cellular polycarbonate.
- Self-tapping screws.
- Necessary tools.
Preparation of the foundation. Experienced builders claim that a hotbed made of metal profile can be assembled in a few hours. However, it is recommended to increase the reliability of the structure. To do this, several steps should be taken to prepare the base:
- Dig a trench around the entire perimeter, the depth of which does not exceed 0.7 m.
- Backfill with 10 cm of crushed stone and sand.
- After a week, remove the formwork and wait another month before mounting the frame.
Some gardeners cut the metal profile using an angle grinder, but in this case, the edges will be damaged, which will lead to the appearance of rust. Therefore, it is best to use special cutting shears.
The metal material must be cut in advance so that assembly does not take much time. The end part of the future structure should be assembled on the surface of the ground; use ordinary self-tapping screws to fasten the profile.
You also need to install the door on hinges and assemble the rear end. At the next stage, the arches are fastened to the driven-in metal rods. When the frame is ready, you can start covering it with polycarbonate. You should start with the roof, after which proceed to the walls, and lastly to the installed door.
A utility knife is used for cutting the sheets to the required size. It is recommended to seal the cells with tape. The polycarbonate is laid with an overlap and fixed with thermal washers.
If you competently perform all the stages of building a structure made of metal profile, you have the opportunity to harvest several crops of fruits and berries. You need to bring in soil, make beds, lighting, and, if necessary, install a heating system to use the hotbed during the winter season.
Read next
Greenhouses and covers For gardeners
DIY construction of a polycarbonate and plastic pipe greenhouse
Greenhouses and covers For gardeners
Building a frame greenhouse with a gable roof with your own hands
Greenhouses and covers For gardeners